Provider Admin Flow
The key role of a Provider Admin is to publish an App to MarketPlace
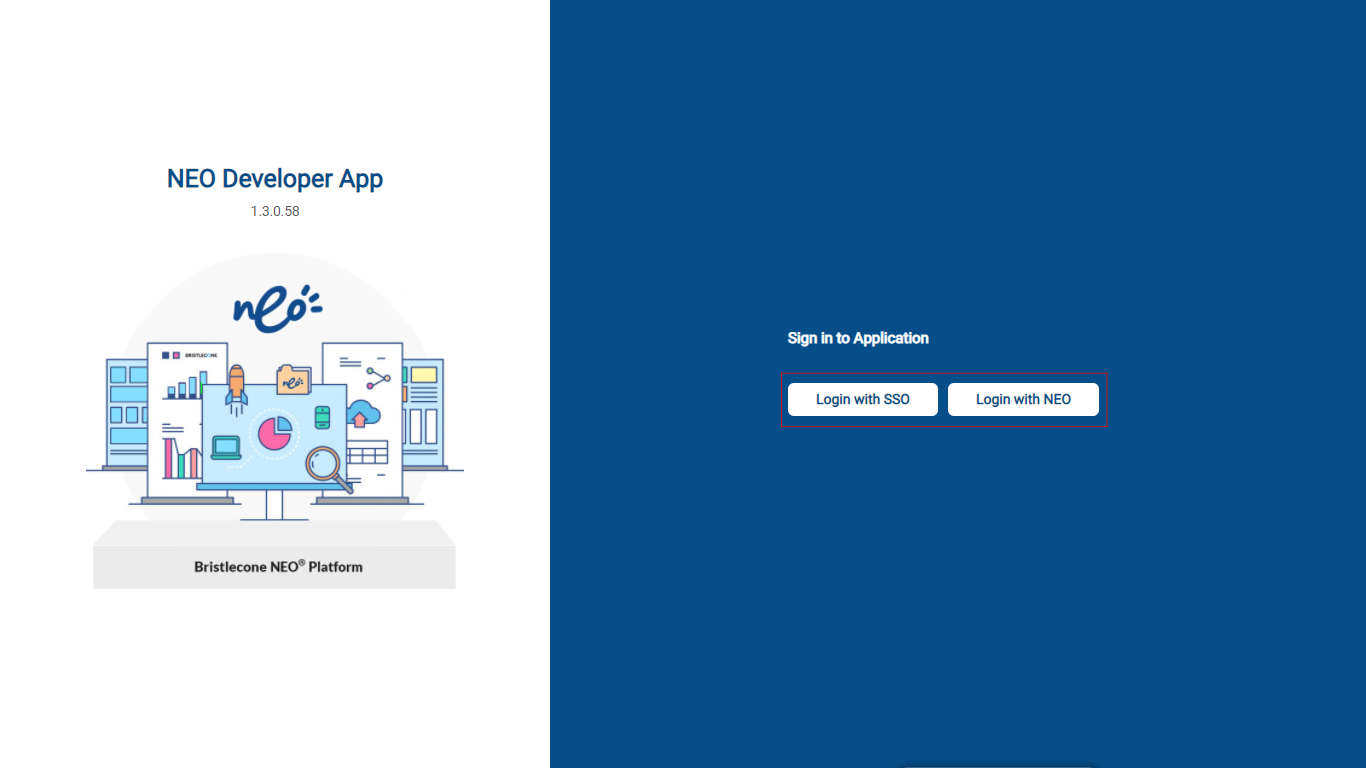
Login to NEO Developer APP Using SSO or Cognito
Use SSO ( Single Sign On ) or Cognito to login to the NEO Developer App
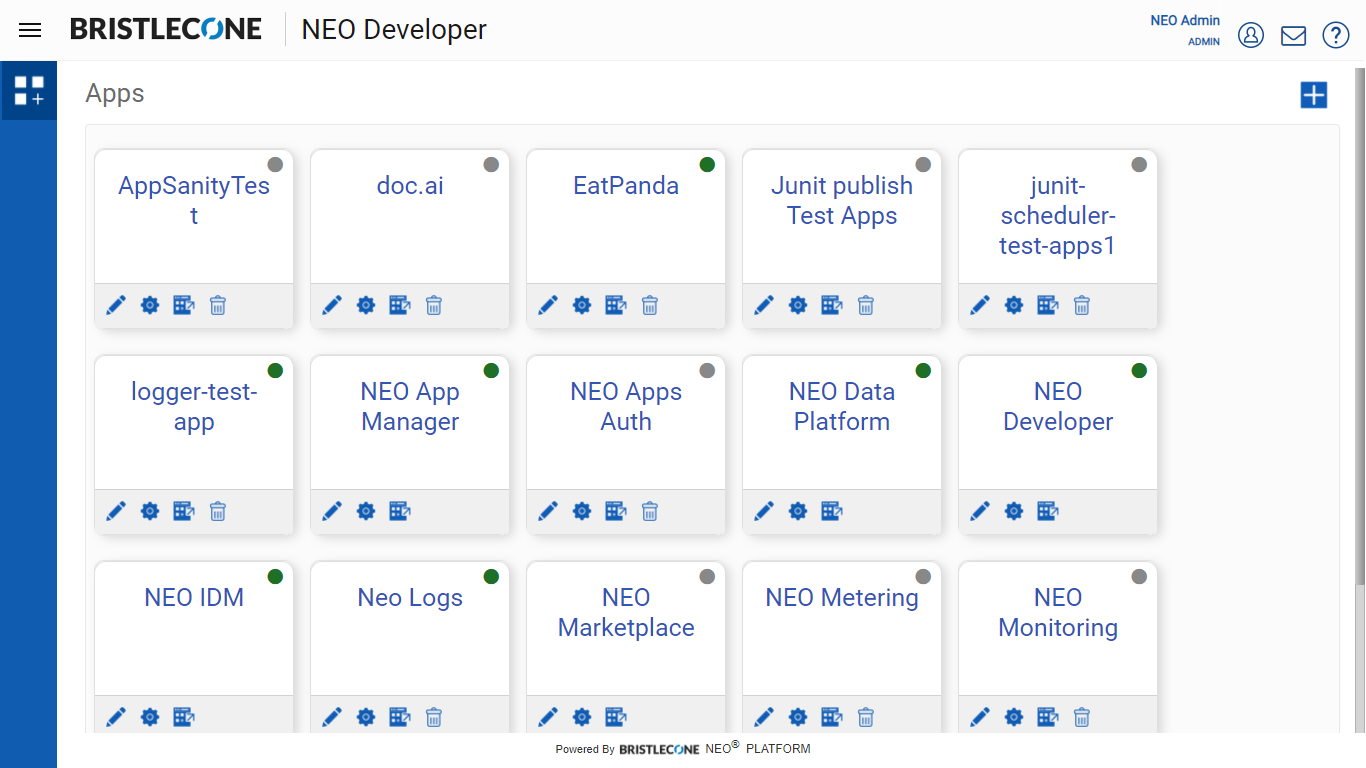
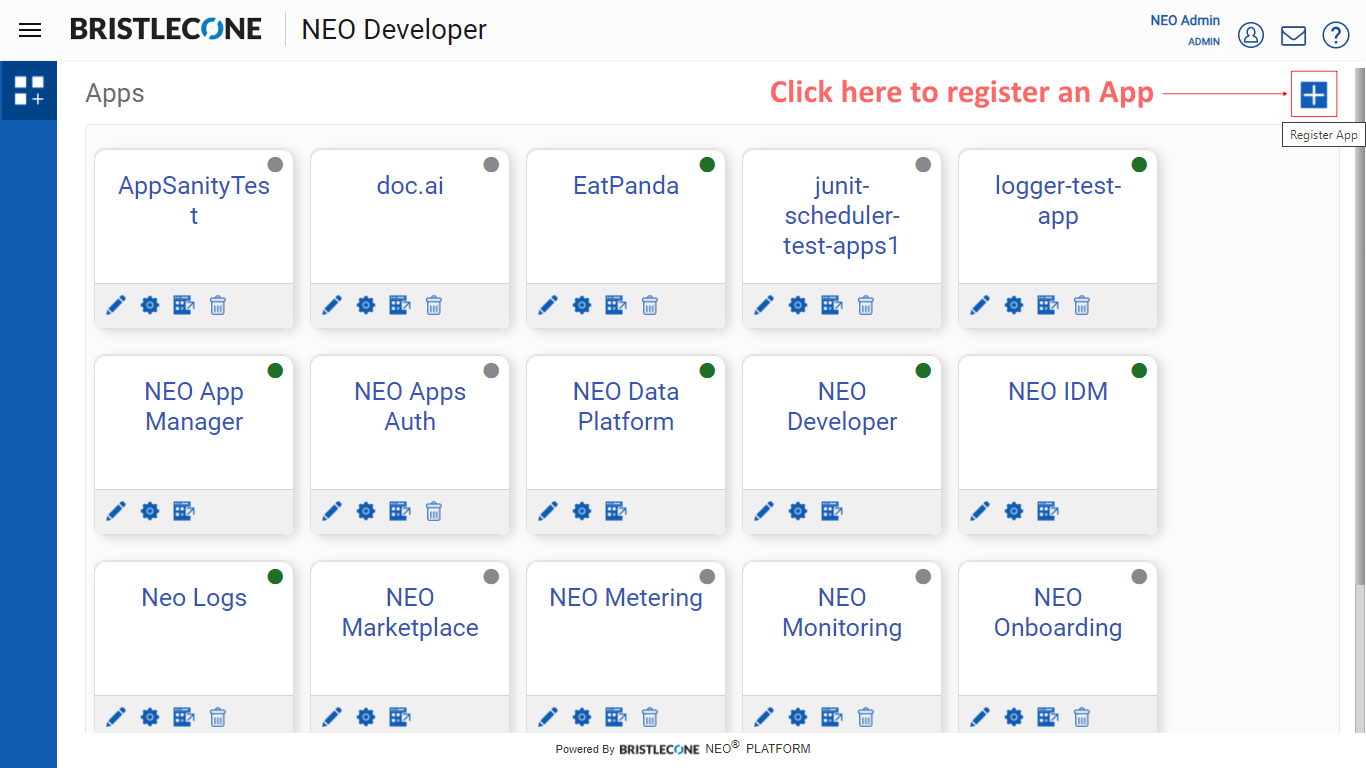
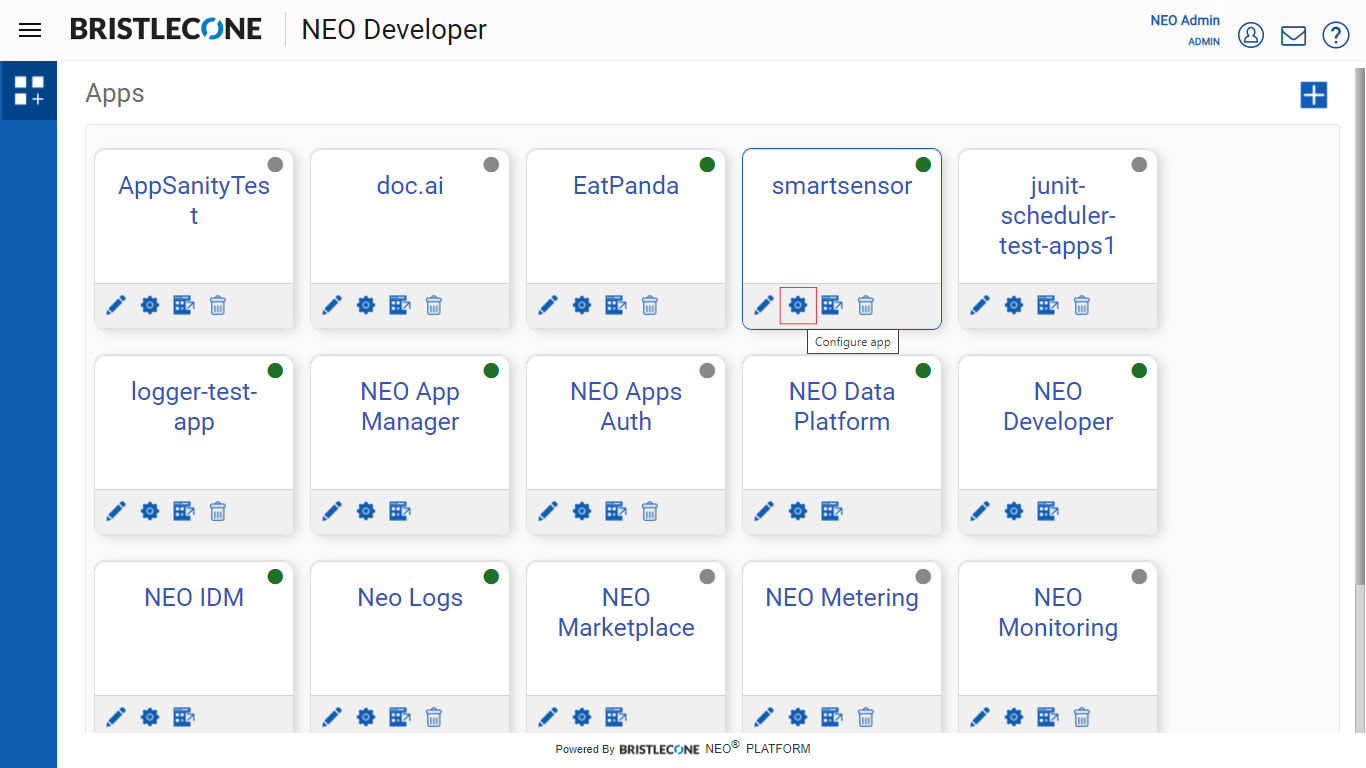
Post login , Provider Admin will be able to see the Apps Dashboard as shown below
Register an App
As a Provider Admin, to register a new app follow the steps below
I. Click on the + as shown below
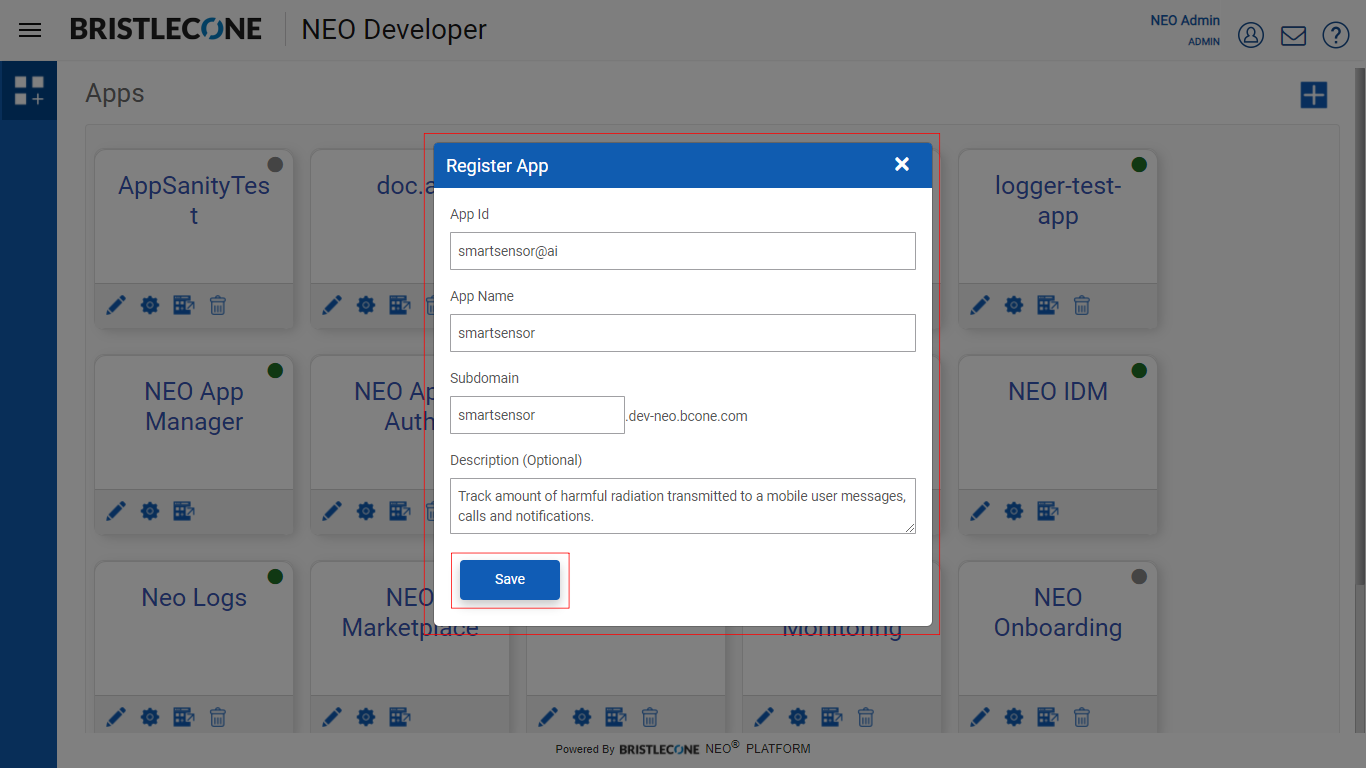
II. Enter the following parameters to register an App successfully
- App Id : is a key used in front-end application
Note:App Id must begin and end with alphabet/numbers and can contain special chars(-,@). It must have minimum length of 2 characters and maximum length of 25 characters.
- App Name : Name of the App
Note:App Name must begin and end with alphabet/numbers and can contain special chars(-,@). It must have minimum length of 2 characters and maximum length of 20 characters.
- Subdomain : Where the app is hosted
Note:Subdomain must begin and end with alphabet/numbers and can contain special chars(-, _). It must have minimum length of 2 characters and maximum length of 63 characters.
III. After entering the required parameters click save to register the app
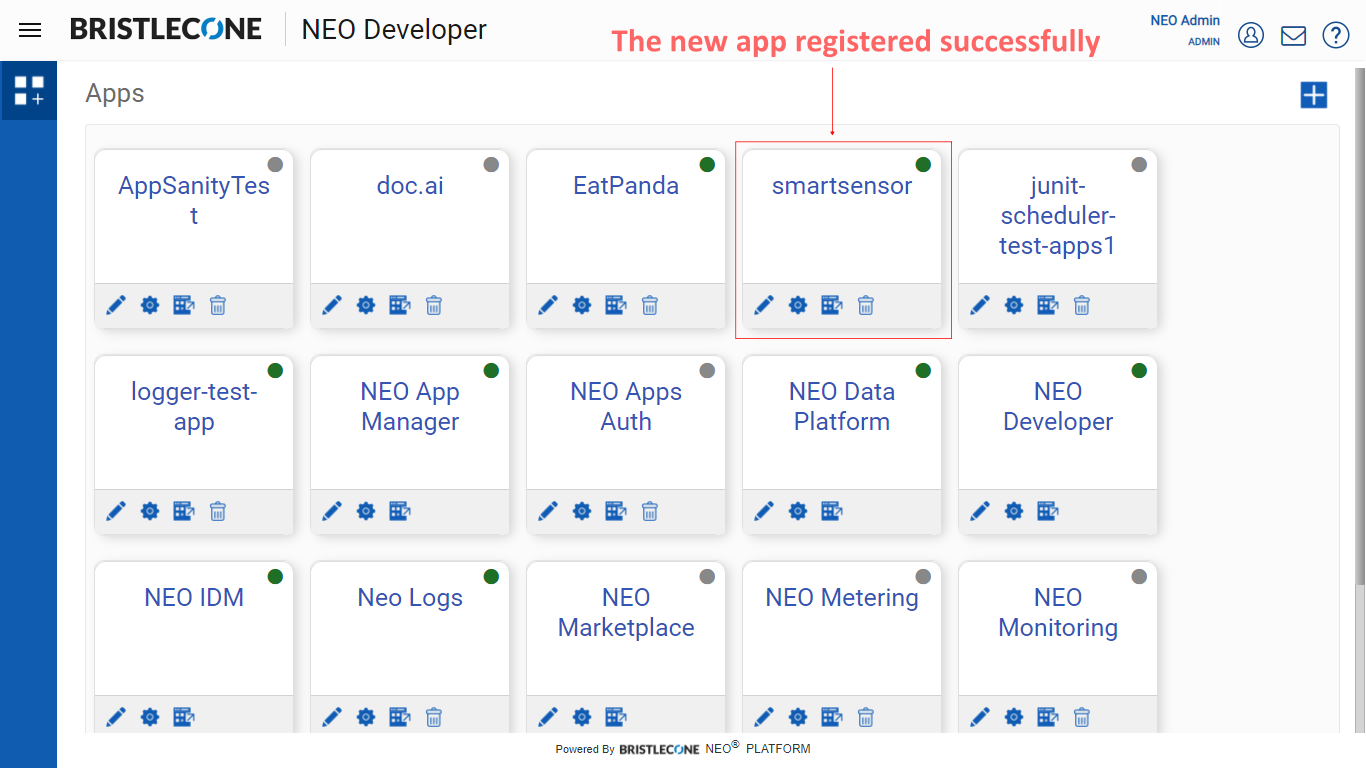
Post creation, the newly created App will be listed in the Apps Dashboard as shown below
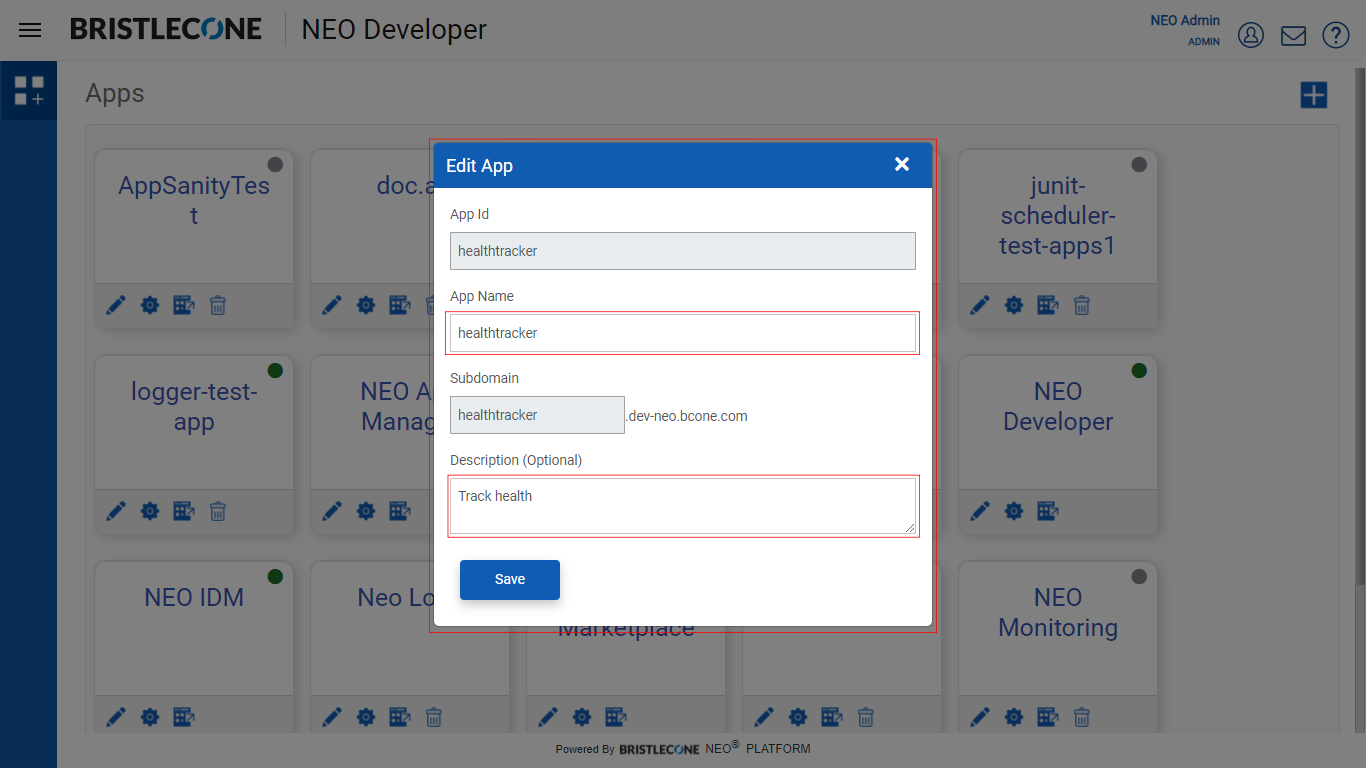
Edit Apps
Click on the Edit icon of the app to edit the App Name and Description fields

Post edit, Click on Save to update the app name/description
Configure App
Allows the provider admin to define
- Configurations used by the App
- Roles used by the App
- User profile used by the App
- Features used by the App
- Role Permissions that the app should adhere to
Click on the Configure app icon as highlighted below
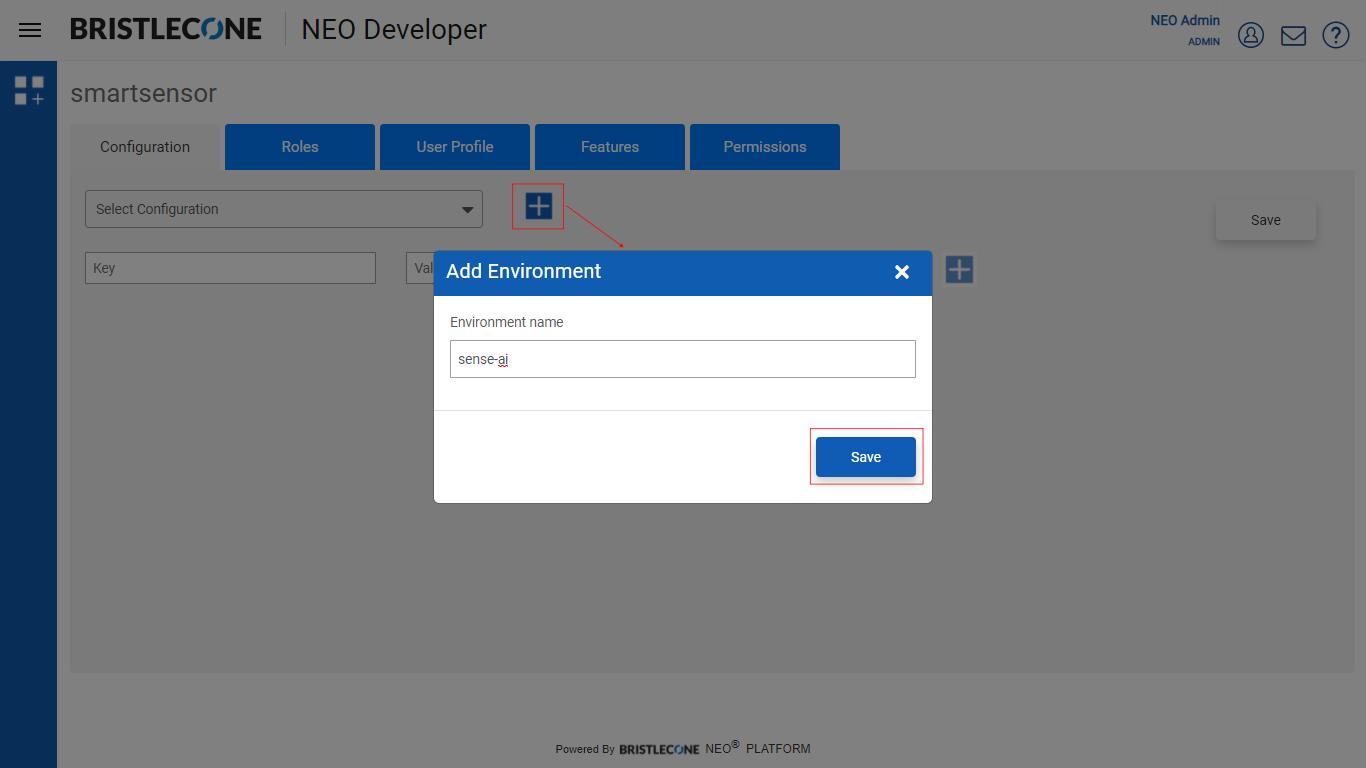
Configuration
Admin can create multiple environments that their App can connect to. It’s a logical grouping of Environment Variables
To add an environment:
Click on + as highlighted below
Add Environment name, Click on Save
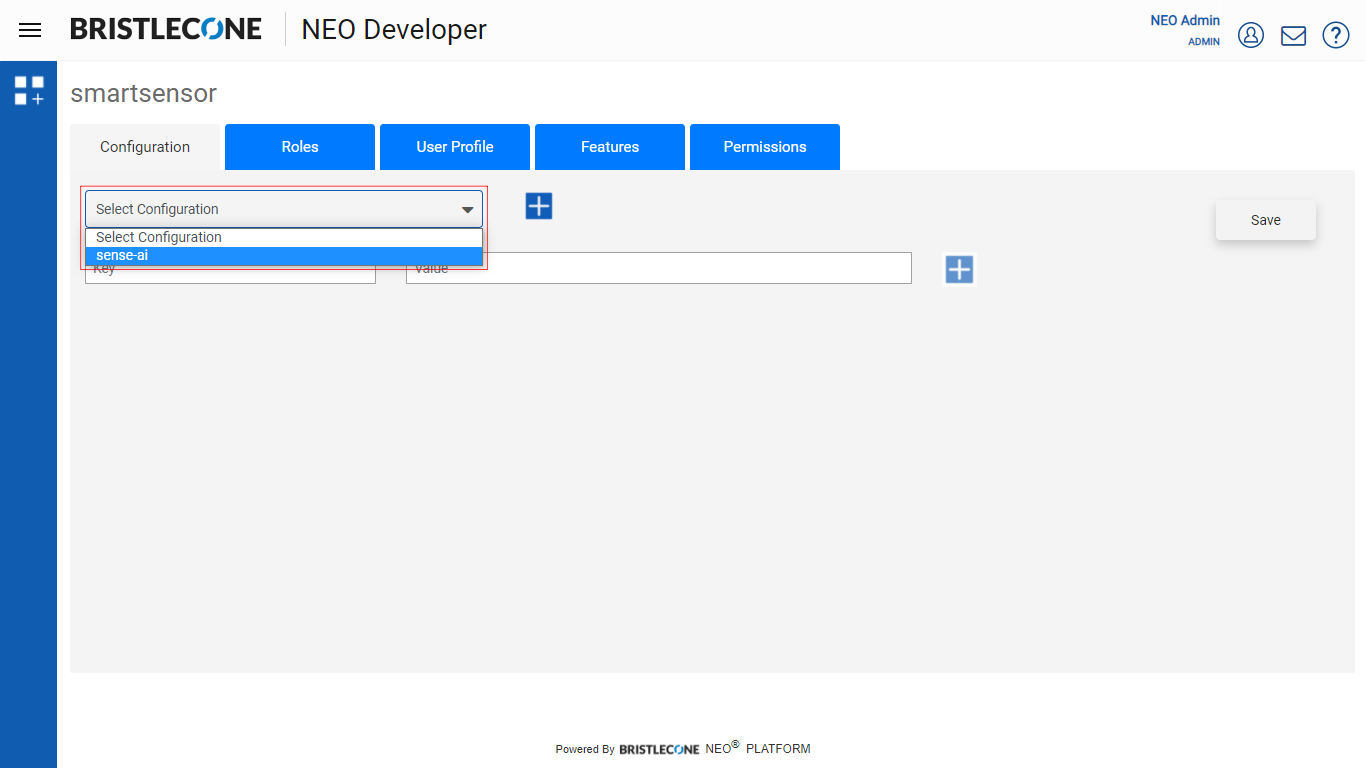
Post creation, environment will be listed as shown below
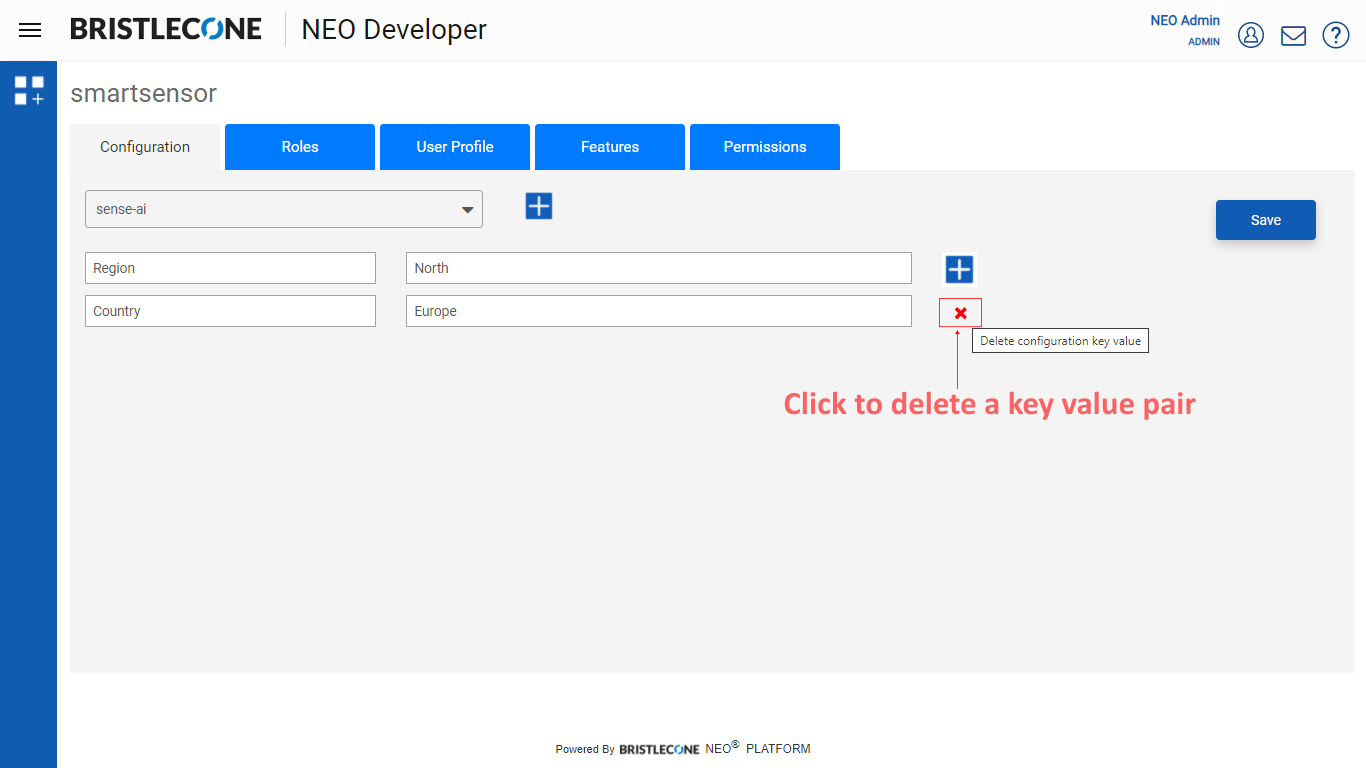
Add environment variables:
Admin can create multiple environments that their App can connect to. It’s a logical grouping of Environment Variables
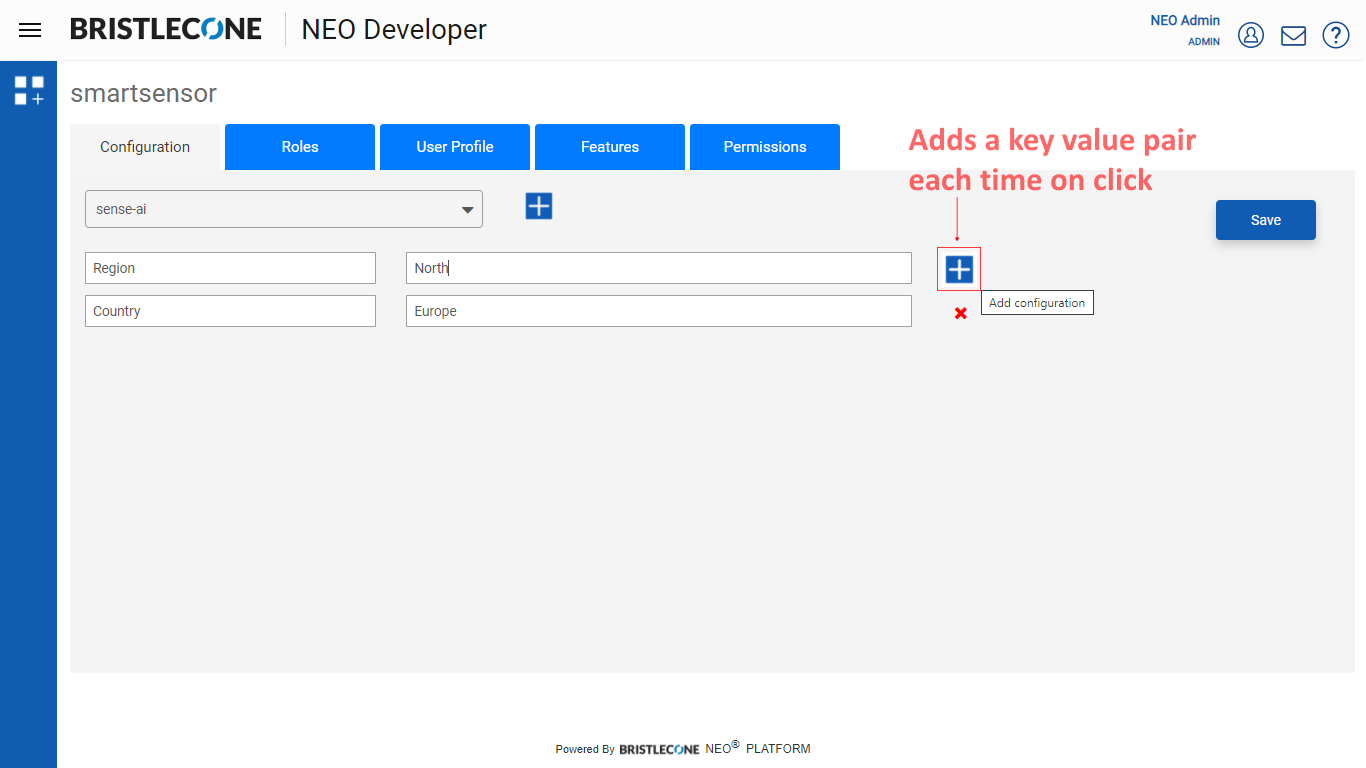
Admin can delete key value pair/s by using the x icon as shown below
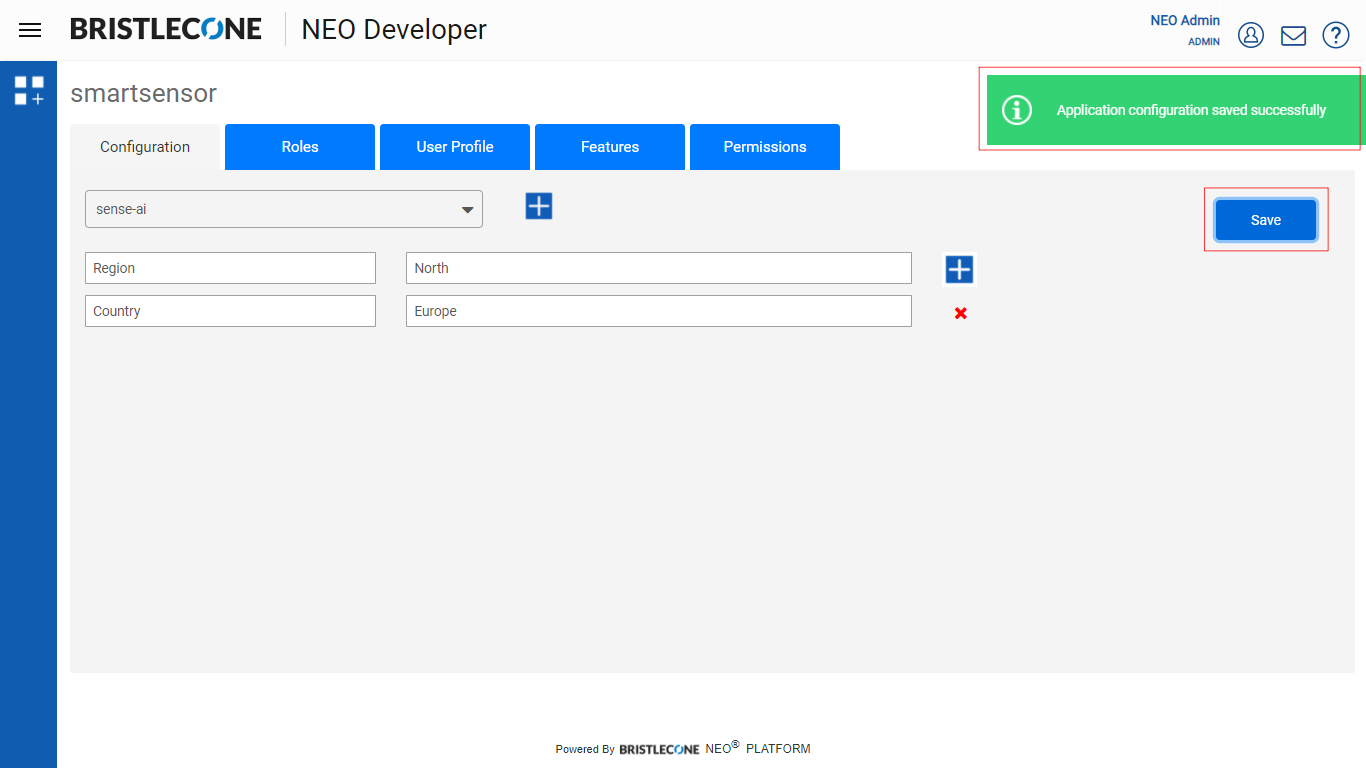
Click on Save button to save the configuration.
Post successful save the notification will be shown as below
Roles
Click on Roles tab to define roles of an app
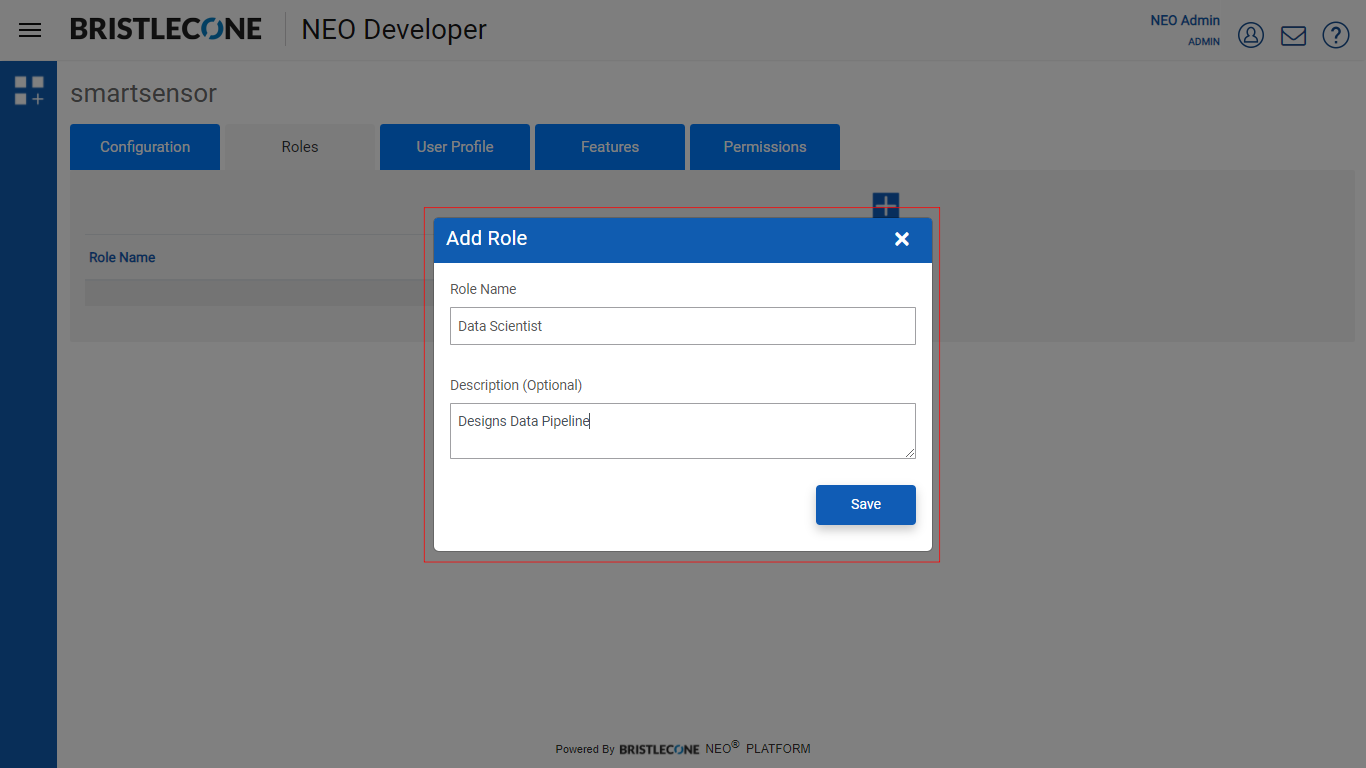
To Create a Role
Click on + button to create a Role

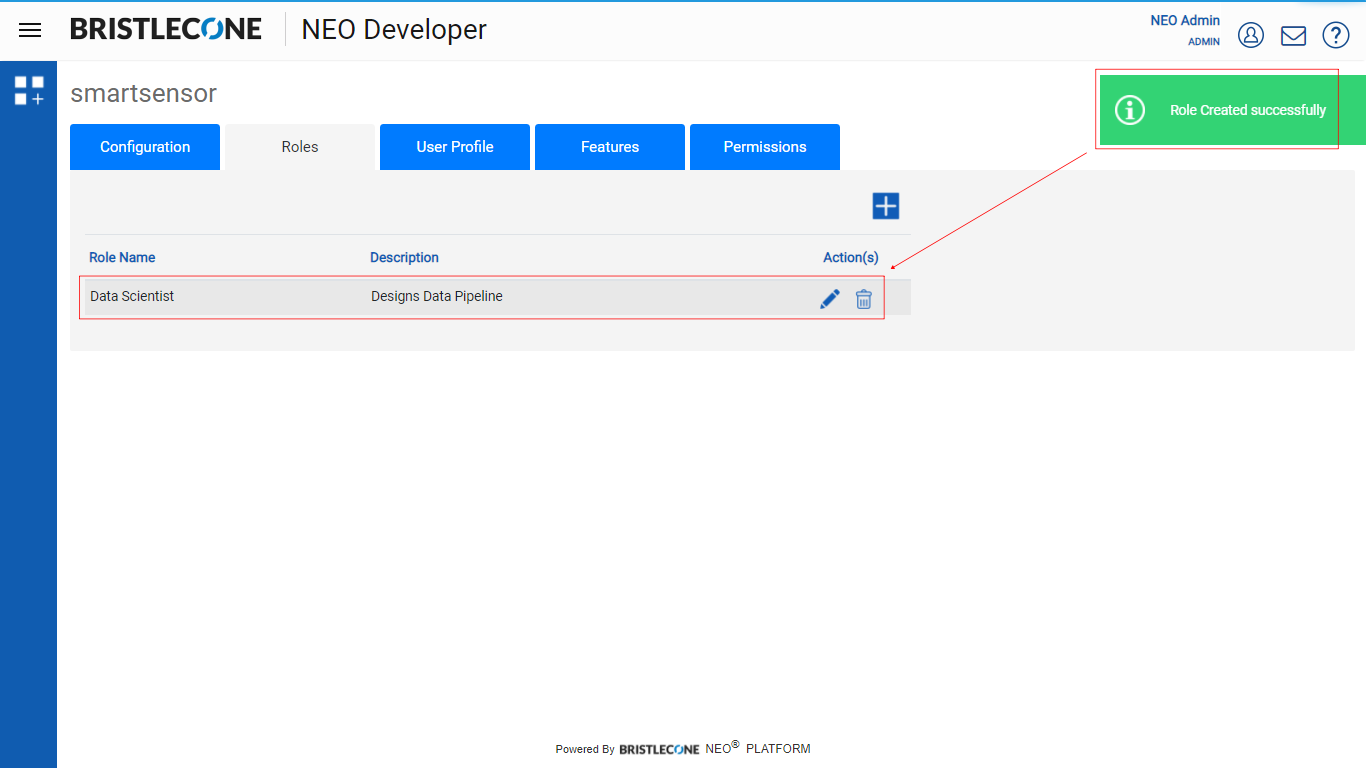
Provide Role Name and Description and click on Save as shown below
Post successful creation, Role created is listed as shown below
Provider Admin can Edit or Delete a role by clicking on the links accordingly
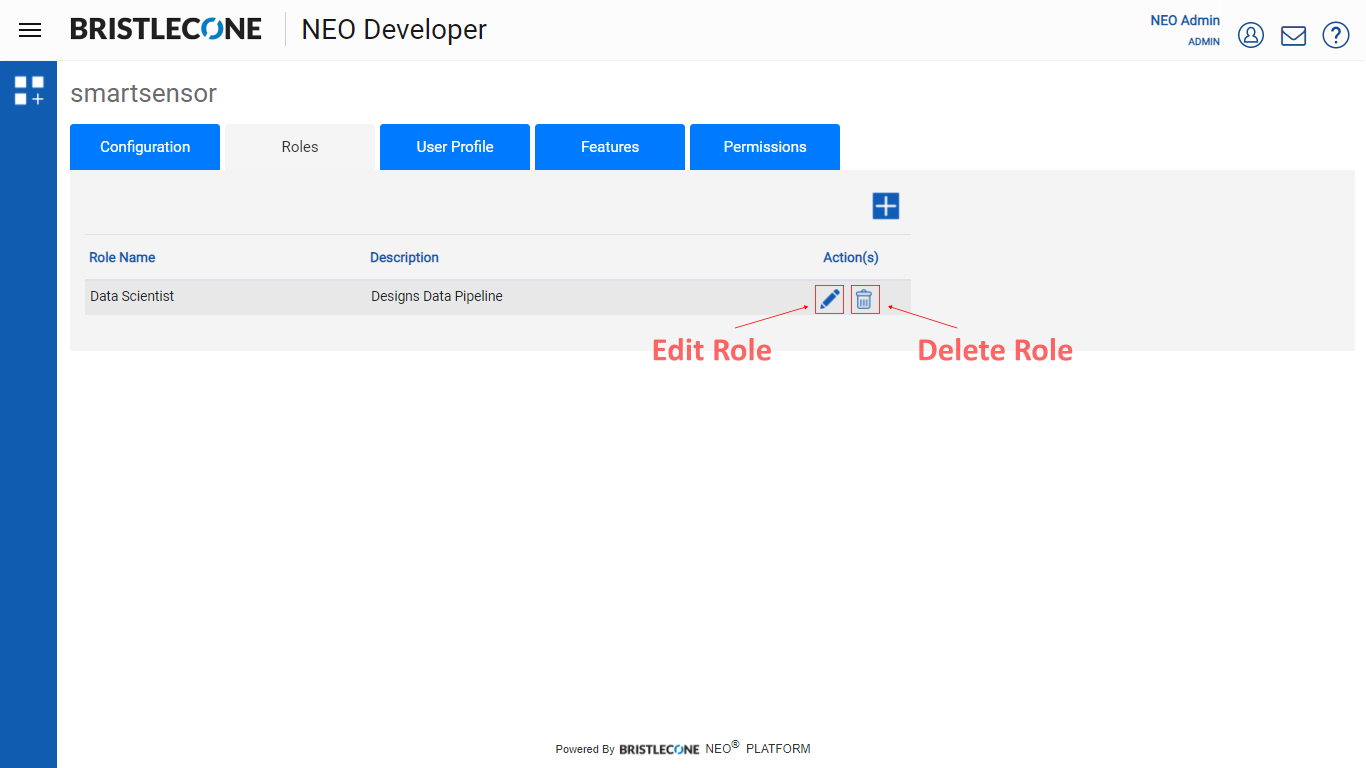
Note: If user is associated with a role and delete operation is performed on the Role, an error message will be displayed as “There are User(s) associated with this role”
User Profile
Allows admin to define the user profile of an app. The values of the user profile vary from user to user and is set by the Admin of Neo App Manager
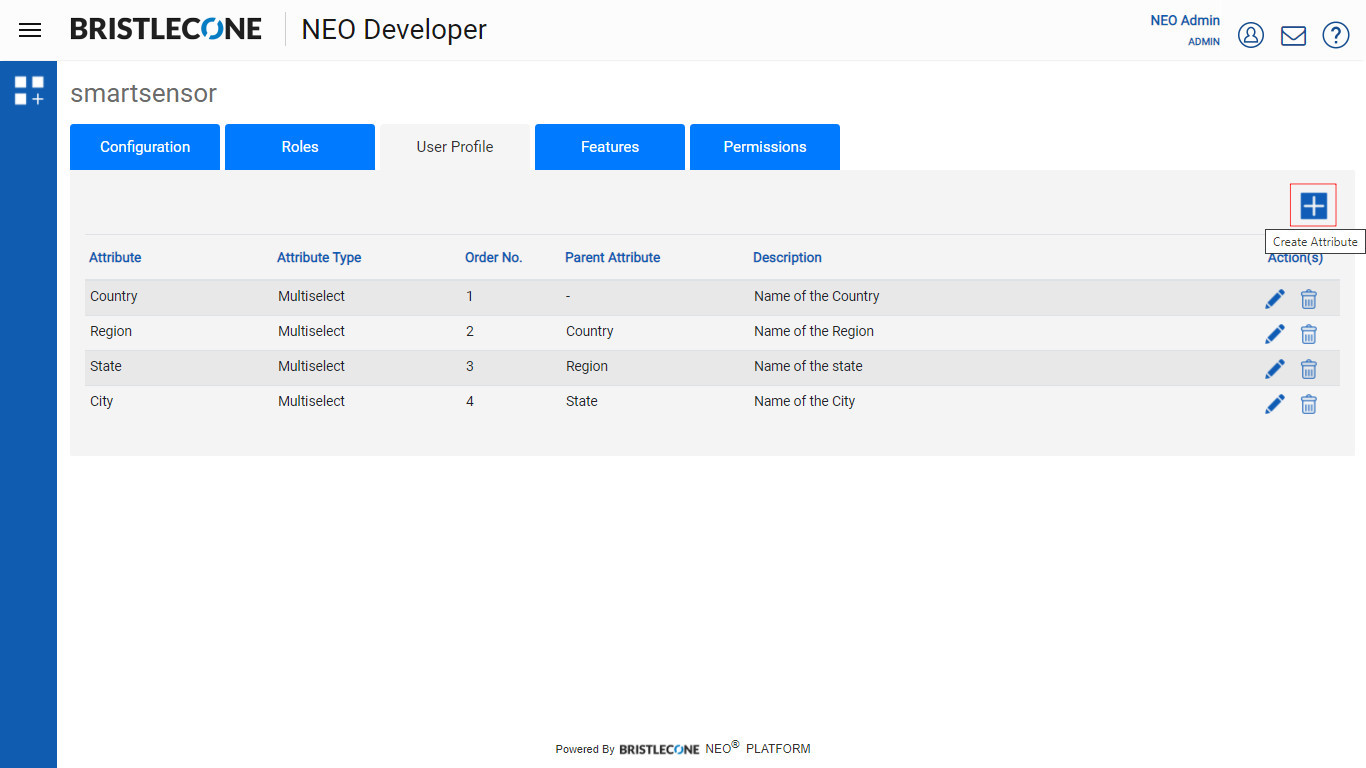
1. Click on User Profile tab as shown below and Click on + icon to Create New Attribute
2. Fill the Attribute details to Add Profile
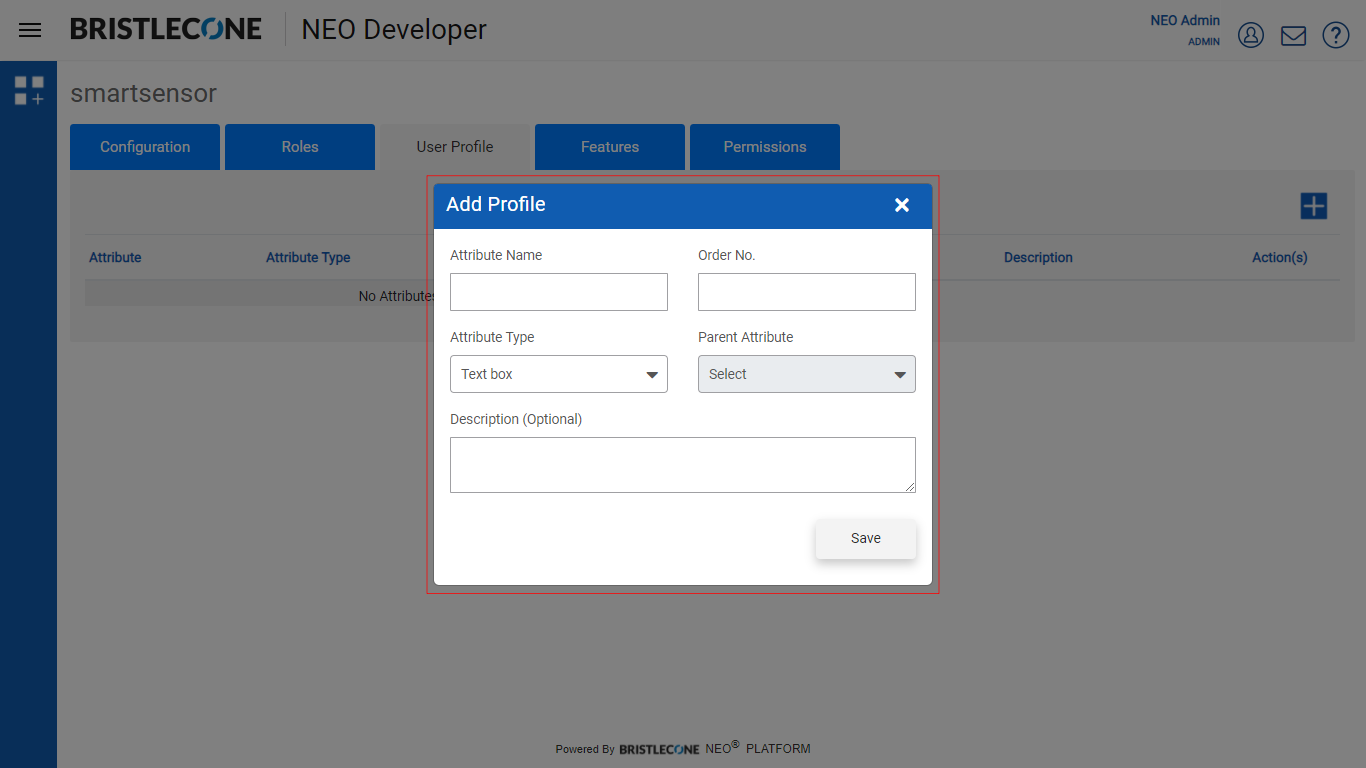
Add Profile Parameters definition
- Attribute Name: Name of the Attribute field
- Order No: The serial order number as expected to appear one after another as Parent and Child Attribute respectively. Order Number cannot be repeated
- Attribute Type: There are two type of attributes
- Text Box: For user profile attribute that is a free flowing text

2. Multiselect: For user profile that can be one or more values from a drop down list. If it is a drop down list then it can be dependent on another user profile that is of type multiselect
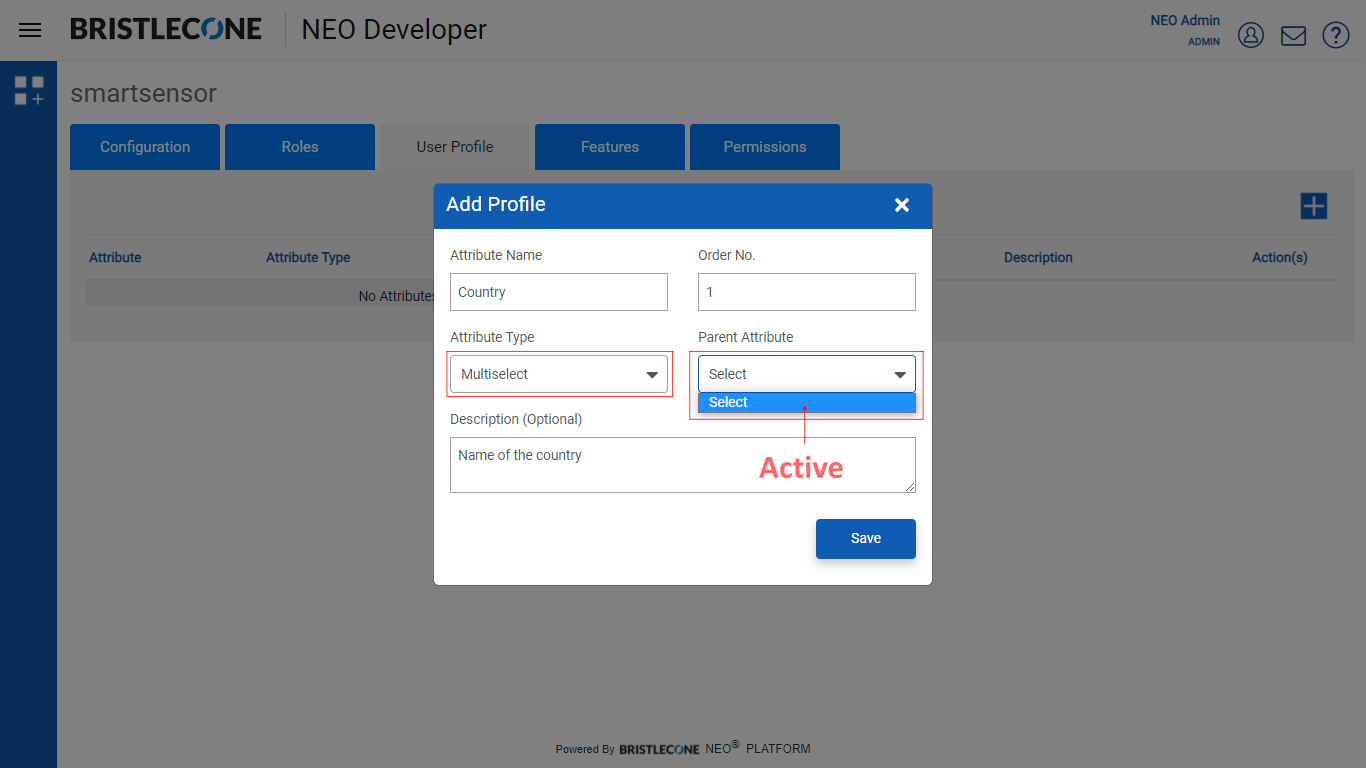
- Parent Attribute: If Attribute Type is Multiselect, then Parent Attribute drop-down list will show the list of multi select user profile attributes.
- Description: Description of the Attribute as Optional
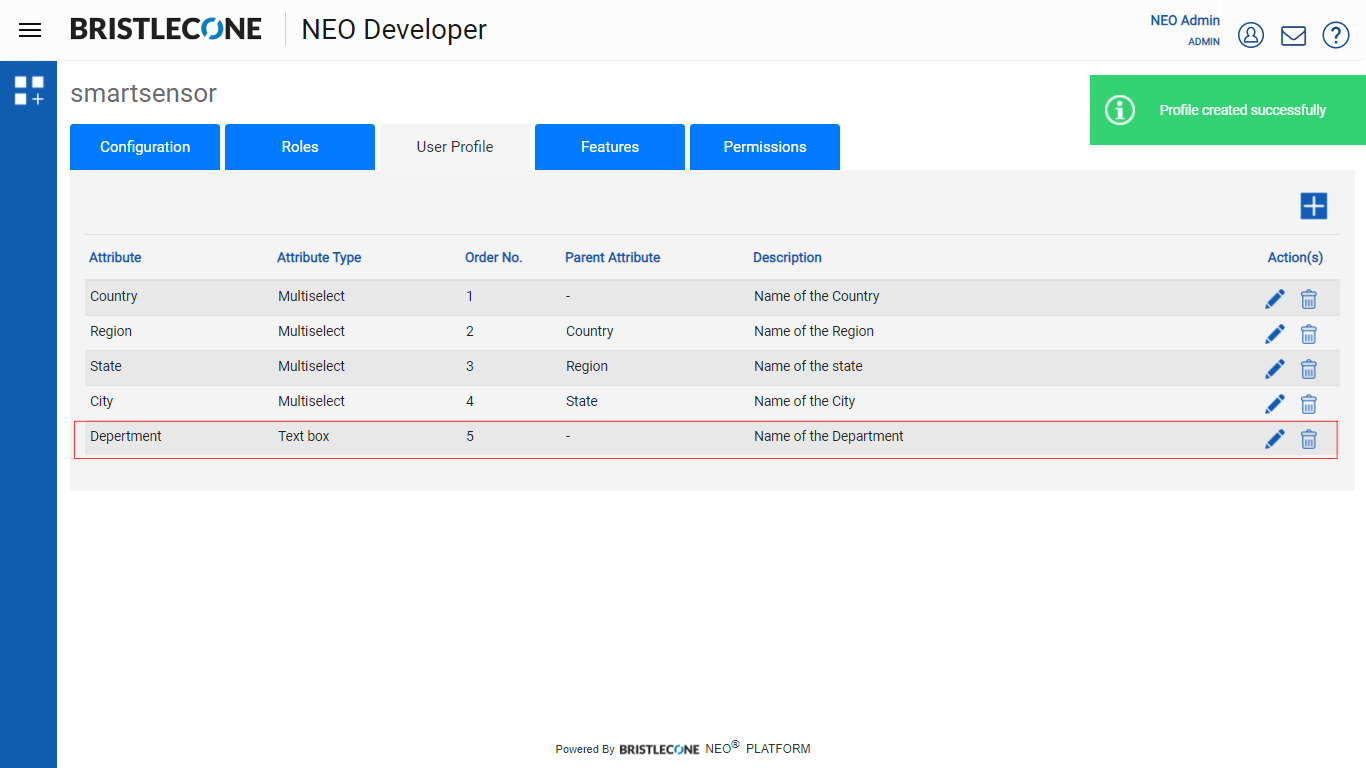
3. Add Profile with Attribute Type as Multiselect
3a. Fill the details with Master Parent Attribute as Order No 1 and Click on Save
Note: Master Parent Attribute doesn’t come under any parent category

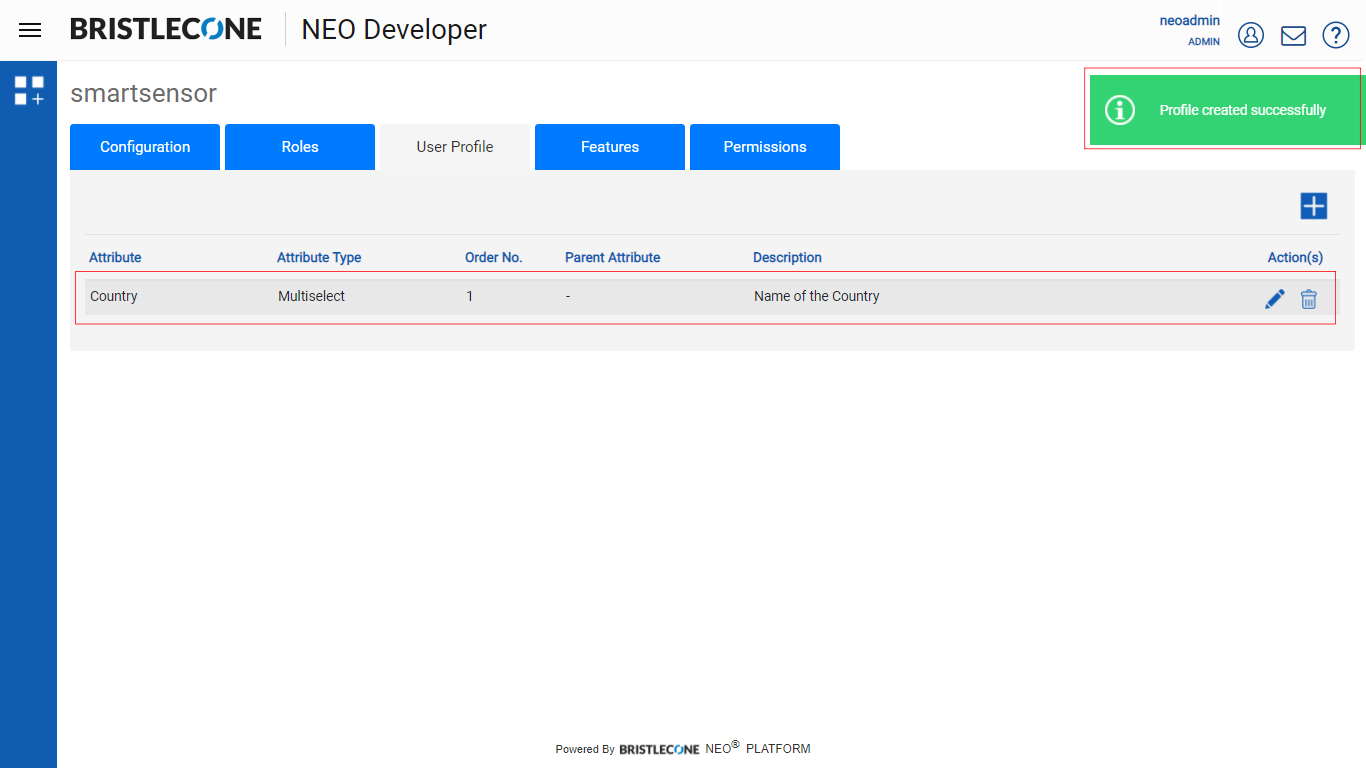
Post creation the profile will be added in the list as shown below
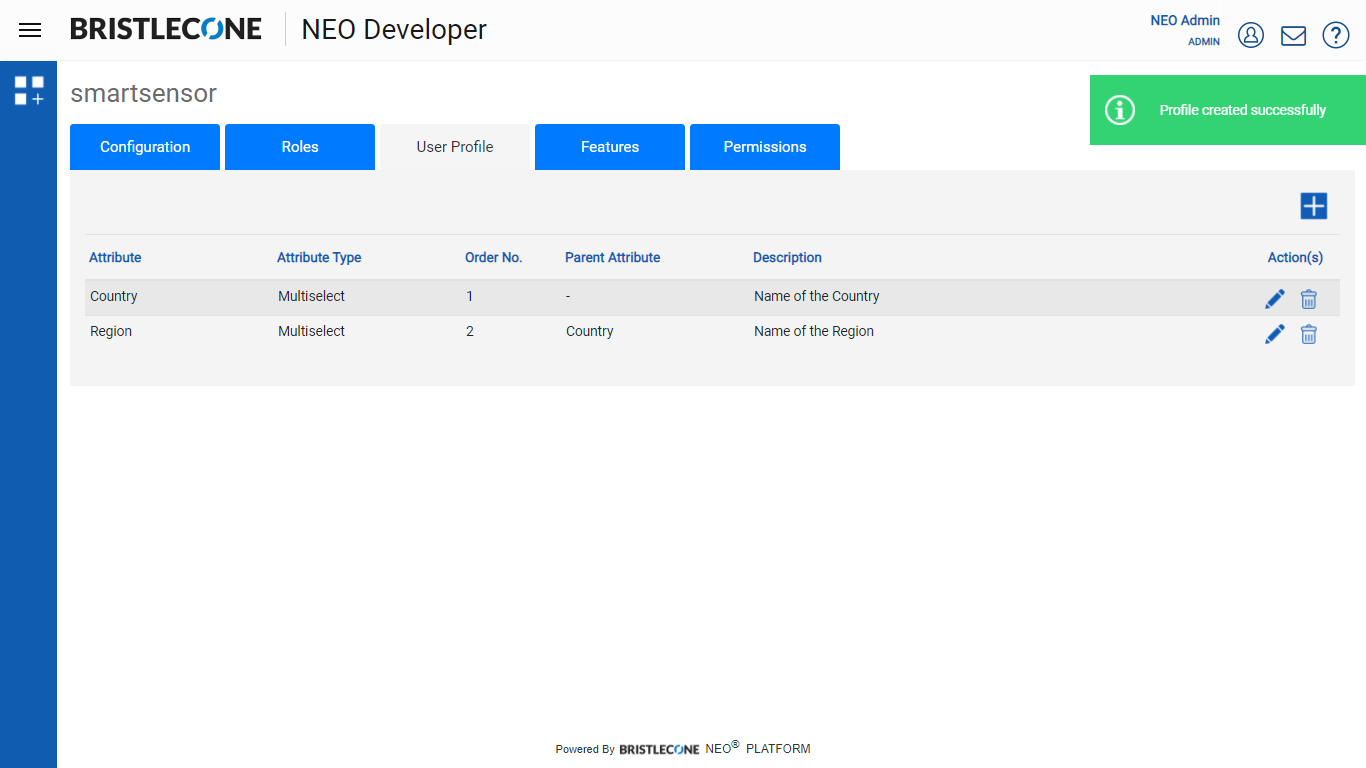
3b. Add few more profiles by adding more attributes after clicking on + icon as before
3c. Fill the details with incrementing Order No. by 1 as shown below and select the Parent Attribute accordingly

Post creation the profile will be added in the list as shown below
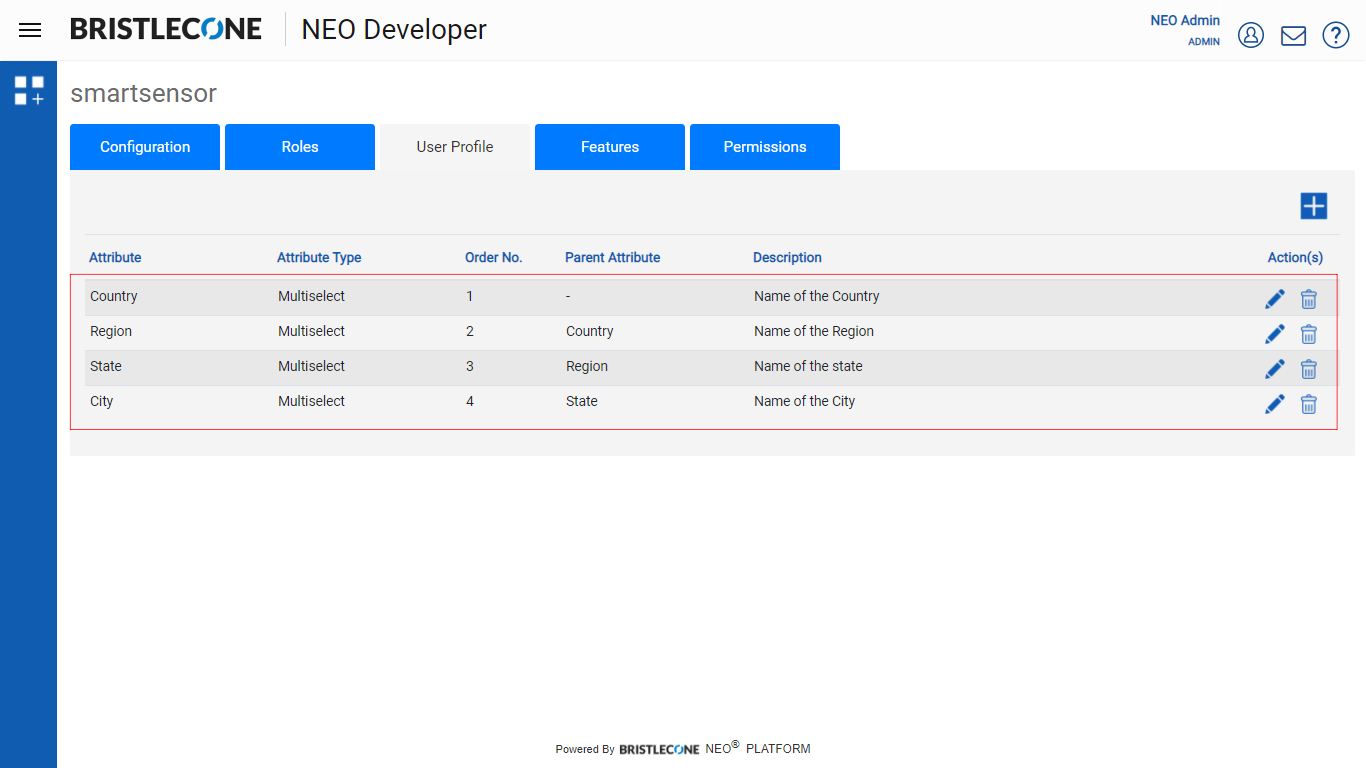
3d. As per requirement, follow the previous steps to add more attributes by incrementing order number with parent/child attribute selection
4. Add Profile with Attribute Type as Text
4a. Click on + icon as shown below
4b. Fill in the details with Attribute Type as Text and Click on Save button

Post creation the profile will be added in the list as shown below
Features
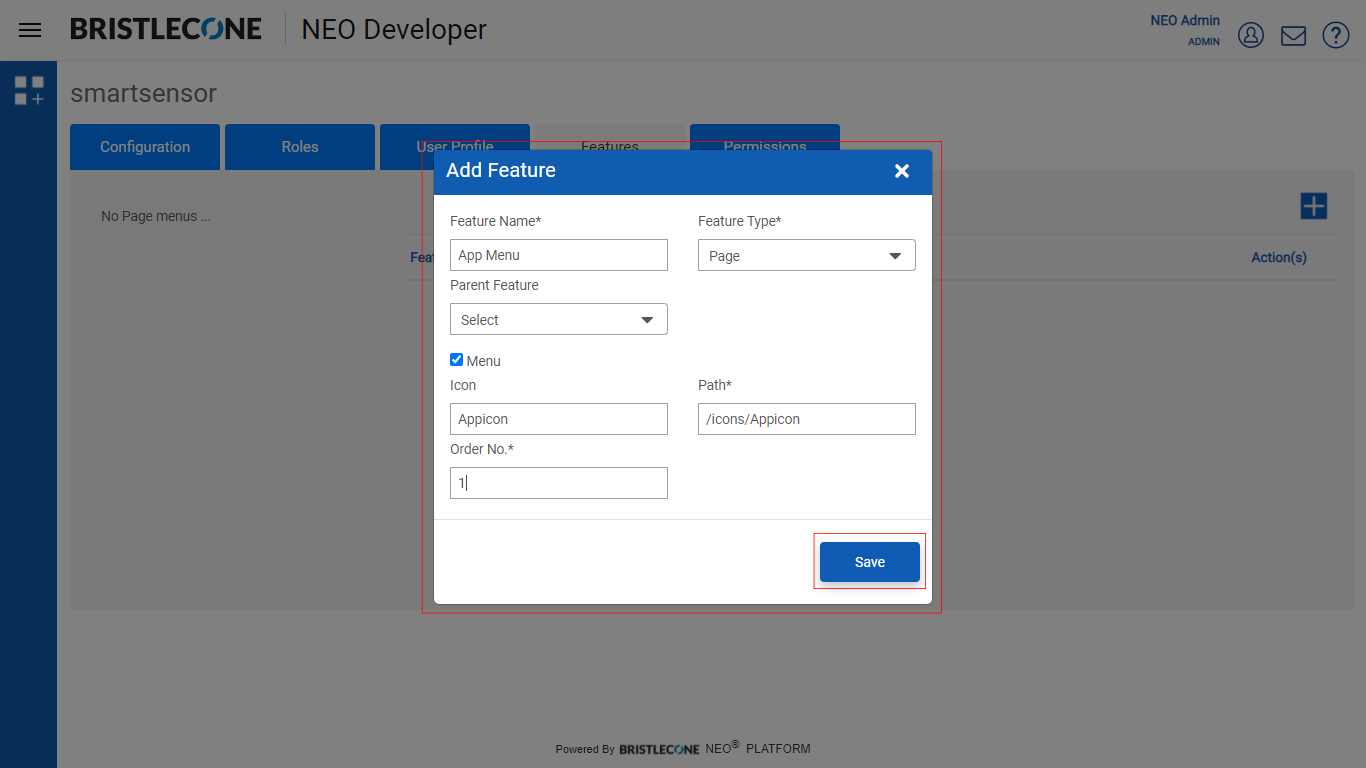
Add Feature

Click on the + icon as shown below and fill the parameters to define the feature

Enter the following parameters to define the feature
- Feature Name : Name your feature
- Feature Type : Specify the type of the feature
- Page : If the feature is a Page in an app. Page feature have only view permission. So either you can view the page or not view it
- Component: If the feature is a component in a Page or a component across pages in the app. For example
- A widget in a page can be treated as a component
- Button to edit across page can be treated as a component
- Entity: If the feature refers to a data in the app then we should treat it as an entity.
For example, an app that deals with Customer data should treat Customer as an entity. Entities have CRUD (Create/Read/Update/Delete) permission
Note: Page level permissions configured will be handled by default by the App SDK, whereas as a Developer you can use the claims provided by the platform to handle the Component level security. For more information on this please go here: https://www.npmjs.com/package/@bcone/neo-app-sdk
- Parent Feature : Specify if there are any Parent features associated
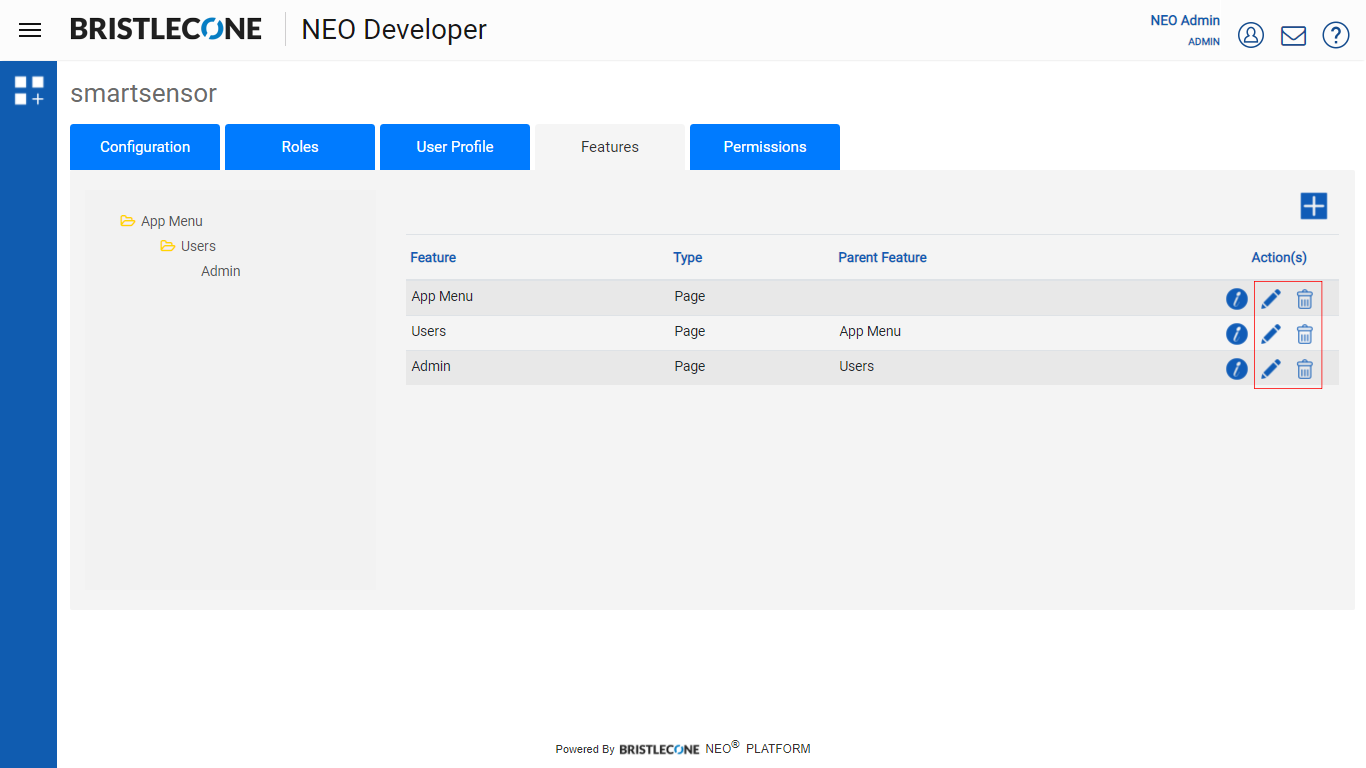
Ex : Admins Page as a feature is nested under Users Page as shown below
Click on Save to create the Feature
Post Feature Creation, Provider Developer will be notified as shown below

Admin can Edit / Delete features by clicking on the icons accordingly
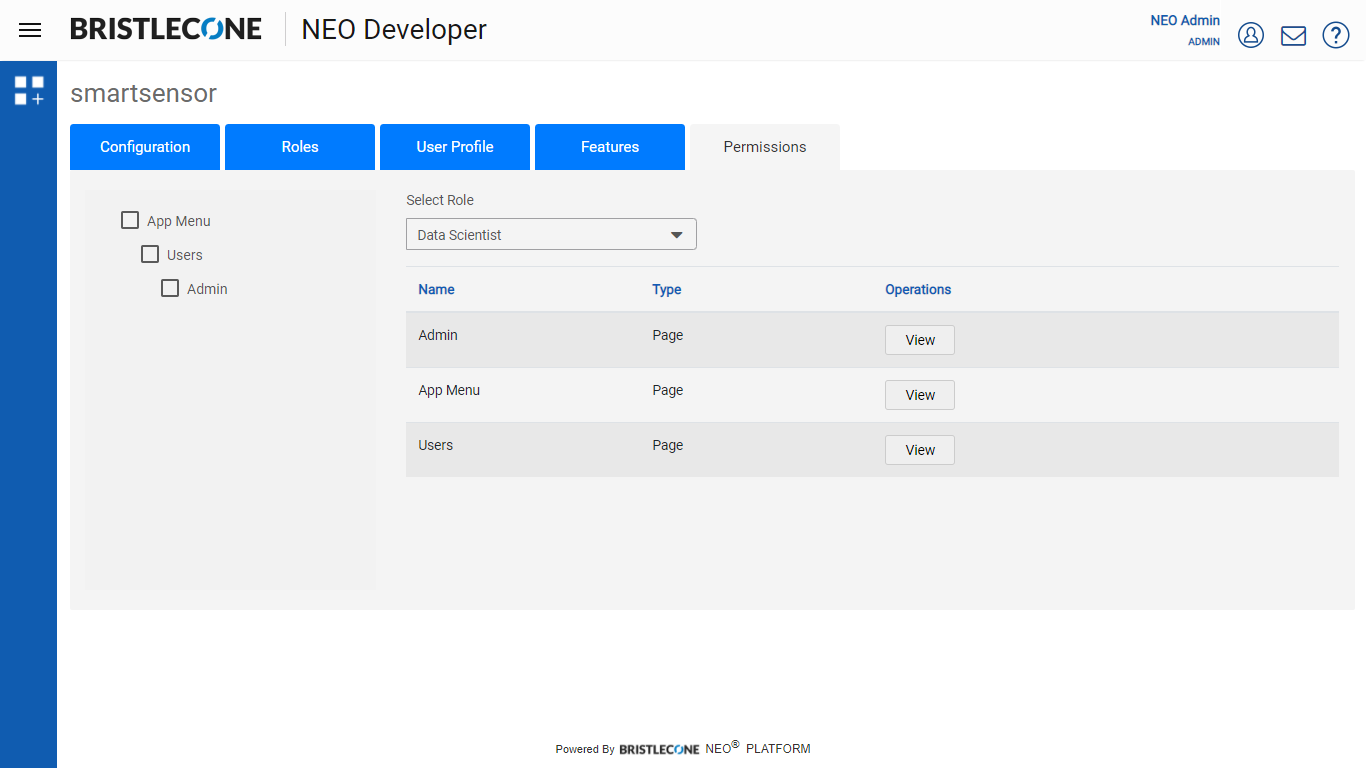
Permissions
Following are the steps to provide permission to a user for specific page/s
Step 1: Click> on Permissions Tab as shown below
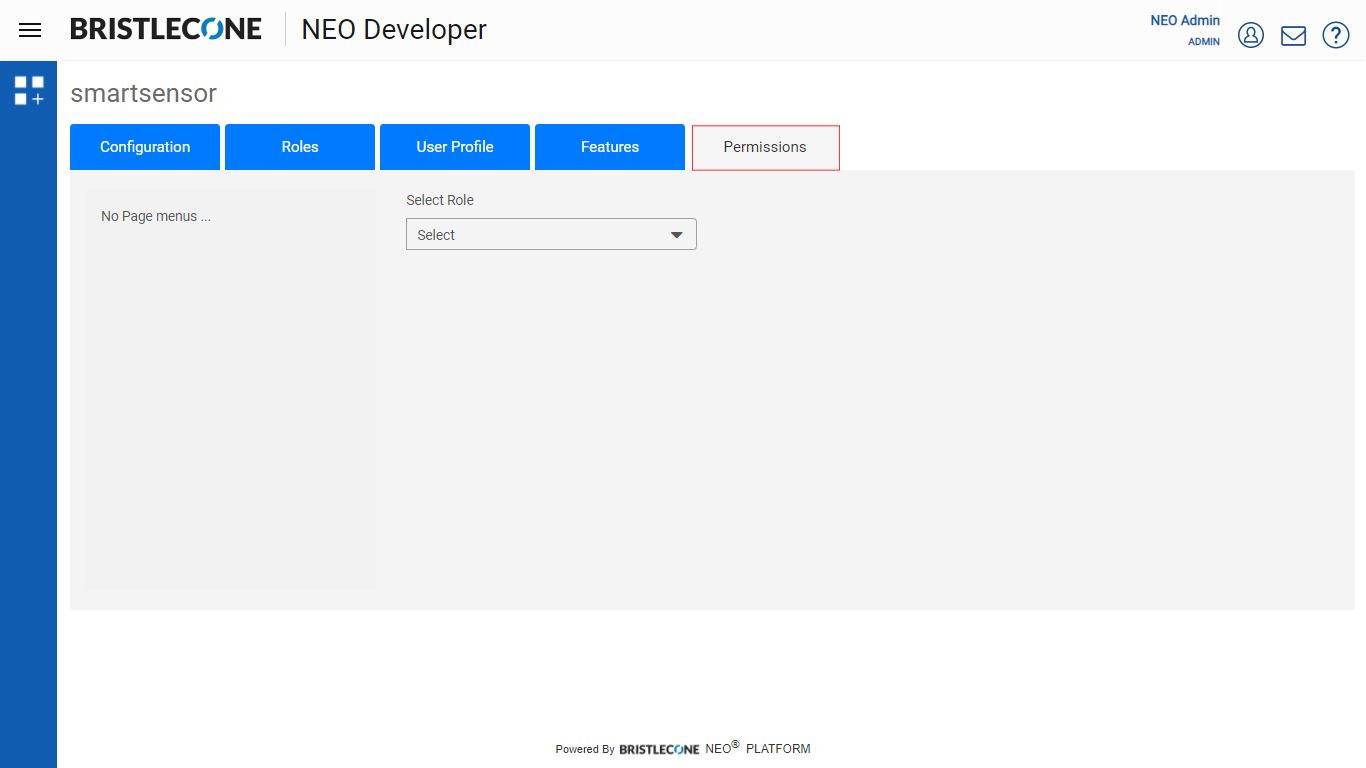
Step 2: Select the Role to be permitted

Step 3: Select the feature
User as a role before receiving Permission to view pages
Data Scientist can now view Users, Apps, Admin pages
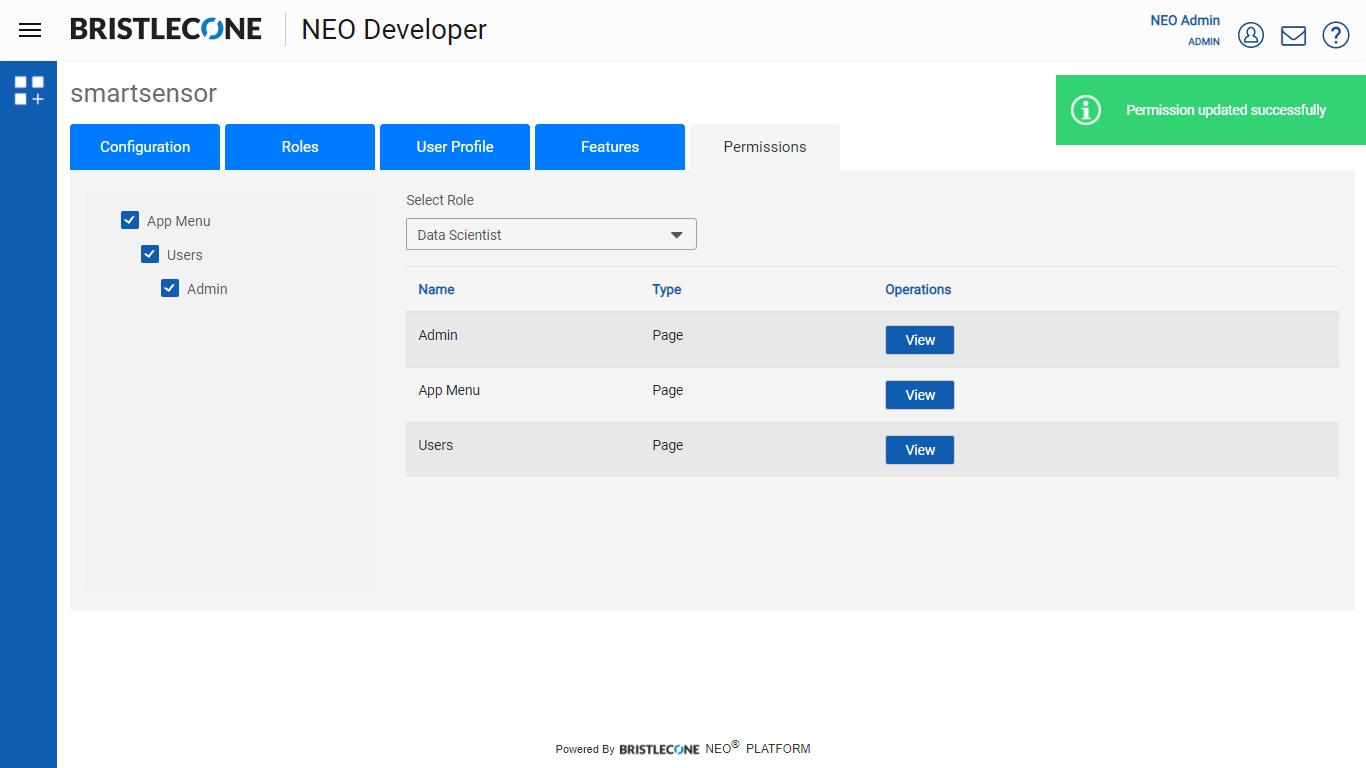
Post receiving the Permissions User can only view the specific pages
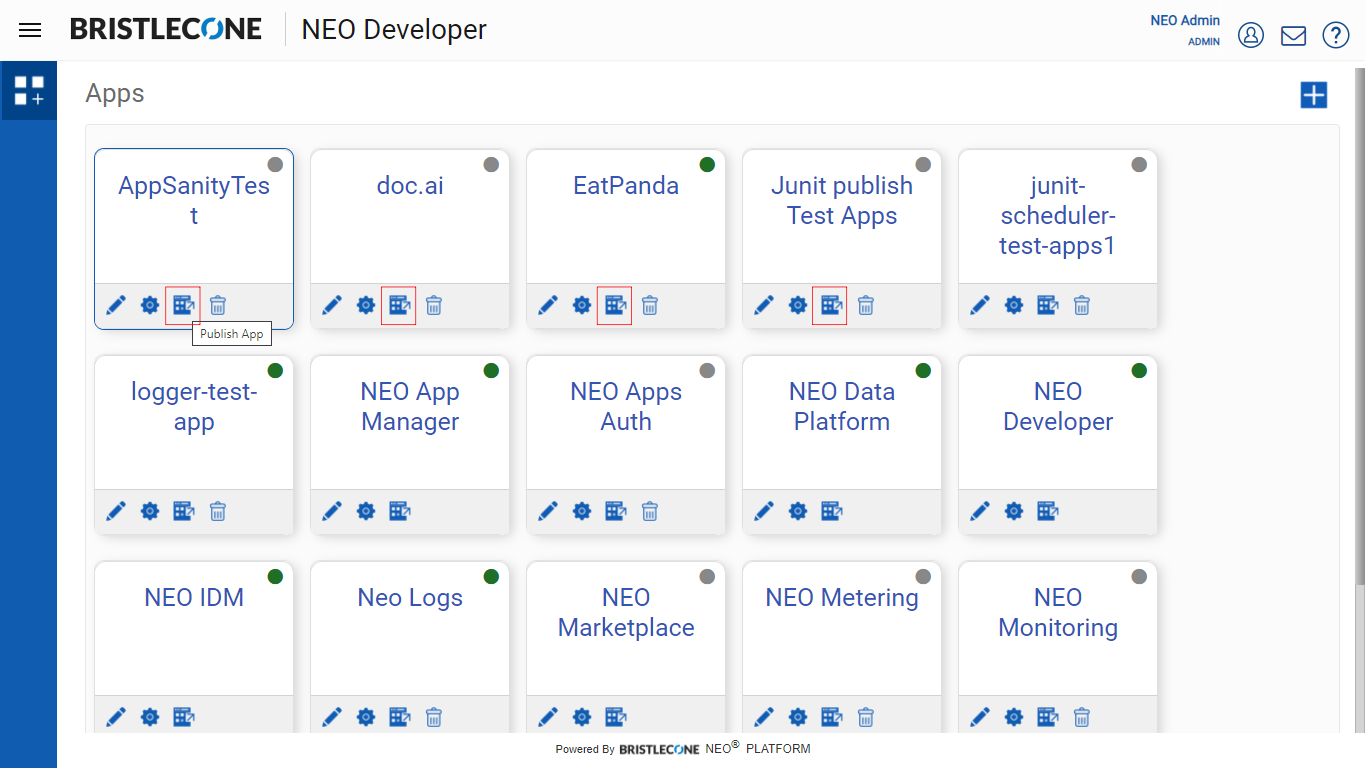
Publish App
Click on the Publish as shown below
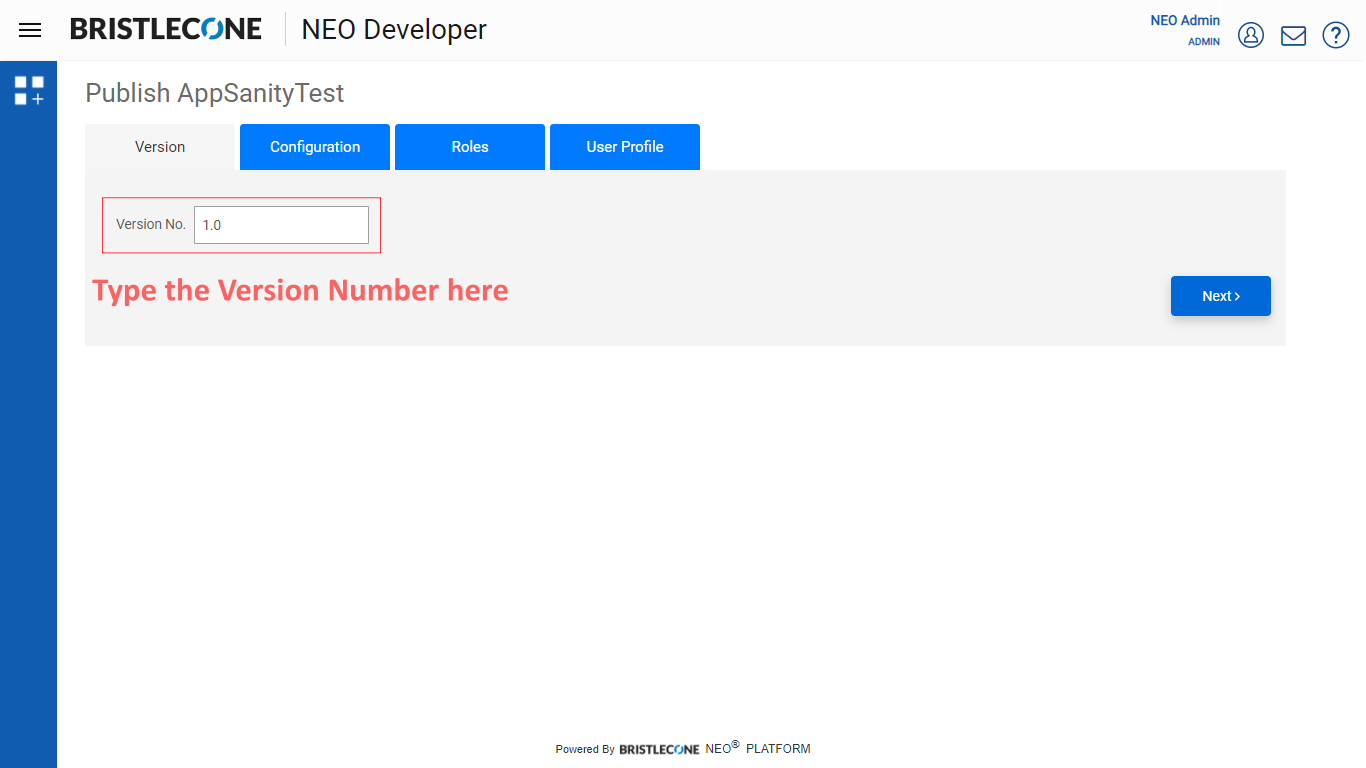
Version
Provide the version number in the text box as shown below and click on Next button
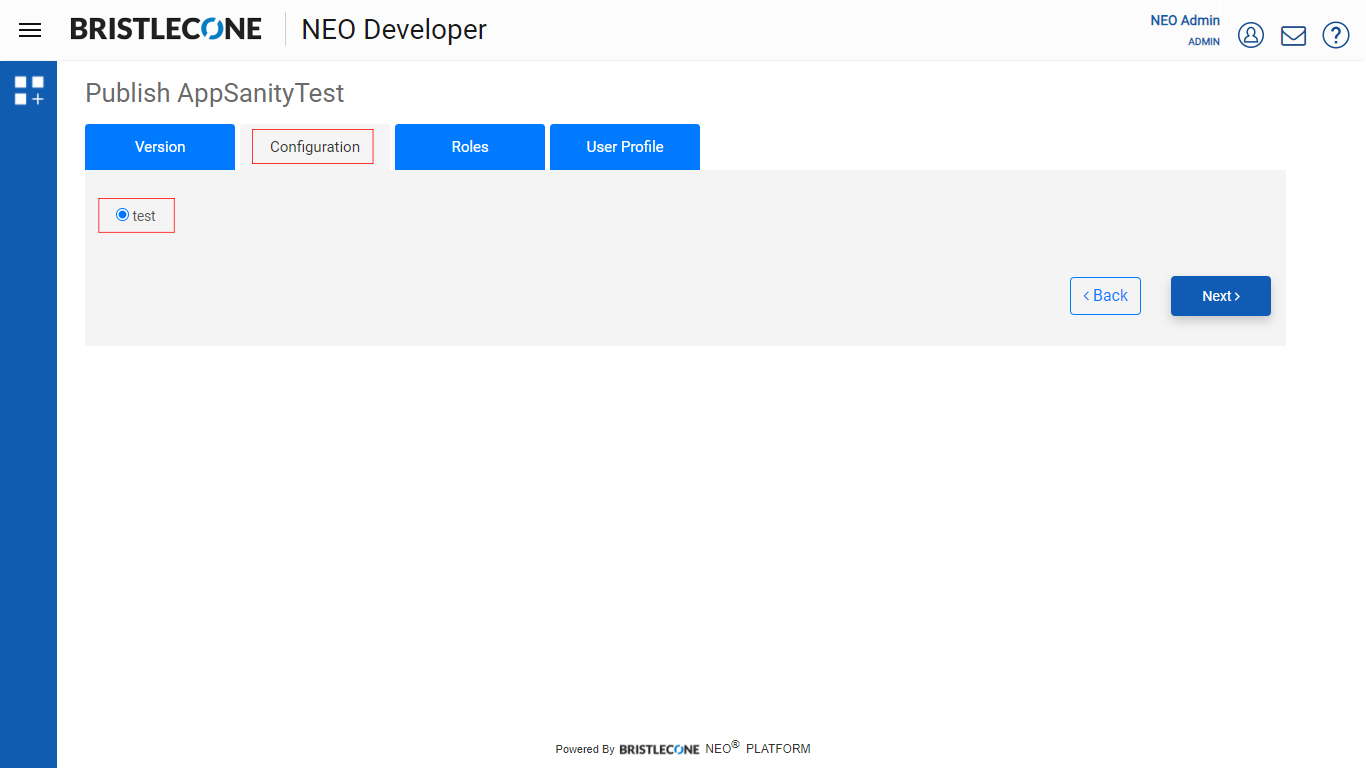
Configuration
Provider Admin must choose the App configuration as shown below. Click the radio button and click on Next
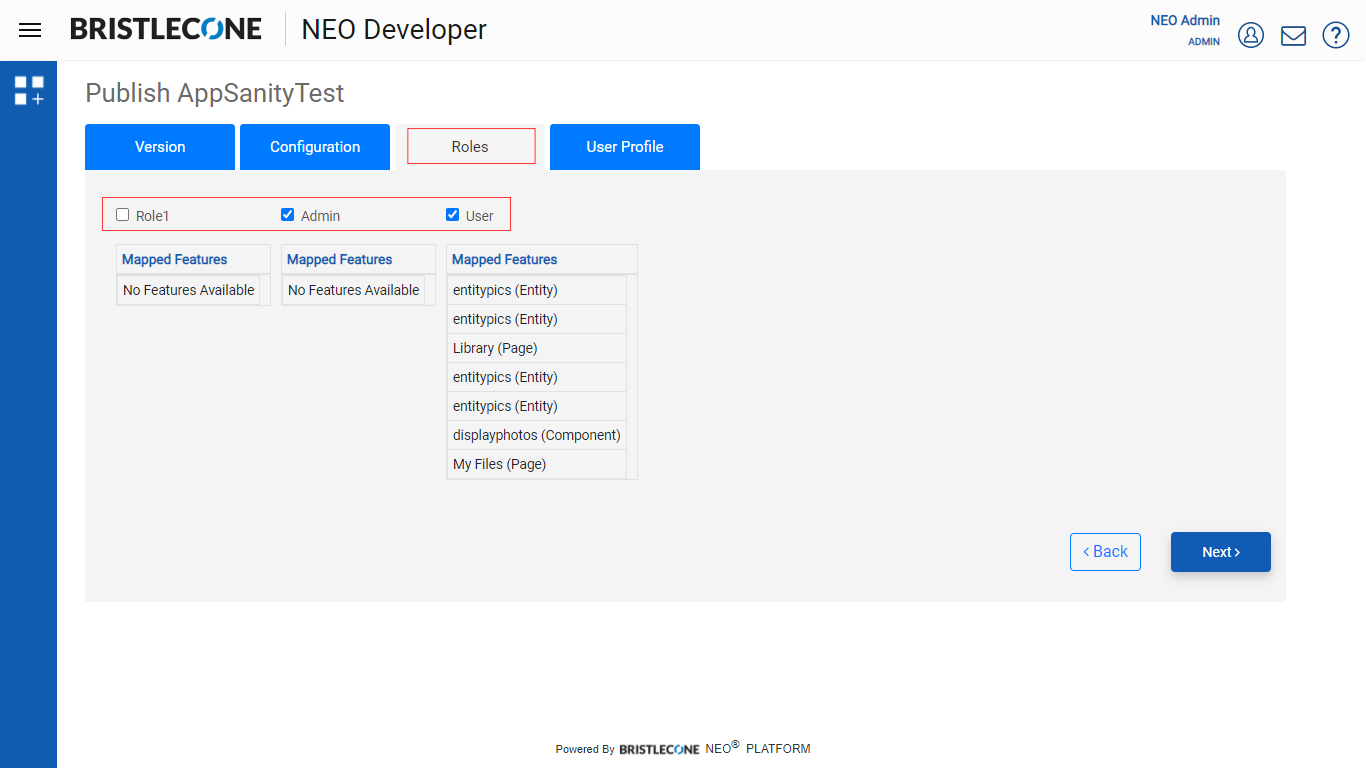
Roles
Check/Uncheck the boxes to select the roles and click on Next button
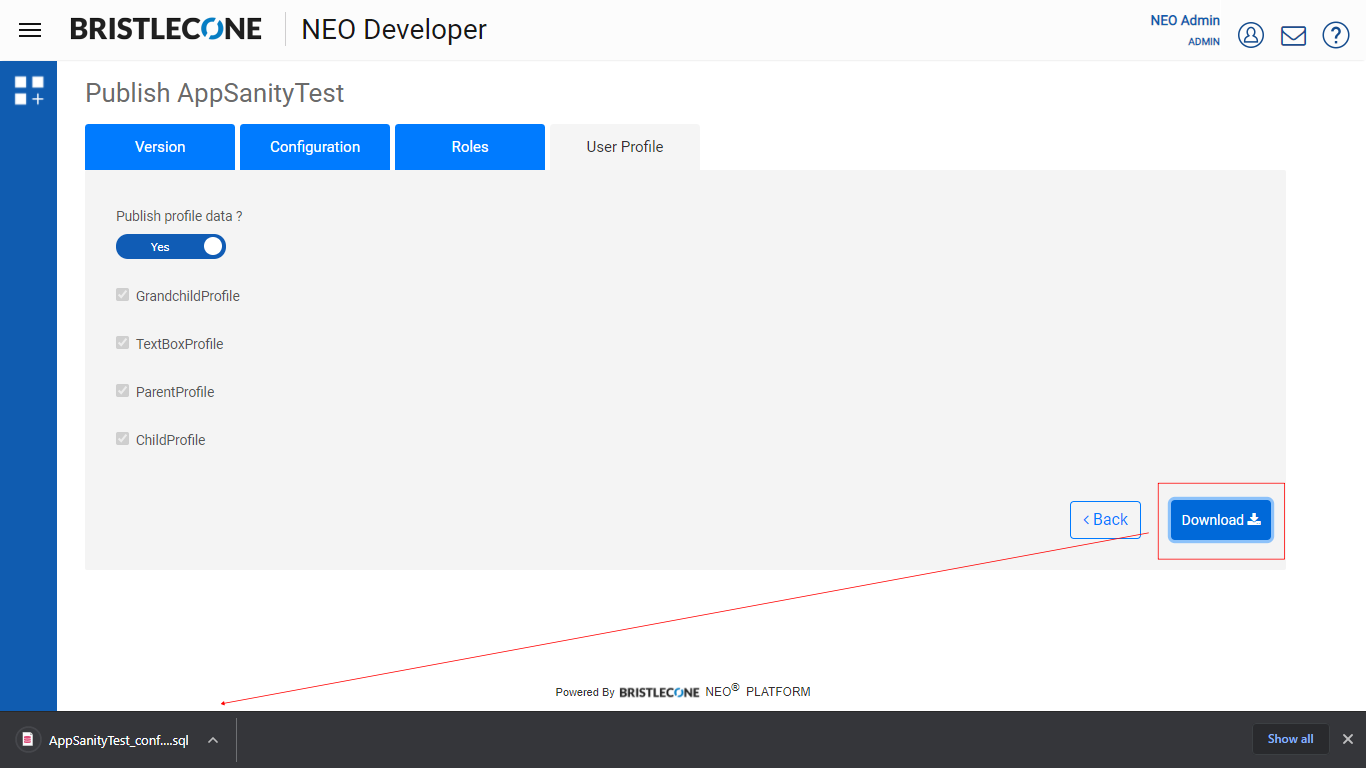
User Profile
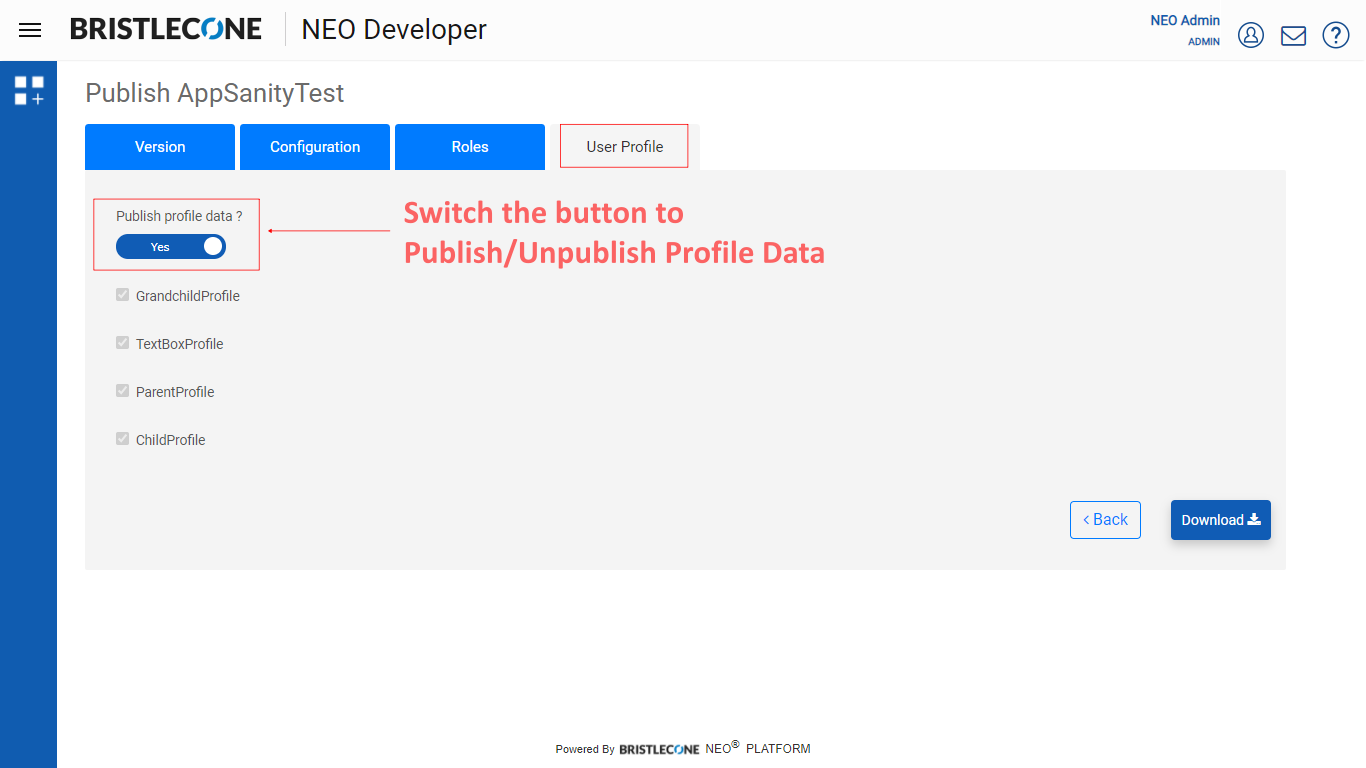
Provider Admin can publish or unpublish the Profile Data set by Developer. To publish/unpublish, switch the radio button as shown below
Now click on Download button to download the configuration file. The configuration file will be downloaded as .sql format in the system
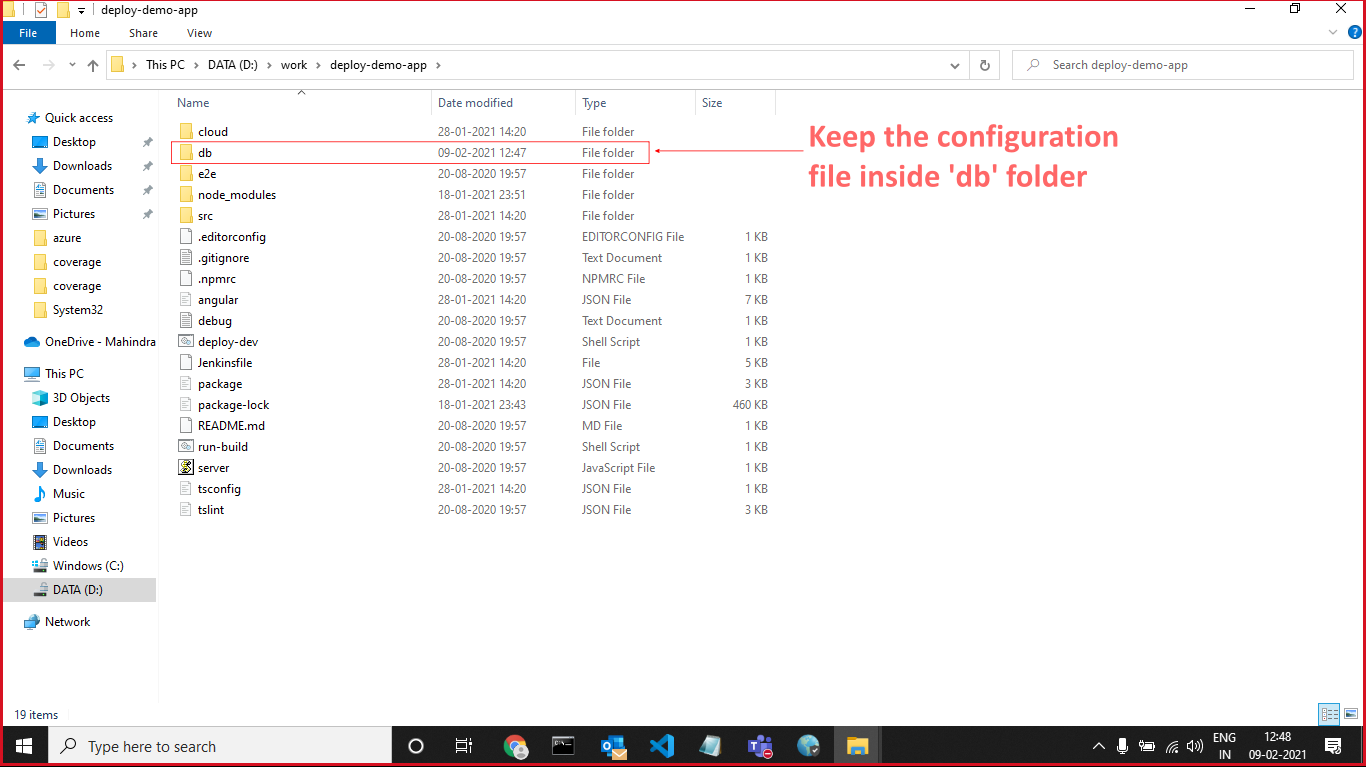
Now to deploy the app, copy the sql file from downloaded folder and paste it inside ‘db’ folder of the application project.
Please Note: Create a folder name "db" inside application project folder if it's not there.

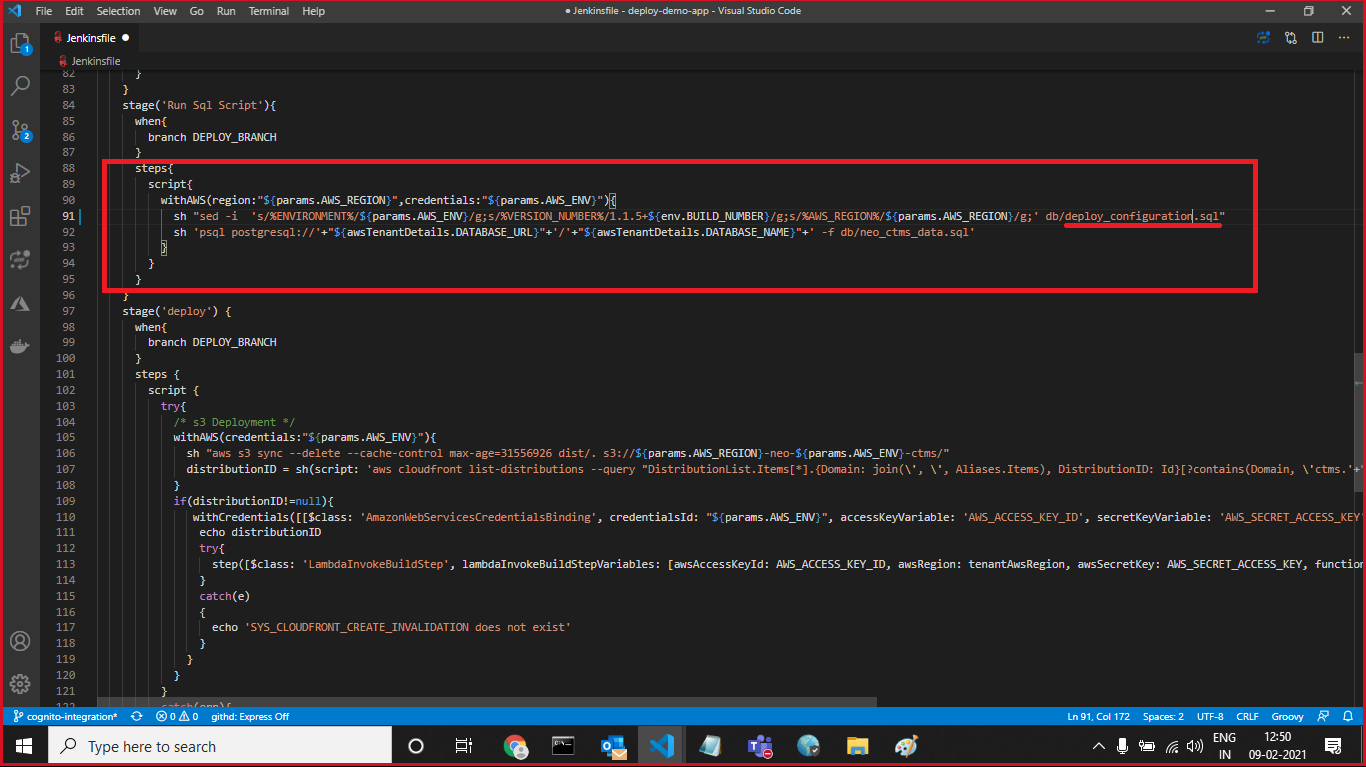
Now add the configuration.sql (SQL file) file in the SQL deployment steps inside Jenkinsfile. Here, as an example updating the Jenkinsfile with deploy_configuration.sql
Post Jenkinsfile configuration, follow the below steps:
- Create S3 Bucket for your application
- Example: east-us-1-deploy-demo-app
- Create cloud Formation
- Route 53
- Create a pipeline in the Jenkins for further application deployment
Please Note: The SSO users needs to raise a request to Devops team for creating or updating configuration on application
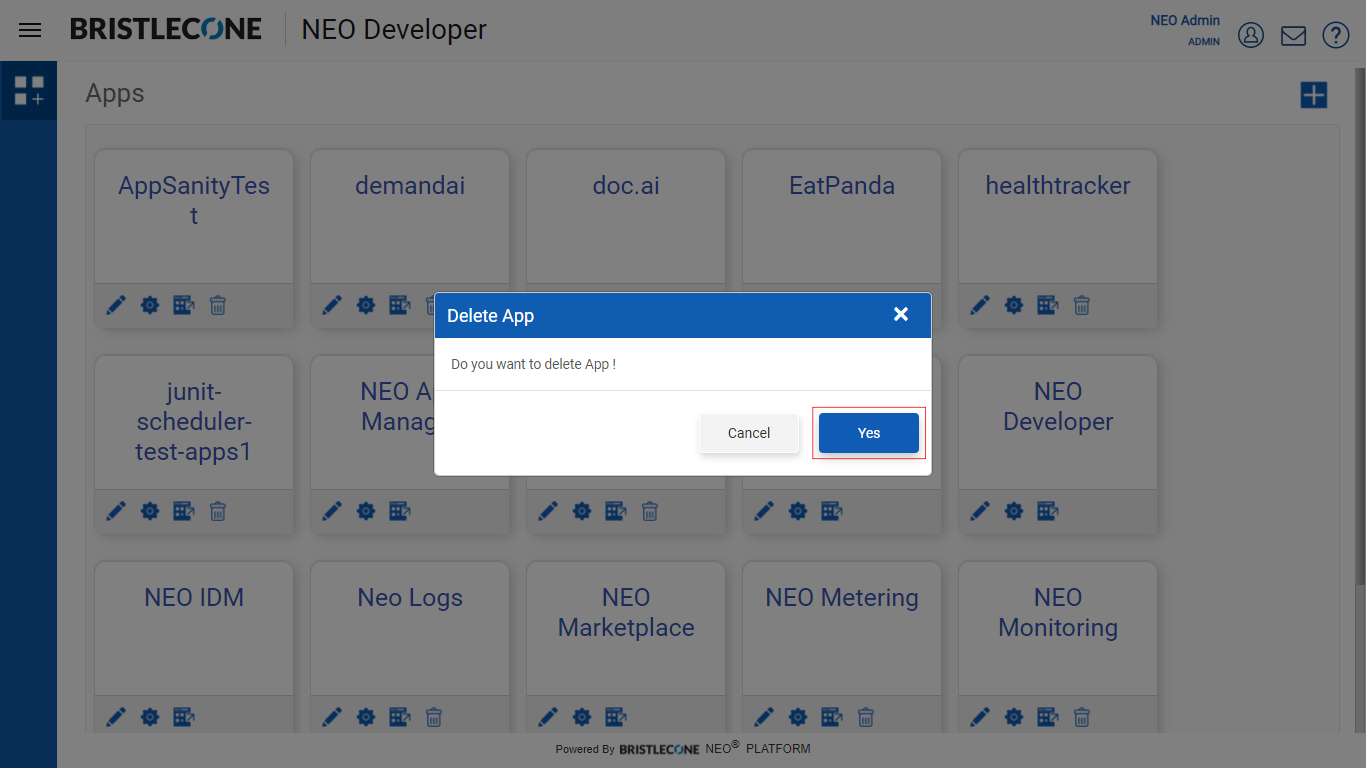
Delete App
Provider Admin can delete an app as shown below

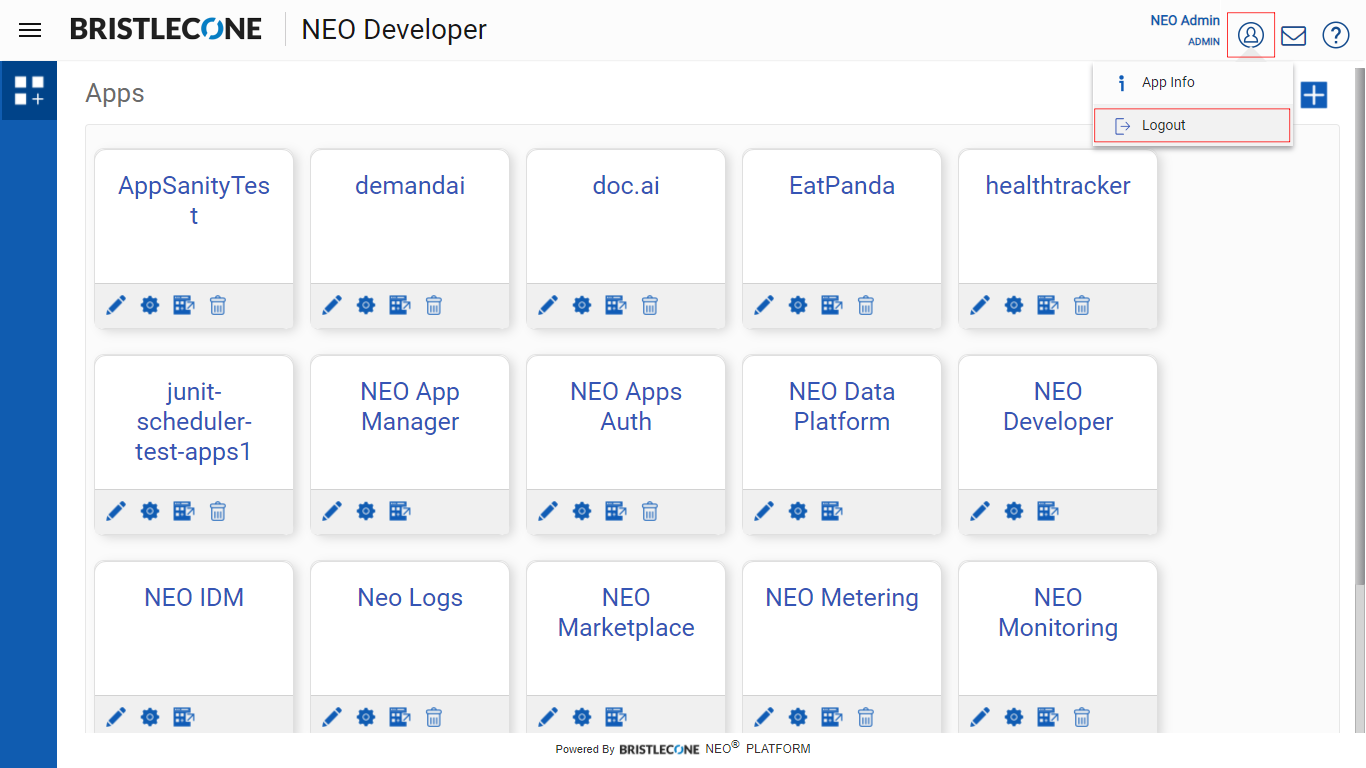
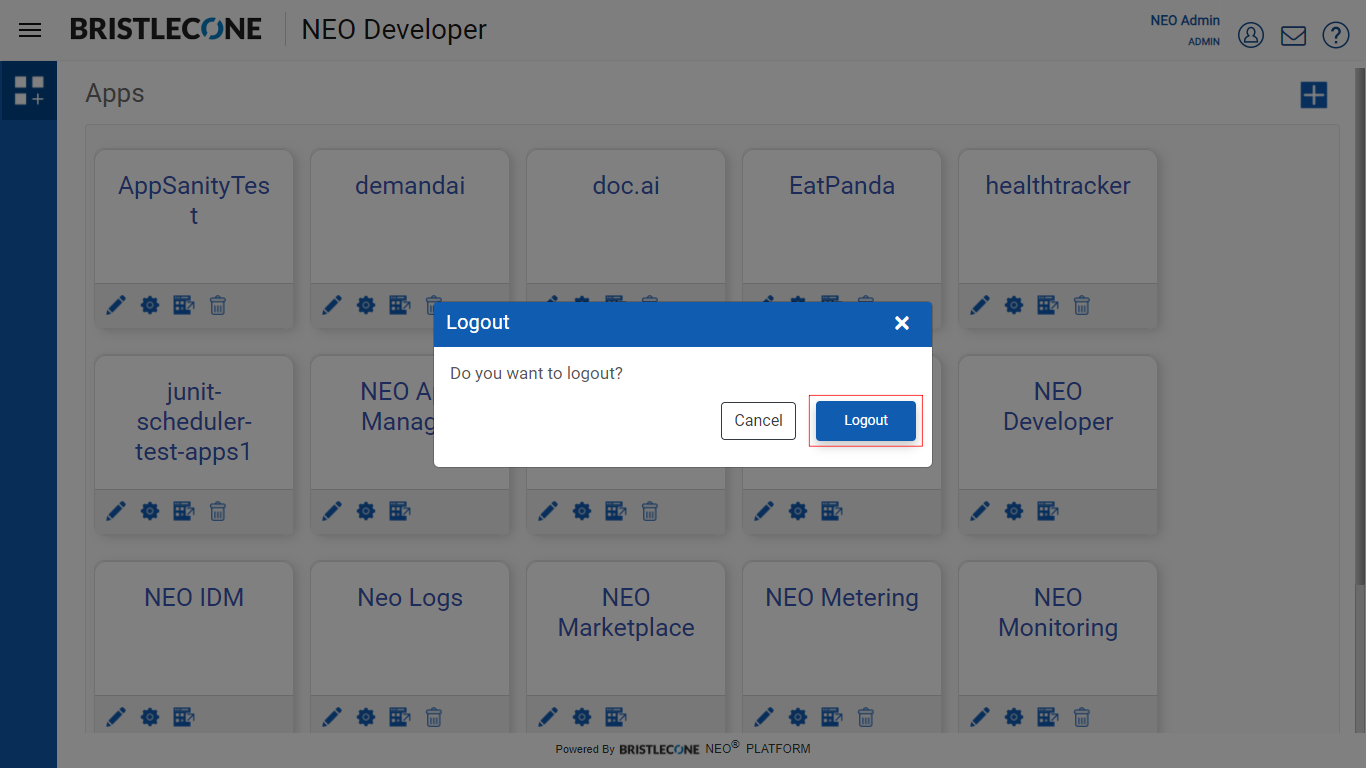
Logout
Click on Logout to signout from the account