Execution Flow
Execution flow enables a Provider Data Scientist /Business Analyst to design the Data Pipeline in a specific sequence
File Validation
This feature enables a Provider Data Scientist /Business Analyst to validate the raw input file ingested into the Bristlecone NEO® Platform.
- Empty File Check : Validates if the raw input file is empty
- Missing Column Header : Validates the raw input file for columns without a header
- Duplicate Column Check : Validates the raw input file for duplicated columns
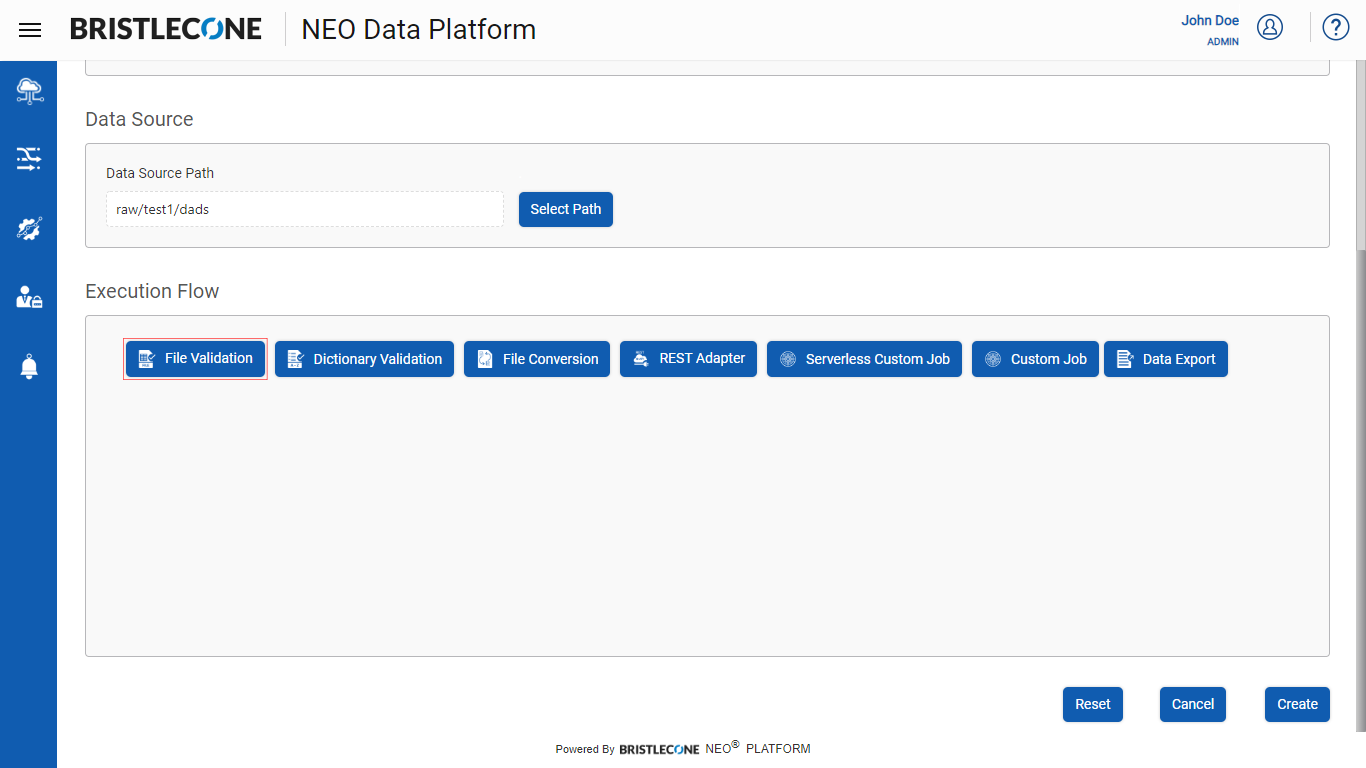
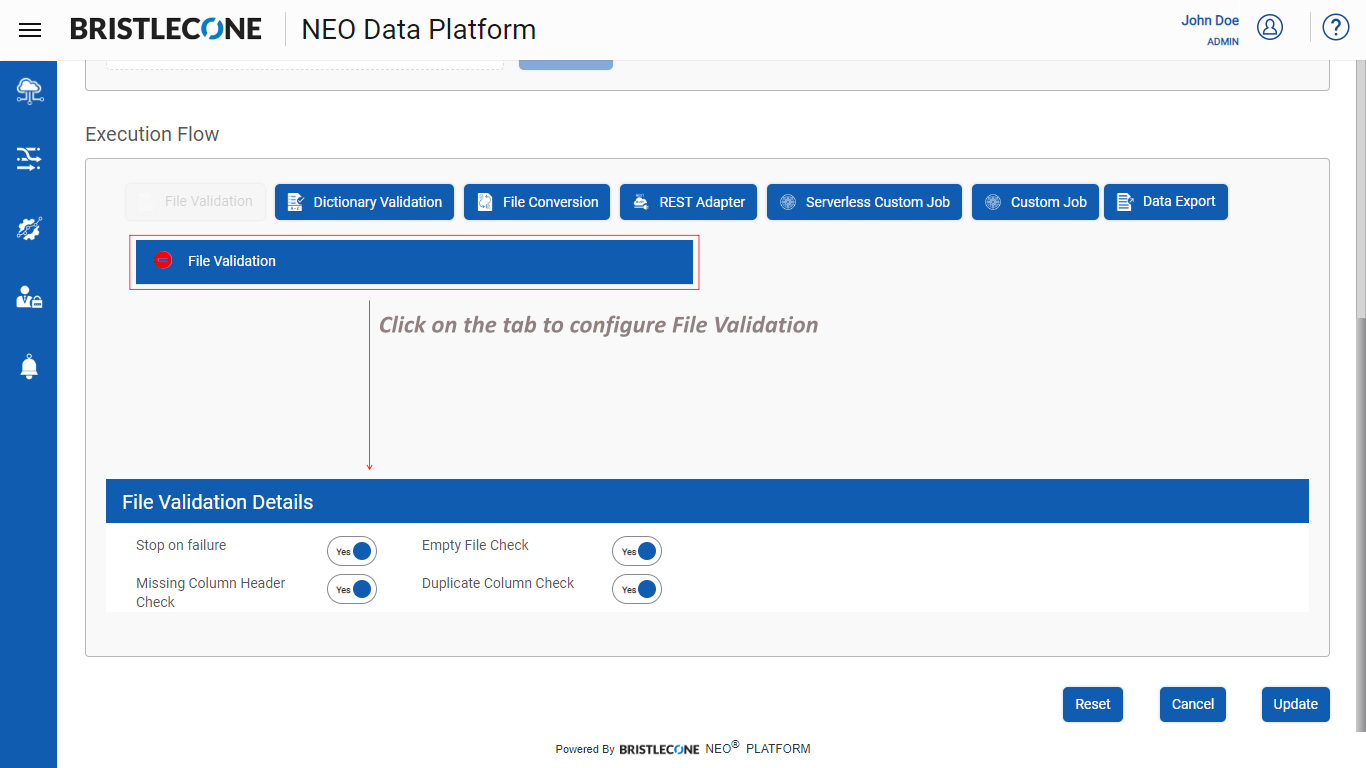
Configuring File Validation
Step 1 : Click on File Validation button as shown below
Step 2 : Click on File Validation tab as shown below :
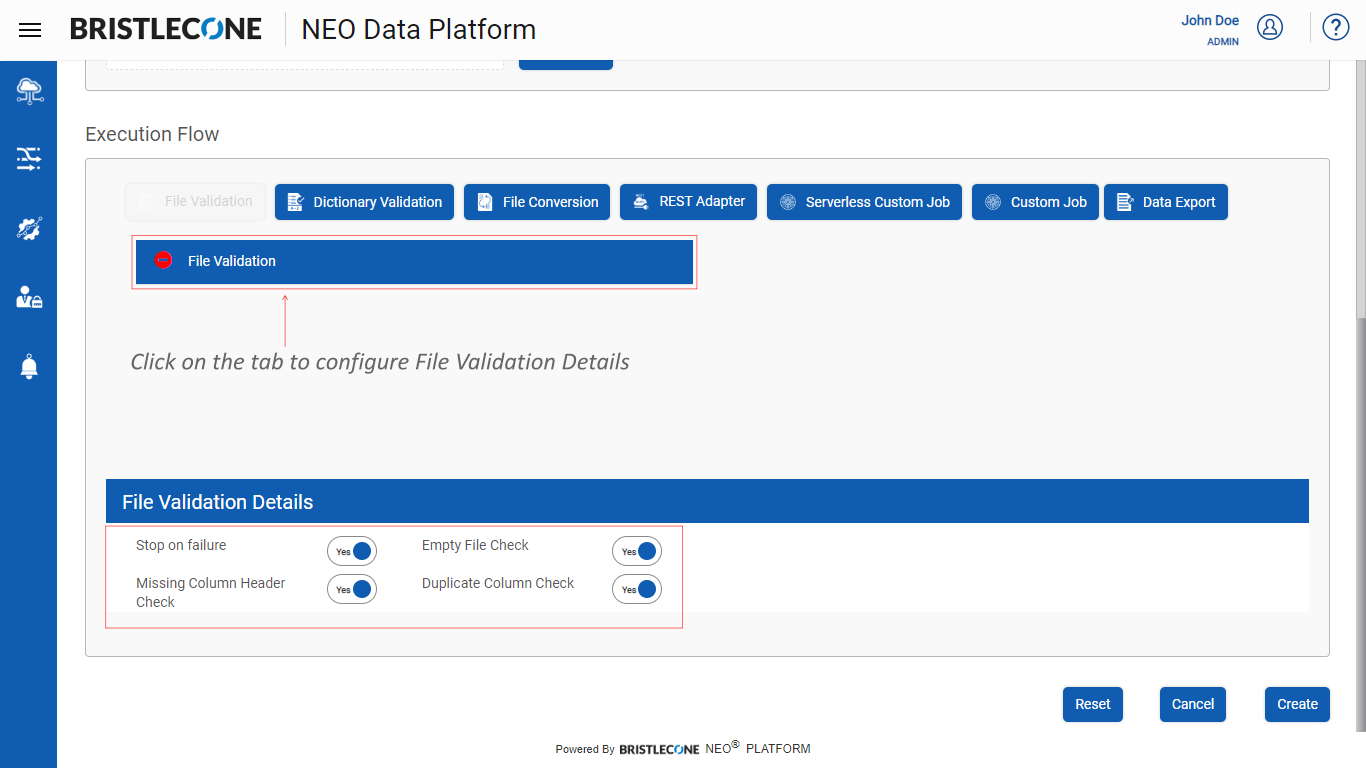
Step 3 : Configuring File Validation Details
- Stop on Failure : This feature stops the execution of the Data Pipeline when the File validation fails
- Empty File Check : This feature checks if the input file is empty
- Missing Column Header Check : This feature checks for columns which do not have headers
- Duplicate Column Check : This feature check if there are any columns duplicated in the input file
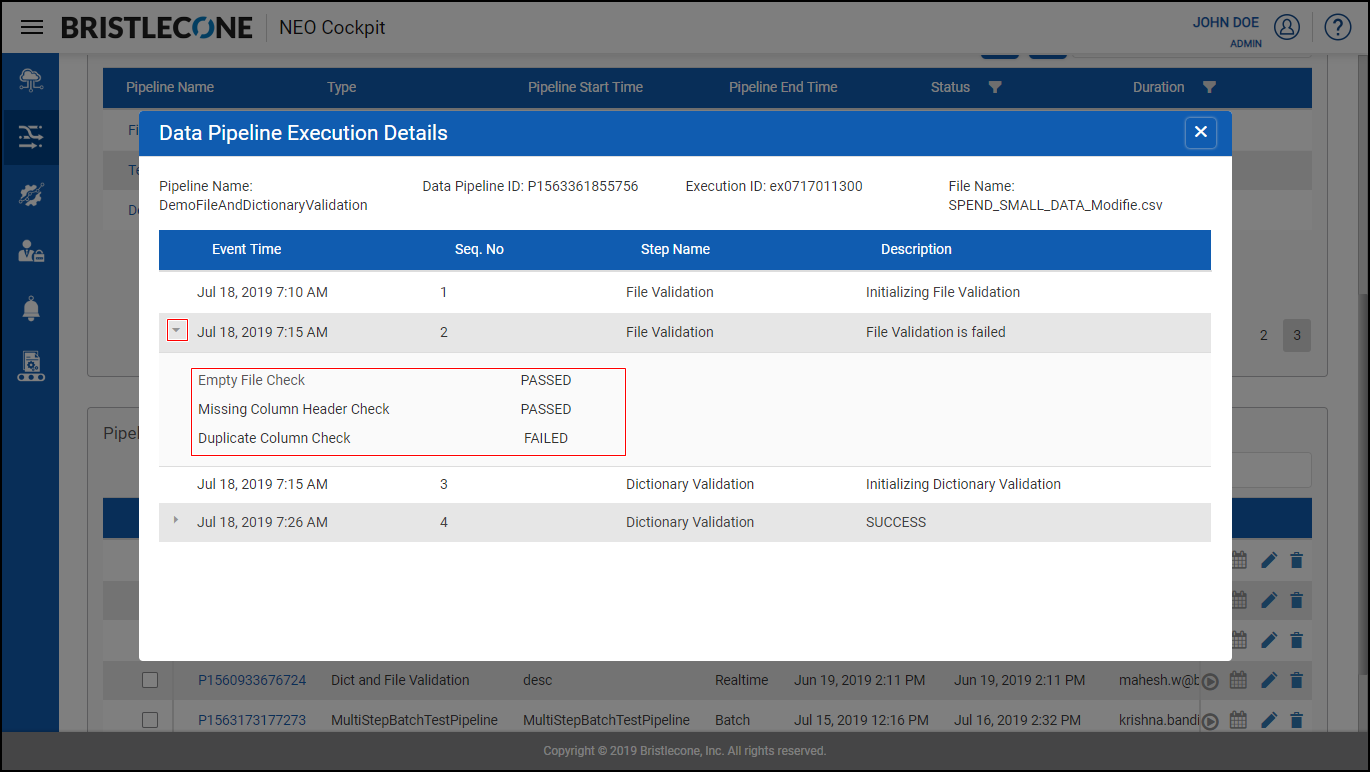
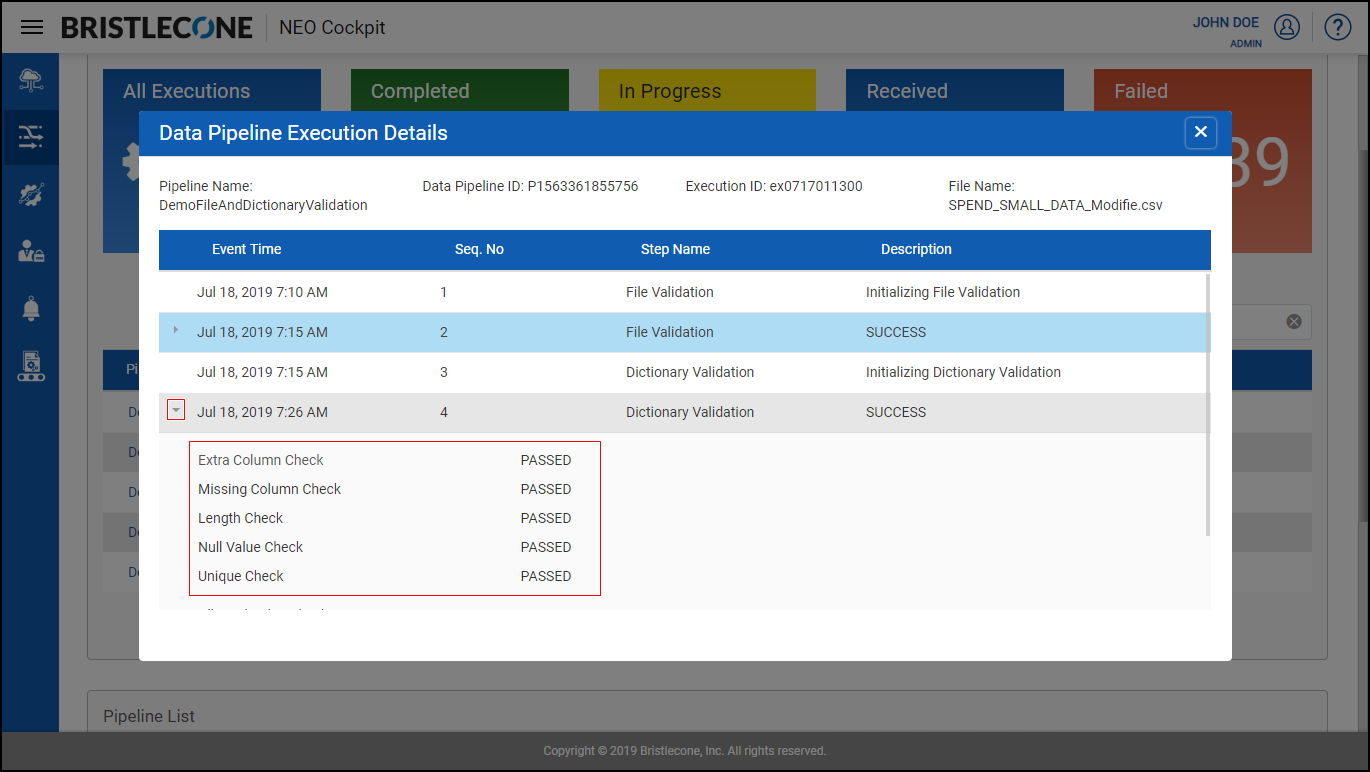
Post Data Pipeline Execution , click on Data Pipeline Execution Details to receive a pop up. Expand File Validation Step to find the dictionary validation details
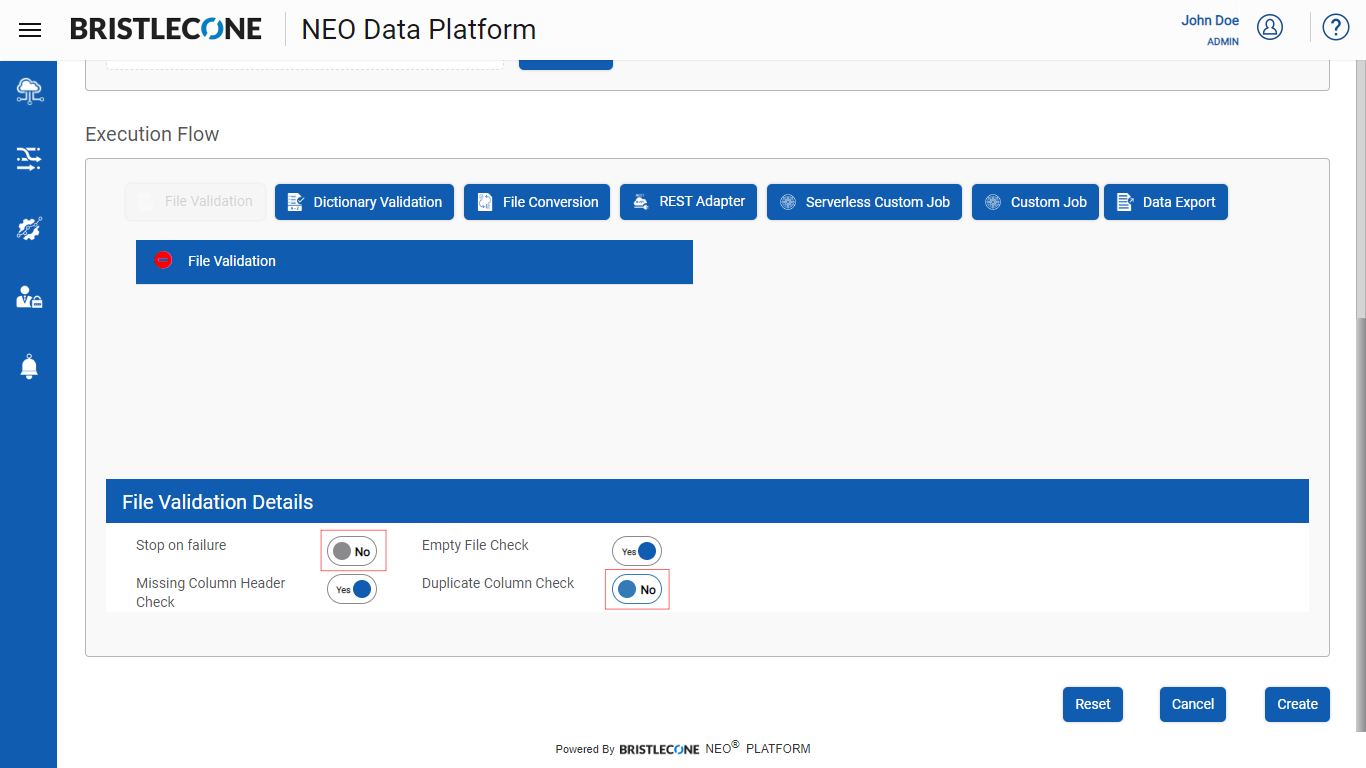
Note : User can enable /disable these toggle buttons as per the requirement
Dictionary Validation
This feature enables a Provider Data Scientist /Business Analyst to validate the raw input file and stop the data pipeline from triggering, if the file turns to be invalid based on the following conditions.
|
S.No |
Feature Based Test |
Status |
Comments |
|
1 |
Extra Column Check |
PASS |
No extra column |
|
2 |
Extra Column Check |
FAIL |
Input file has columns which are not defined in dictionary |
|
3 |
Missing Column Check |
PASS |
No missing column |
|
4 |
Missing Column Check |
FAIL |
Input file has one / more missing columns |
|
5 |
Null Value Check |
PASS |
No nullable values found in the non-nullable columns |
|
6 |
Null Value Check |
FAIL |
Null values found in the non-nullable columns |
|
7 |
Allowed Value Check |
PASS |
A column has only allowed values and (nulls if marked as nullable) |
|
8 |
Allowed Value Check |
FAIL |
A column has values other than allowed values |
|
9 |
Unique Value Check |
PASS |
No duplicates |
|
10 |
Unique Value Check |
FAIL |
Added duplicates entries found in the input file Note: Applicable for columns marked as Unique in the Data Dictionary |
|
11 |
Data Type Check |
PASS |
No difference in Data Types |
|
12 |
Data Type Check |
FAIL |
Added different data type included which has not been mentioned in the Data Dictionary |
|
13 |
Scale and Precision Check |
Not Implemented |
Will show status message as SKIPPED |
|
14 |
Value Check |
Not Implemented |
Will show status message as SKIPPED |
|
15 |
Length Check |
PASS |
Length of a given attribute in the input file matches the length specified in the associated Data Dictionary |
|
16 |
Length Check |
FAIL |
Length of a given attribute in the input file is a mismatch with the length specified in the associated Data Dictionary |
Configuring Data Dictionary Validation
Step 1 : Click on Dictionary Validation button during the creation/updating the Data Pipeline as shown below :

Step 2 : Click on Dictionary Validation tab as shown below :
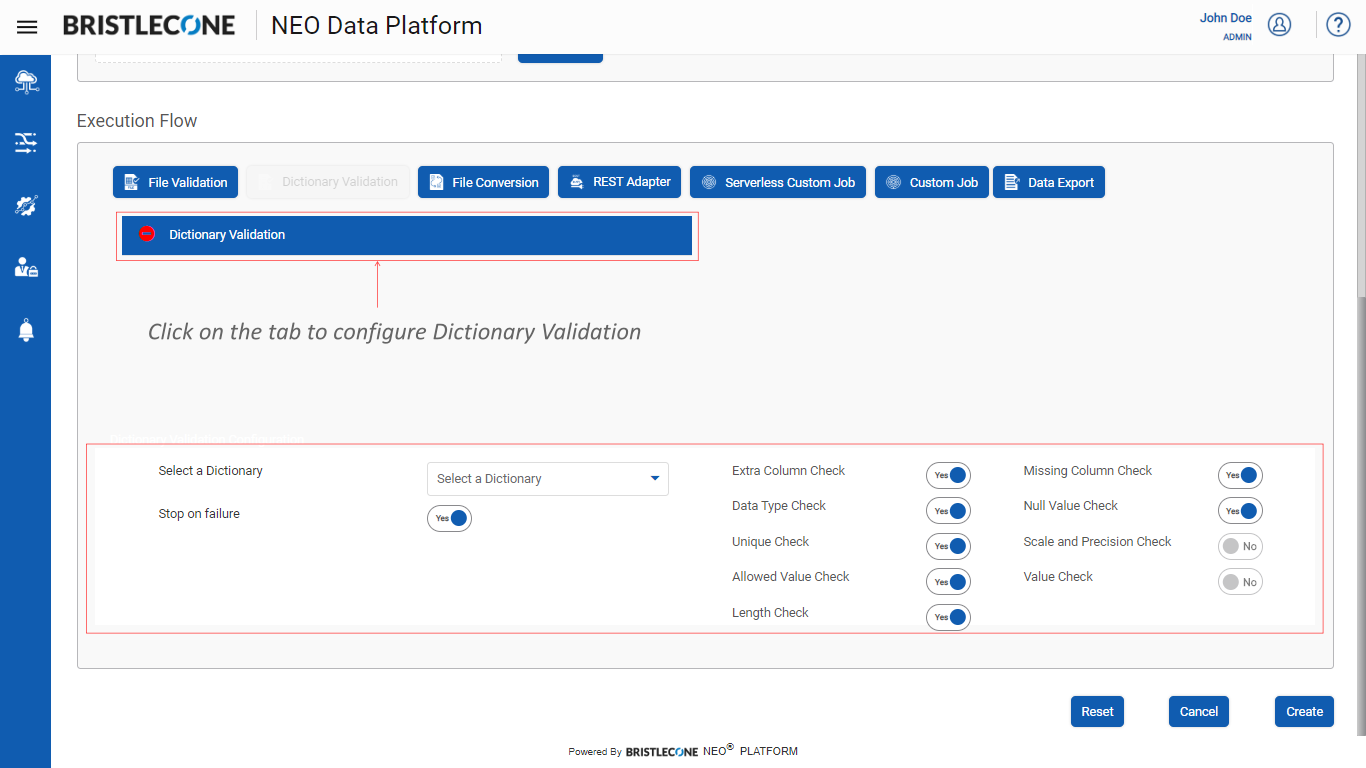
Step 3 : Configure Dictionary Validation Details:
Dictionary Validation Details contain the following toggle buttons that allow the user to enable or disable the following features
- Stop on Failure : This feature stops the execution flow of the Data Pipeline when the raw input data file of the specific data pipeline fails during Data Dictionary Validation
- Extra Column Check : This feature compares the input file with the associated Data Dictionary and checks for extra columns in the input file
- Data Type Check : This feature checks for columns and their associated data types as per the specific data dictionary connected to the input file
- Unique Value Check : This feature checks if the data dictionary has unique values
Note : Unique Value Check is case sensitive
- Allowed Value Check : This feature checks for allowed values for various columns in an input file
Ex : A column called currency has all the values in $ , upon choosing allowed values for the currency column user can have other currency formats such as INR , dinars ,euros, pounds.
- Length Check : Checks for the length of the value in all the columns mentioned in the associated Data Dictionary for the specific input file
Note : Applicable to selected data types such as : String, Character, Integer
- Missing Column Check : Compares the input file with the associated Data Dictionary and checks for the missing columns [ if any ] in the input file
- Null Value Check : Checks if null values are allowed for a specific file as per the associated data dictionary
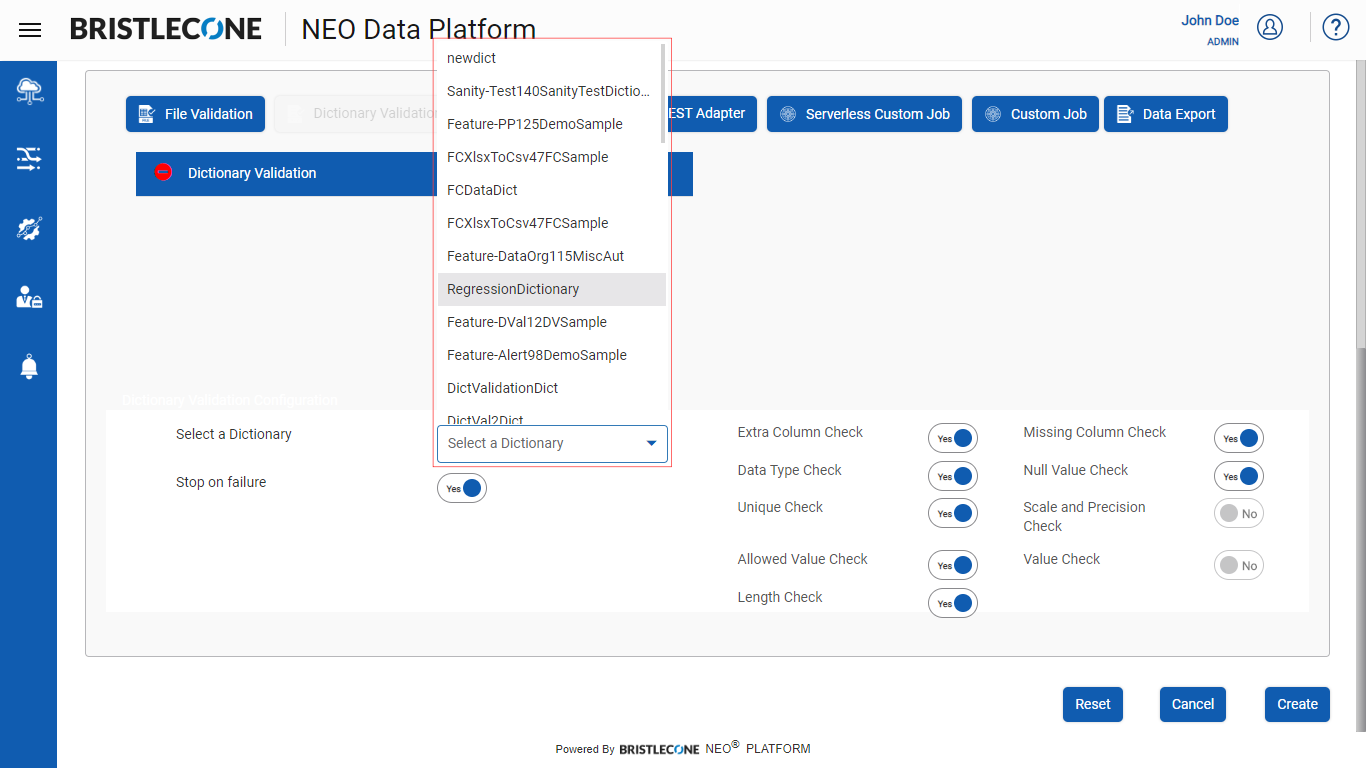
Steps to configure Dictionary Validation
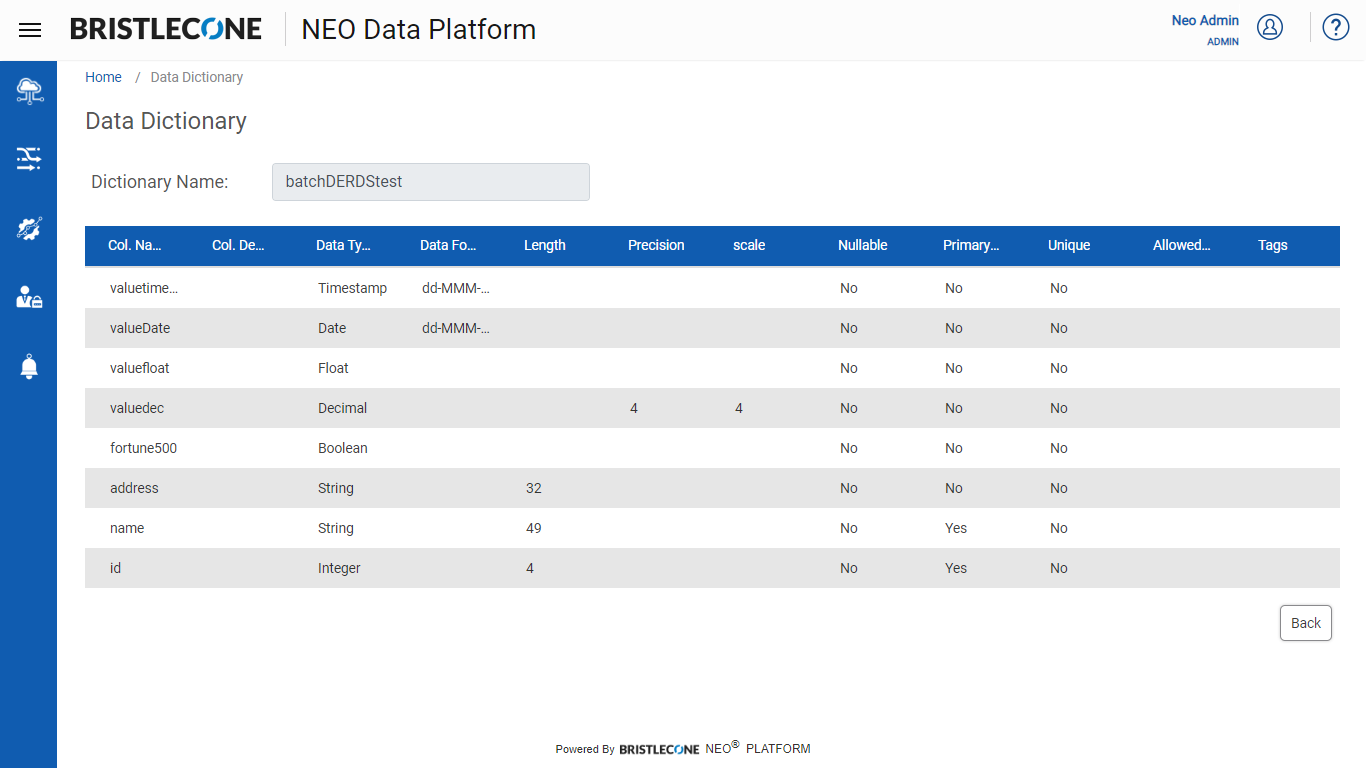
Step 3a : Select the specific dictionary associated with the input file as shown below :
Step 3b : Select the toggle buttons to apply various validations on the associated dictionary of the specific input file as shown below:
The screen capture below shows a few of the toggle buttons activated for illustration purposes
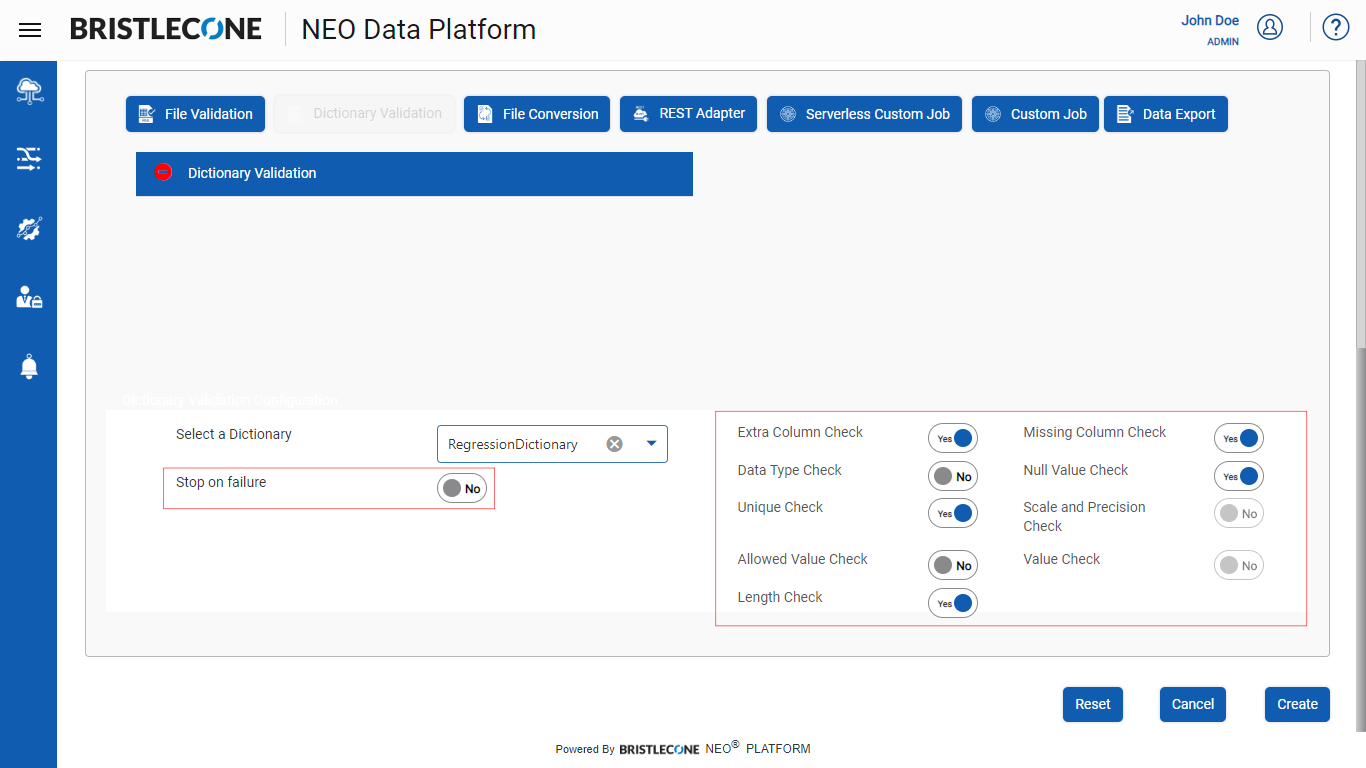
Step 4 : Post Dictionary Configuration, click on Create button to complete Dictionary Validation flow
File Conversion
This feature enables a Provider Data Scientist /Business Analyst to convert the raw input data file from one form to another
Following are the types of conversions currently supported in Bristlecone NEO® Platform
|
File Type Name |
Types of Conversion |
|
AVRO |
AVRO TO CSV |
|
Excel |
EXCEL TO CSV |
|
ORC |
ORC TO CSV |
|
CSV |
CSV TO PARQUET |
|
CSV |
CSV TO AVRO |
|
CSV |
CSV TO ORC |
|
CSV |
CSV TO JSON |
|
|
PDF TO CSV |
|
PARQUET |
PARQUET TO CSV |
Configuring File Conversion
Step 1 : Click on File Conversion button during the creation/updating the Data Pipeline as shown below :

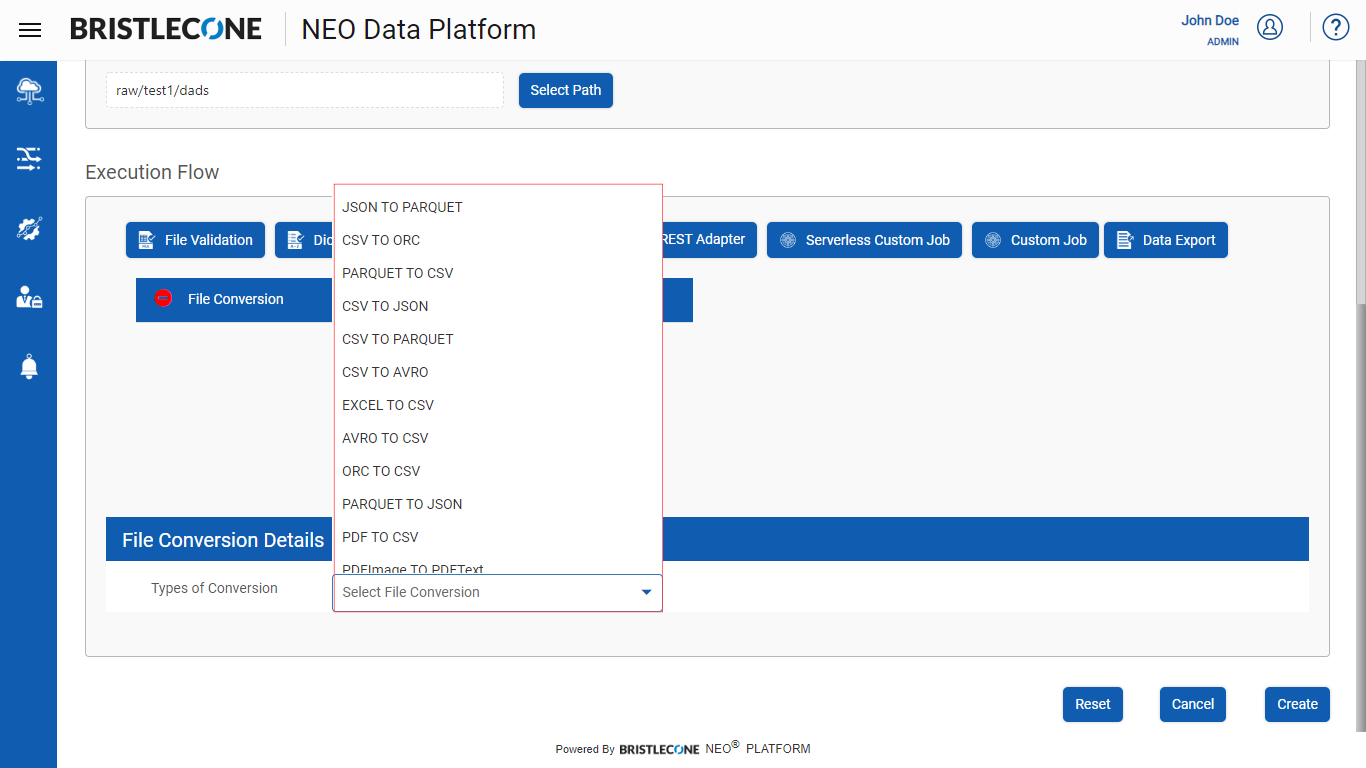
Step 2 : Click on File Conversion tab as shown below :

Step 3 : Click on File Conversion tab as shown below :
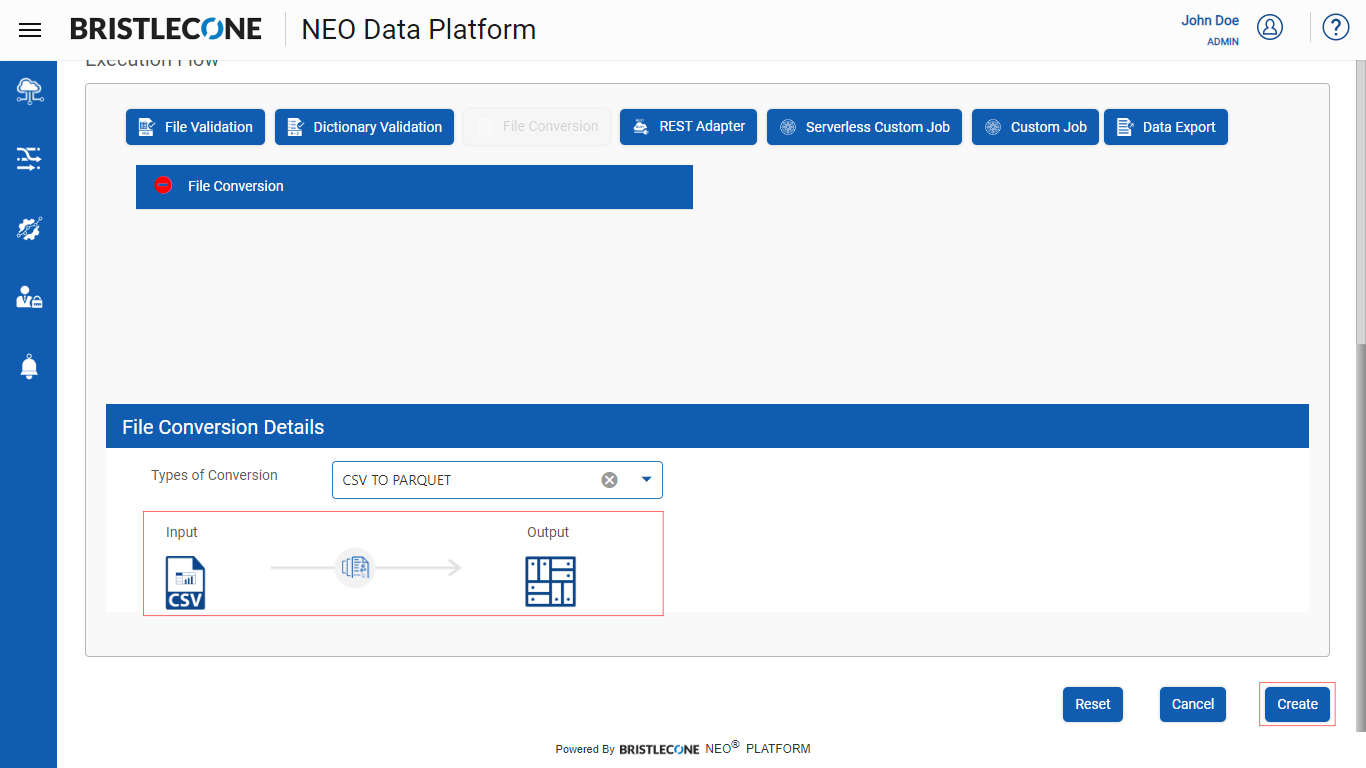
Select the type of conversion among the options provide below :


Post selection, Click on Create or Update button to save the changes made in the Execution Flow to the specific Data Pipeline as shown below
Note : User can also reset the Data Pipeline using Reset as an option. Post reset, unsaved changes are lost and last saved change is populated in the Data Pipeline Execution Flow block

Note : User can cancel the changes and return to the Data Pipeline Page using the Cancel button

Rest Adapter
This feature enables a Provider Data Scientist /Business Analyst to ingest a raw input data into the Bristlecone NEO® Platform.
The Representational State Transfer (REST) adapter enables the user to exchange messages between remote clients or web service servers and the Integration Server.
Note : Bristlecone NEO® Platform supports JSON data formats only.
Steps to configure Rest Adapter
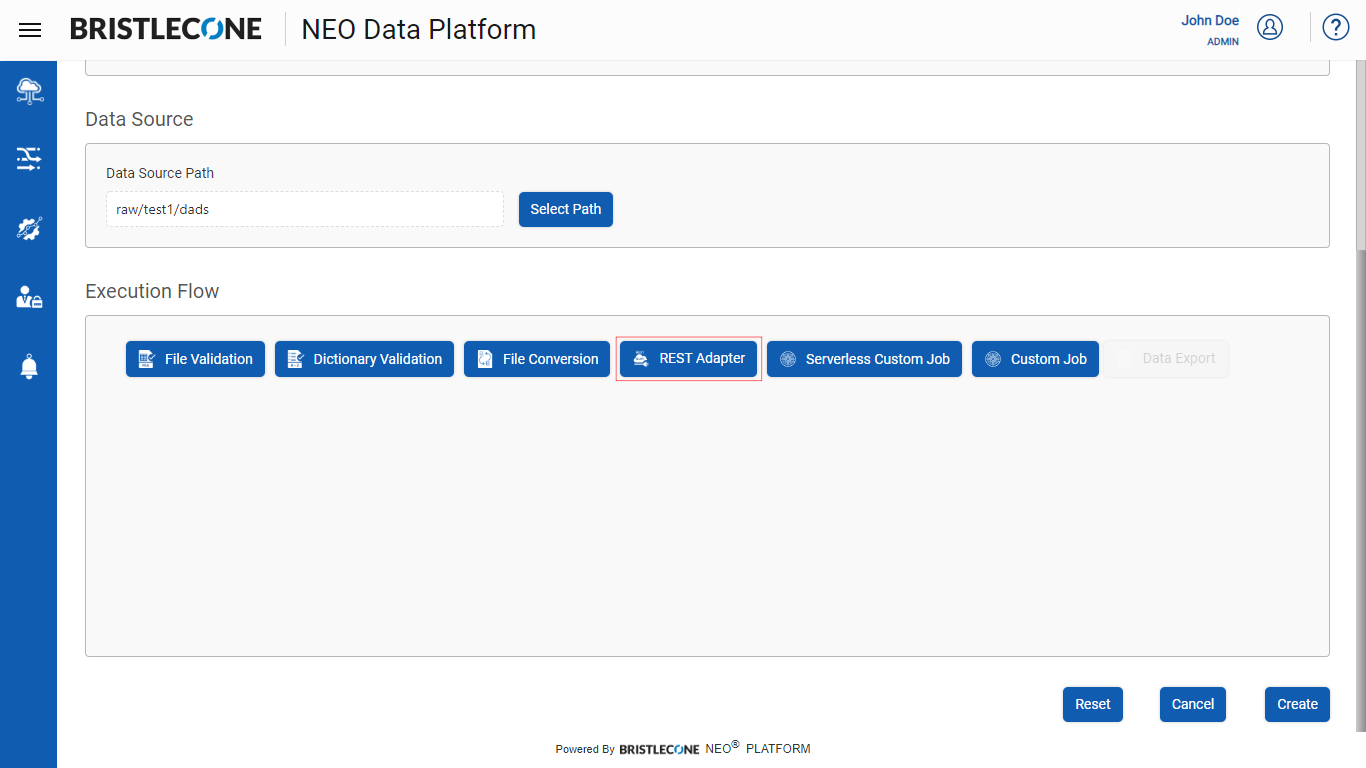
1. Click on Rest Adapter button as shown below
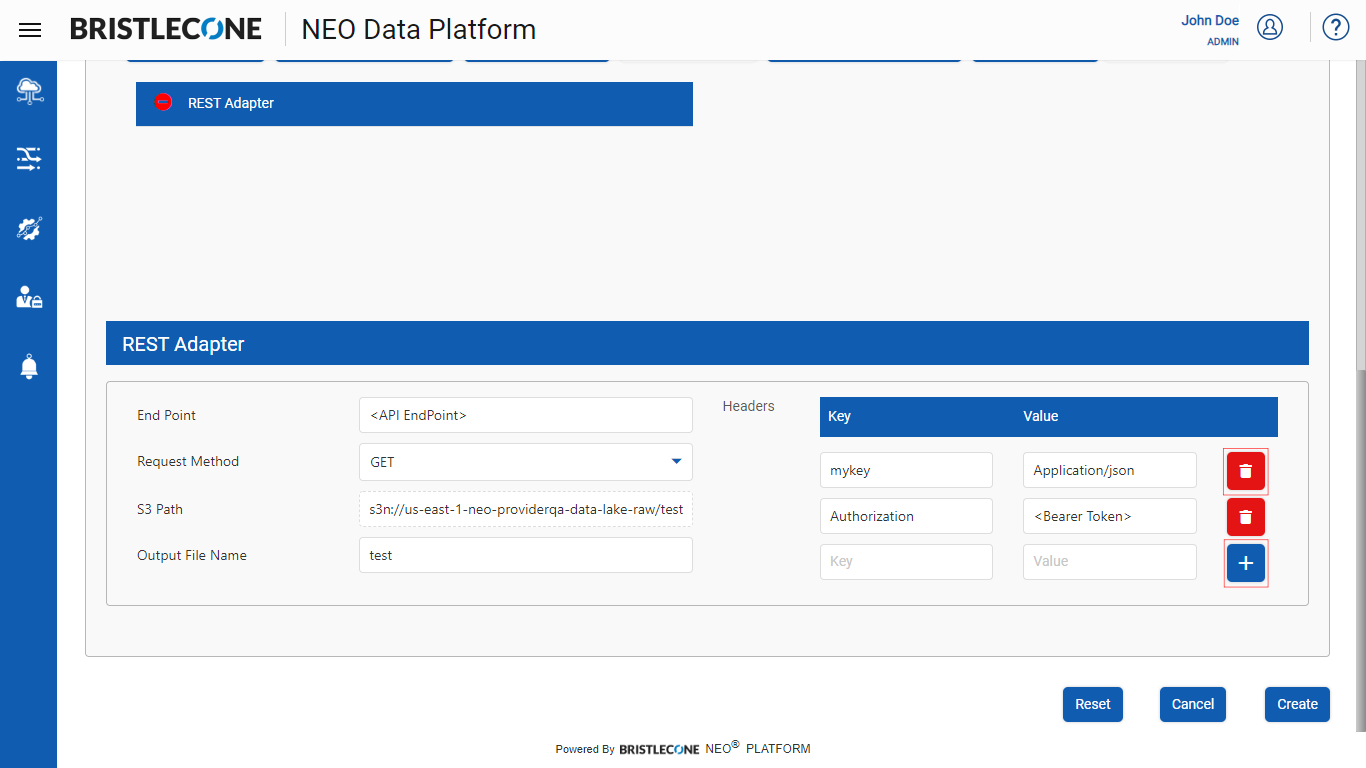
Configuring Rest Adapter
End Point |
<API Endpoint > : Enter the API End Point of the data to be ingested |
Request Method |
User has a provision to select “POST/GET” methods to ingest the data |
S3 Path |
Location of the ingested S3 file post data ingestion |
Output File Name |
Enter the name of the Output file |
Headers |
Sample Key Value Declaration Format |
Note : User can add/delete Key Value pairs using the add and delete buttons as shown below
Post declaration of all the Rest Adapter configuration parameters, click on Create/Update to save the changes as shown below

A Data Scientist can create bespoke Analytical Models on the Platform. These models can then be executed on the Data Pipeline as a Custom Job that provides for Big Data processing and a runtime environments for R and Python.
Steps to configure Custom Job
Click on Custom Job button as shown below

Click on the Custom Job tab as shown below
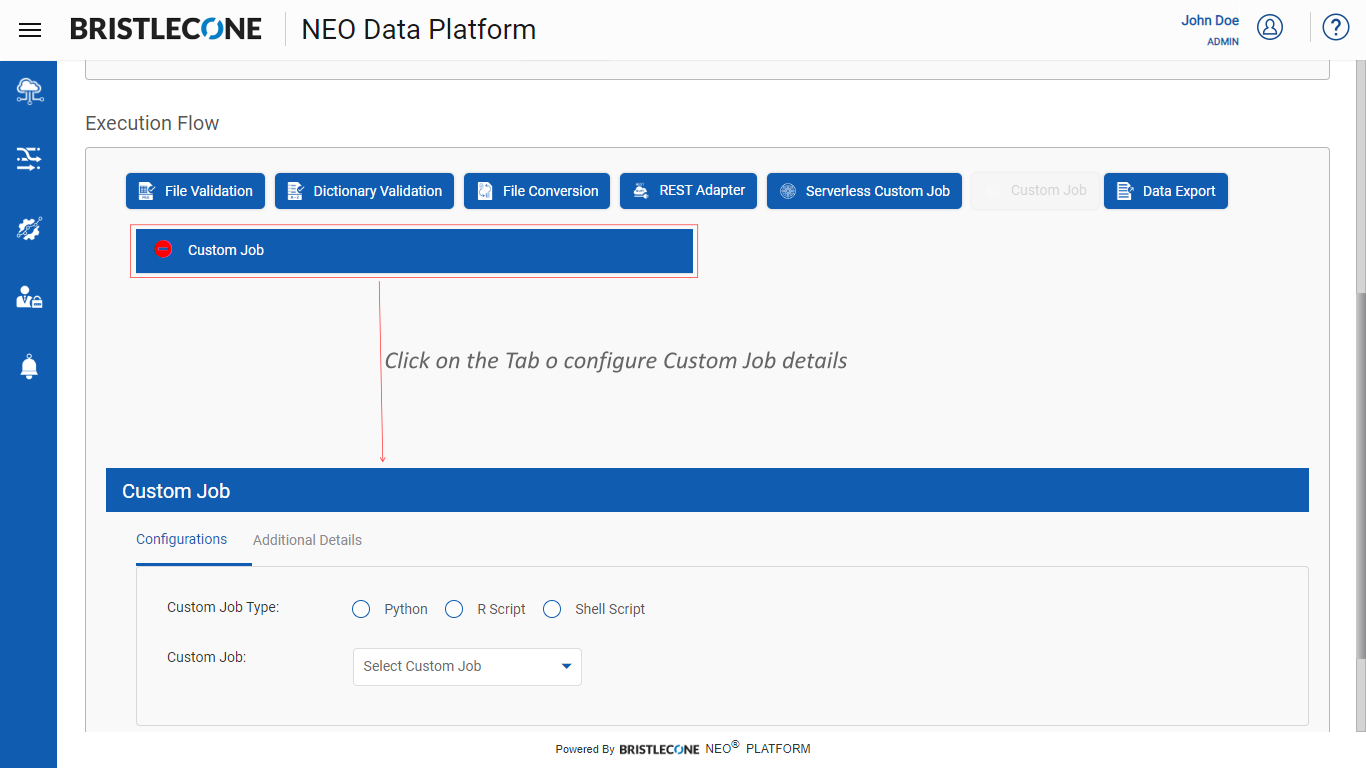
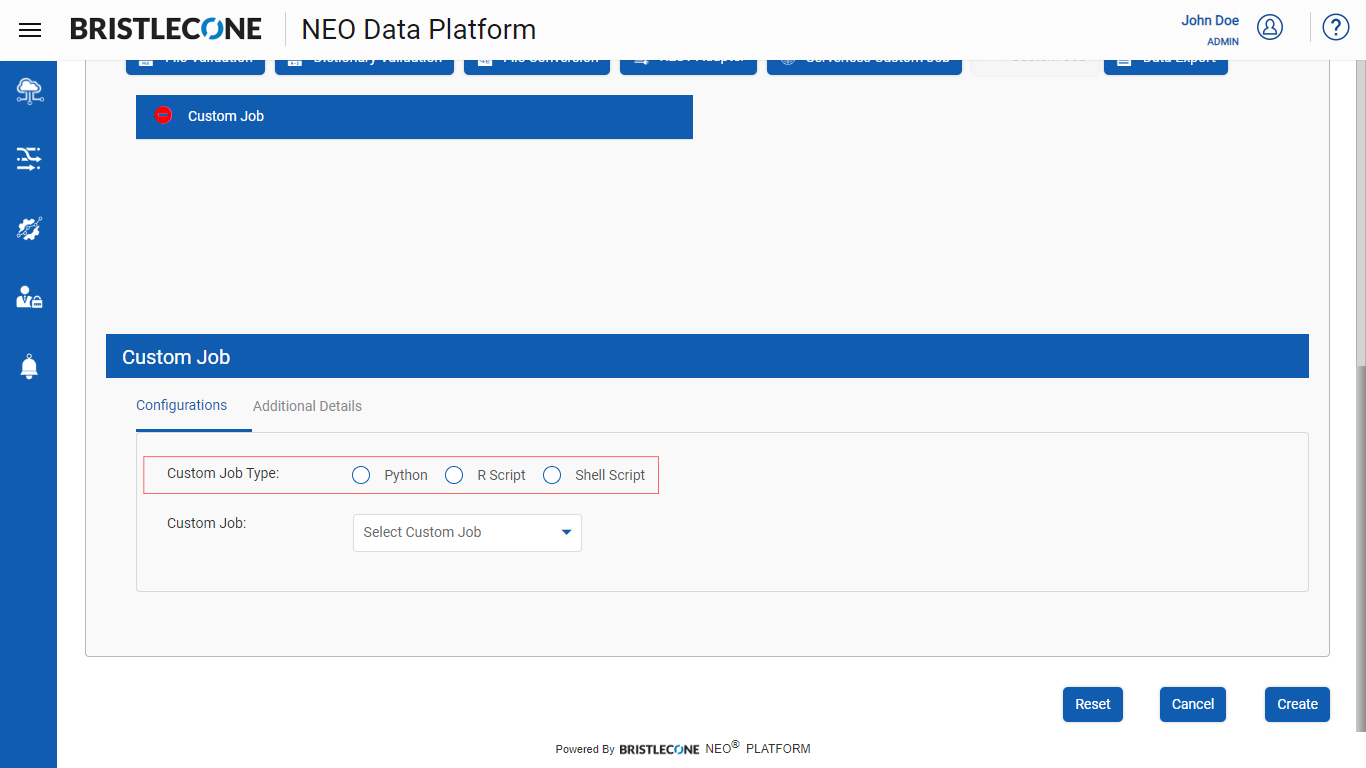
Select the required custom job type among the options available as shown below
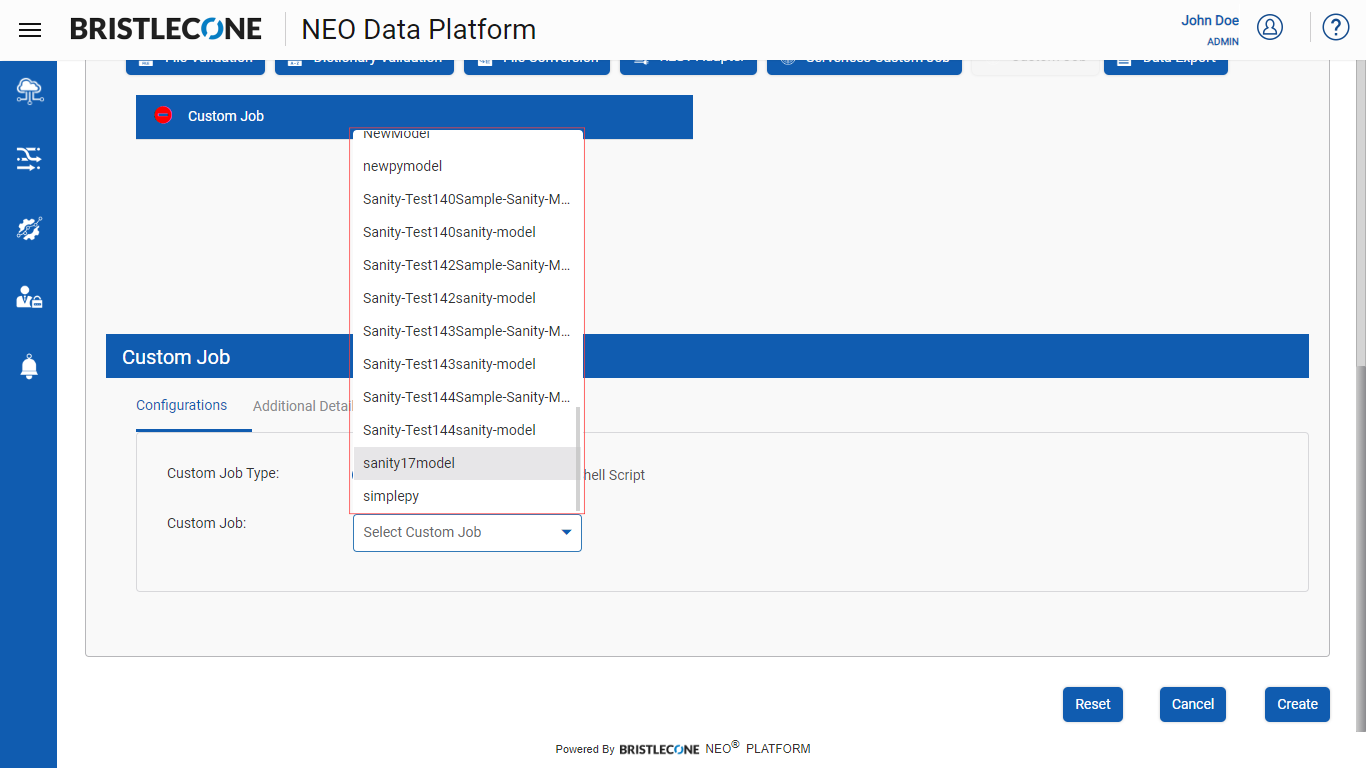
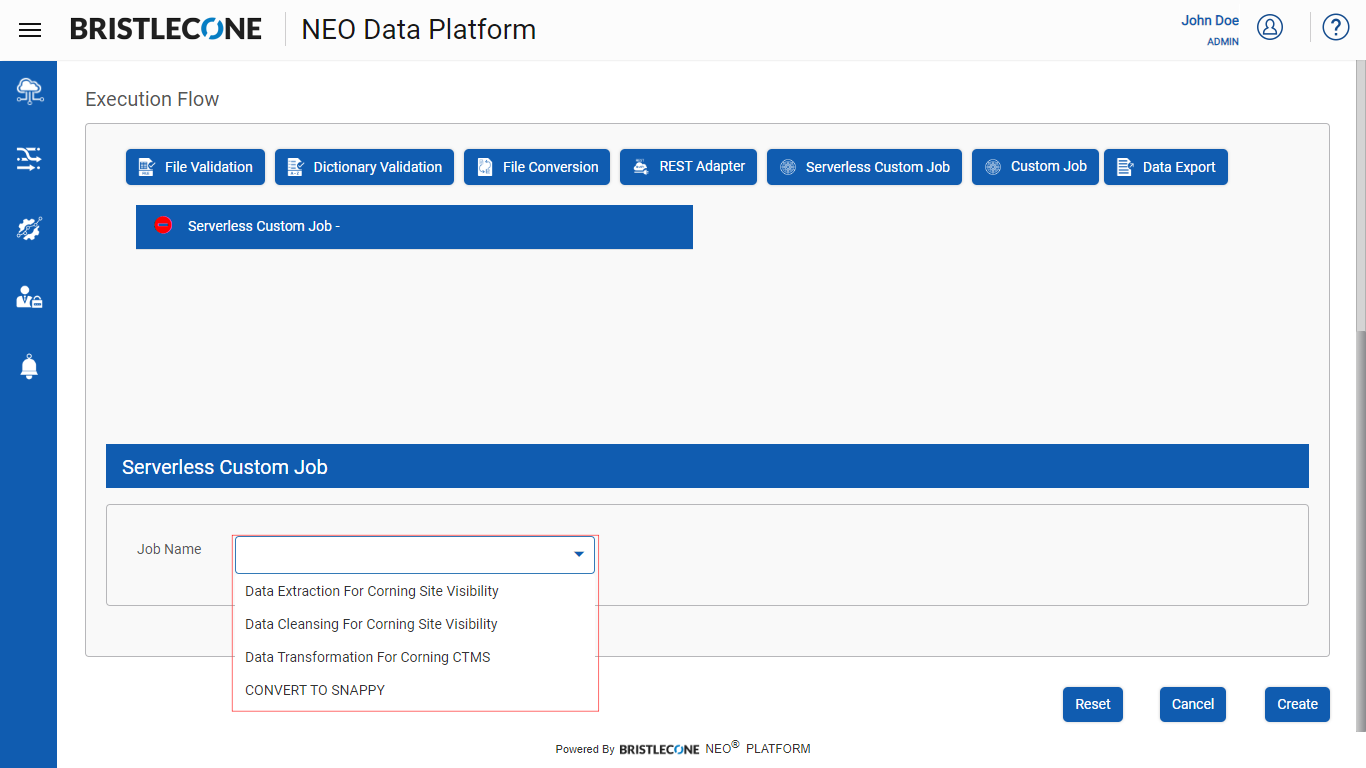
Select the Custom Job from the list of drop-downs available as shown below
Note :The list populates all the models that were created in the environment.
To know more about the creation of models , refer Publish Analytical Model Section in the Product Handbook
Note :User can describe the Custom Job Description using Additional Details section as shown below
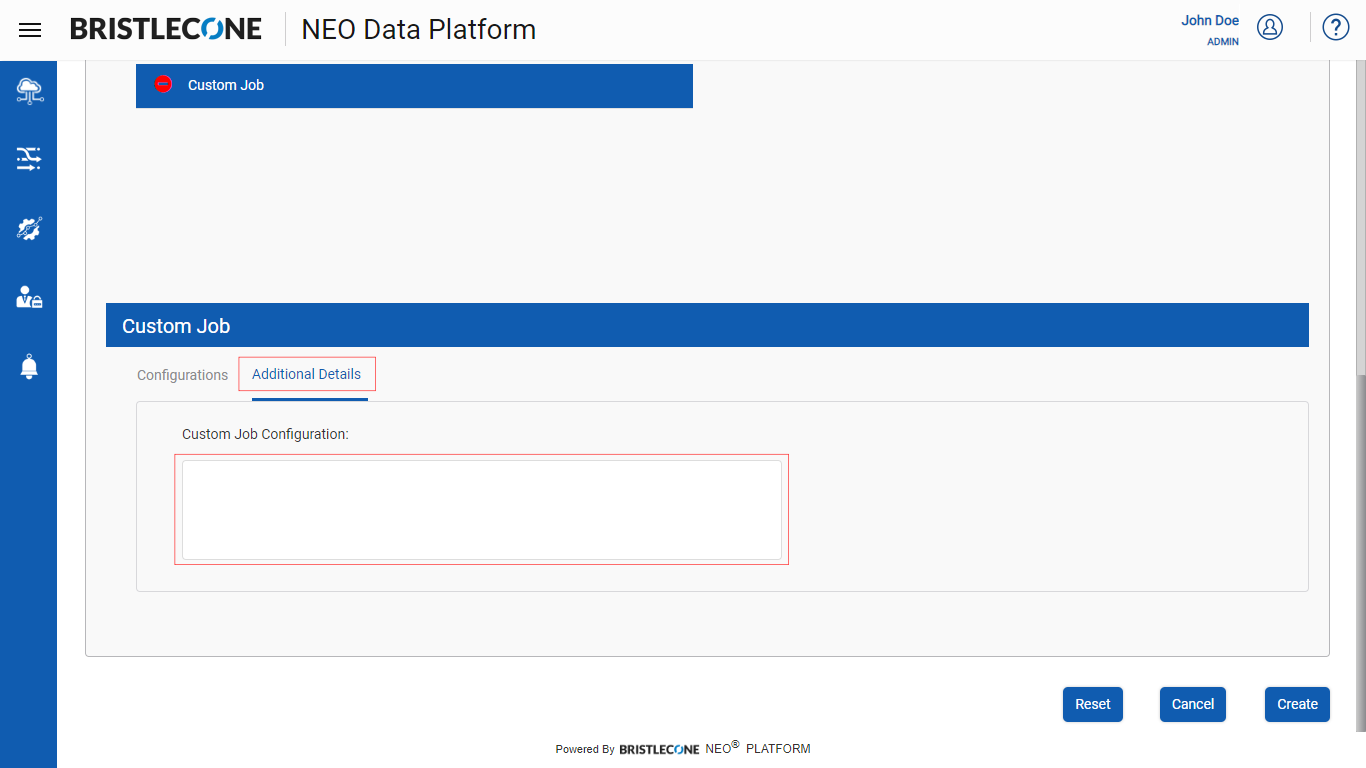
Click on Create button to save the configuration

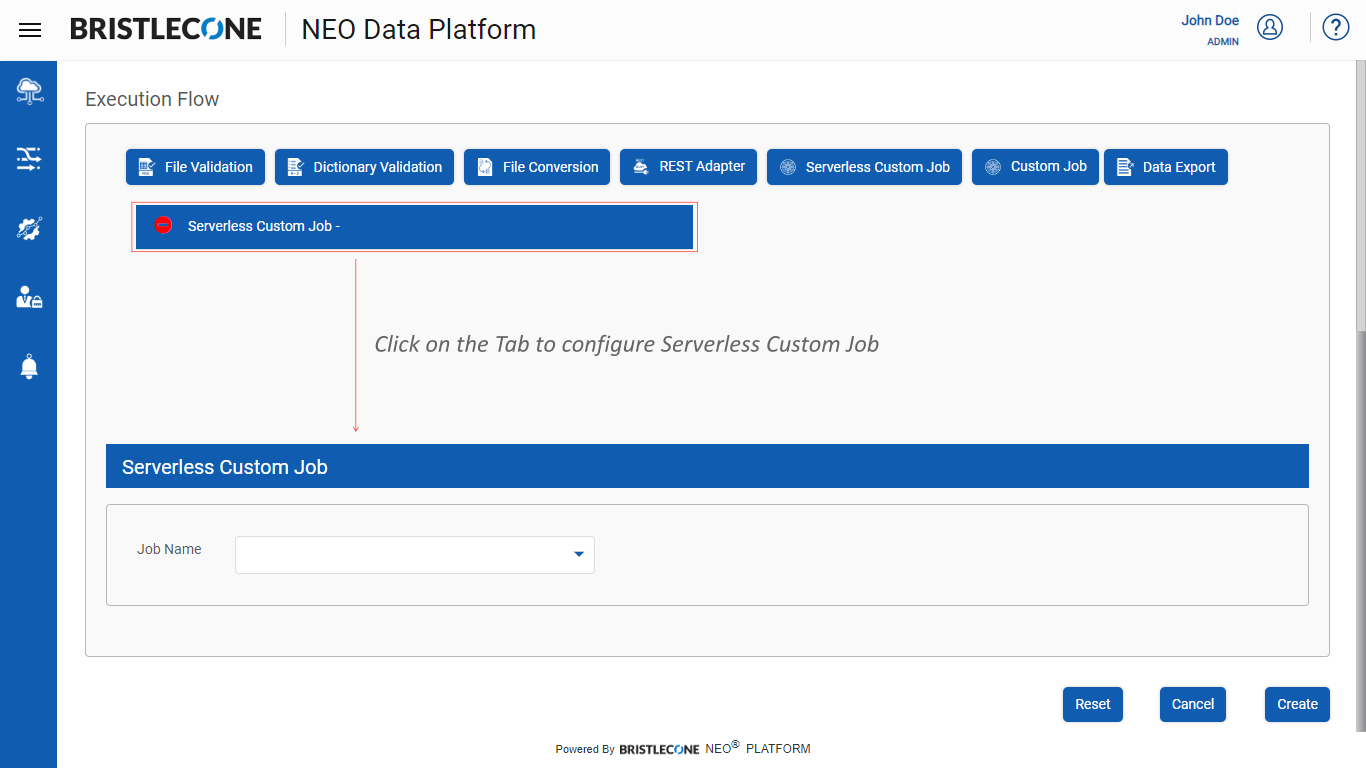
Enables a Provider Data Scientist to execute a pre-configured AWS glue script as a part of the Data Pipeline Execution Flow
Post Data Pipeline creation, click on Serverless Custom Job as shown below

Click on Serverless Custom Job tab to add Jobs as shown below
This feature enables a Provider Data Scientist /Business Analyst to export the output data post execution of the Data Pipeline from the Bristlecone NEO® Platform in the following ways :
- A File type
- A Postgres SQL Table
Bristlecone NEO® Platform enables the user to export the Data as follows :
1. Data Export File Type
Following are the steps showing how to export data with File Validation as an example
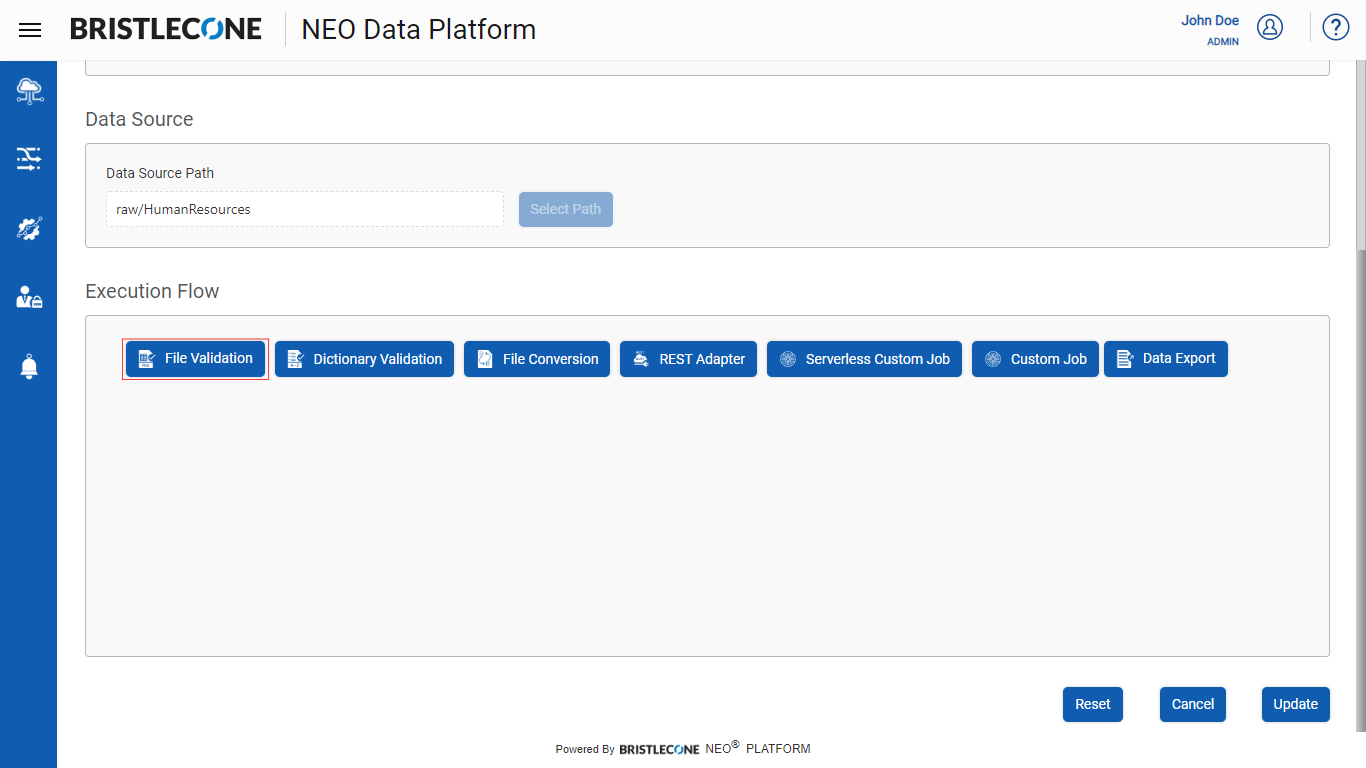
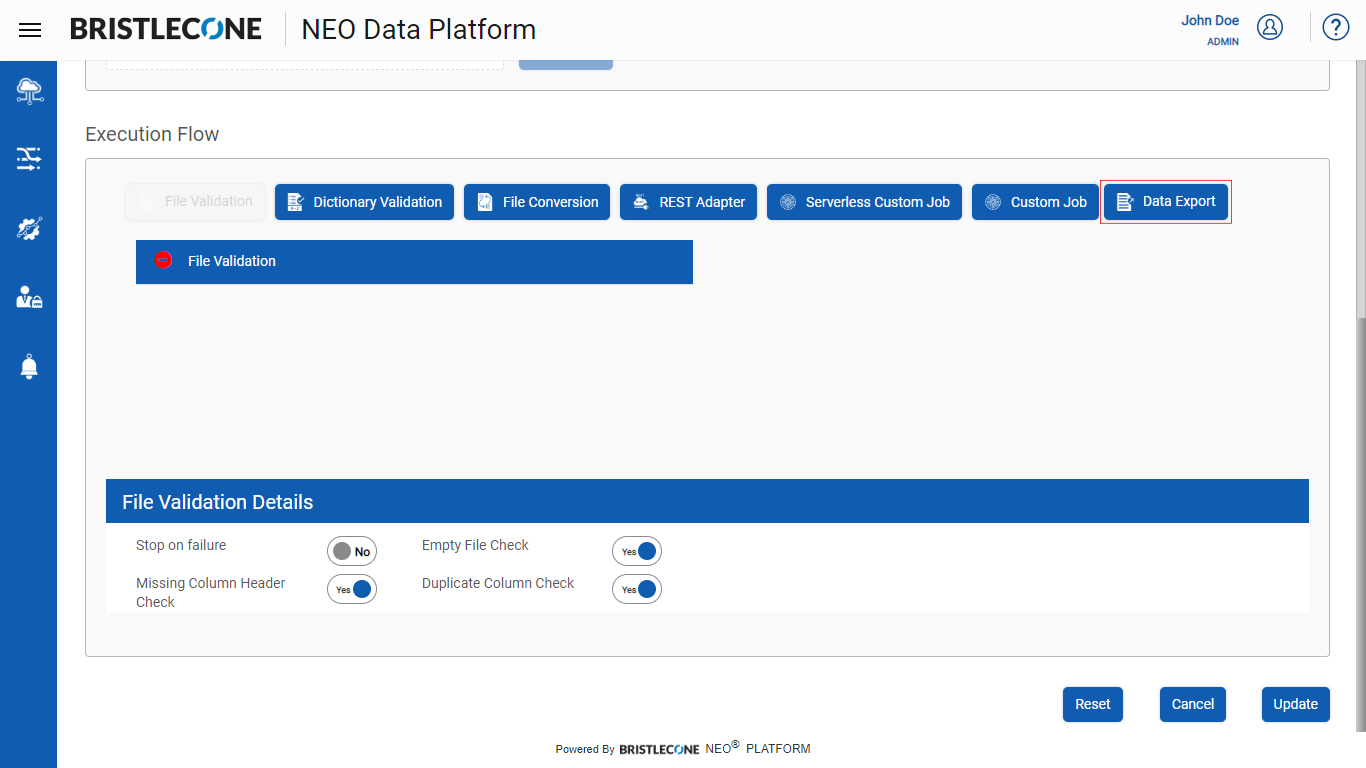
Step 1 : Click on File Validation button as shown below
Step 2 : Click on File Validation Tab and configure details as shown below
Step 3 : Click on Data Export button as shown below
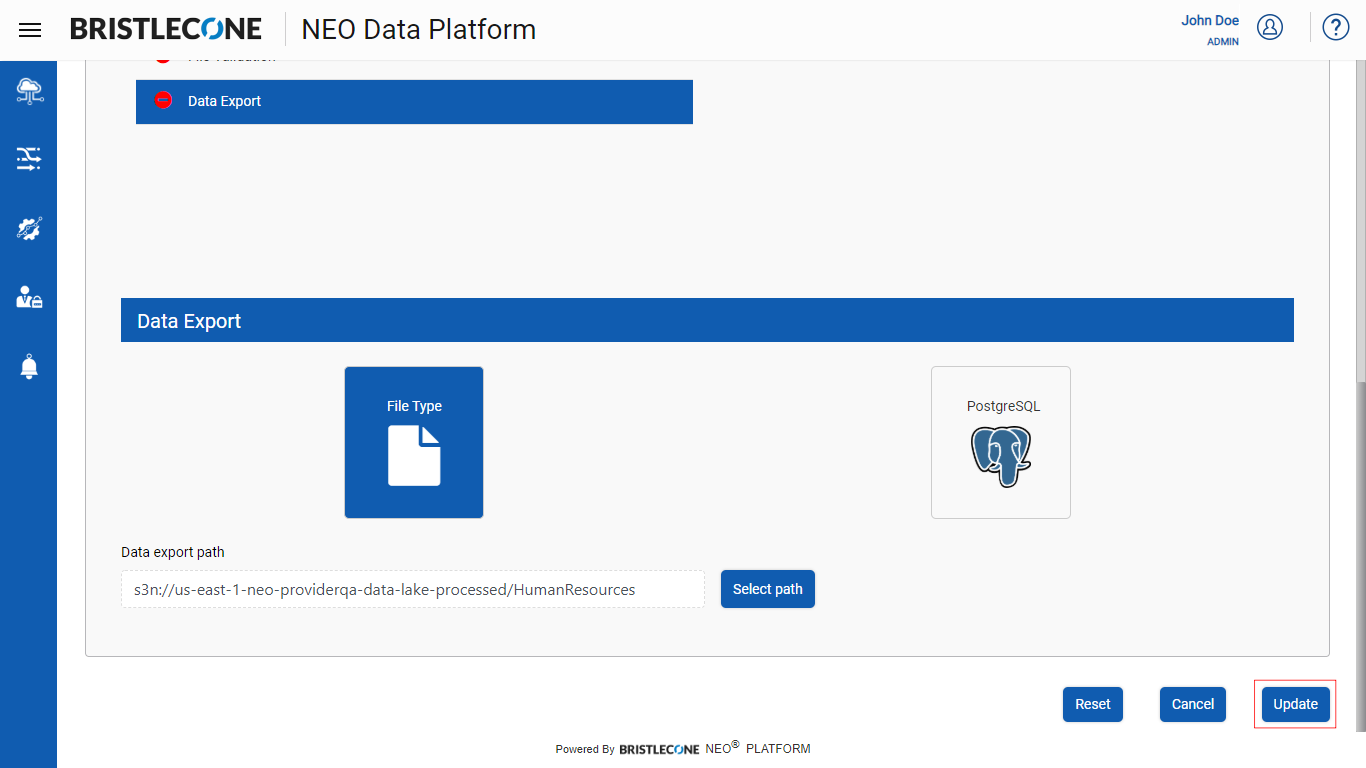
Step 4 : Click on Data Export tab and configure the details
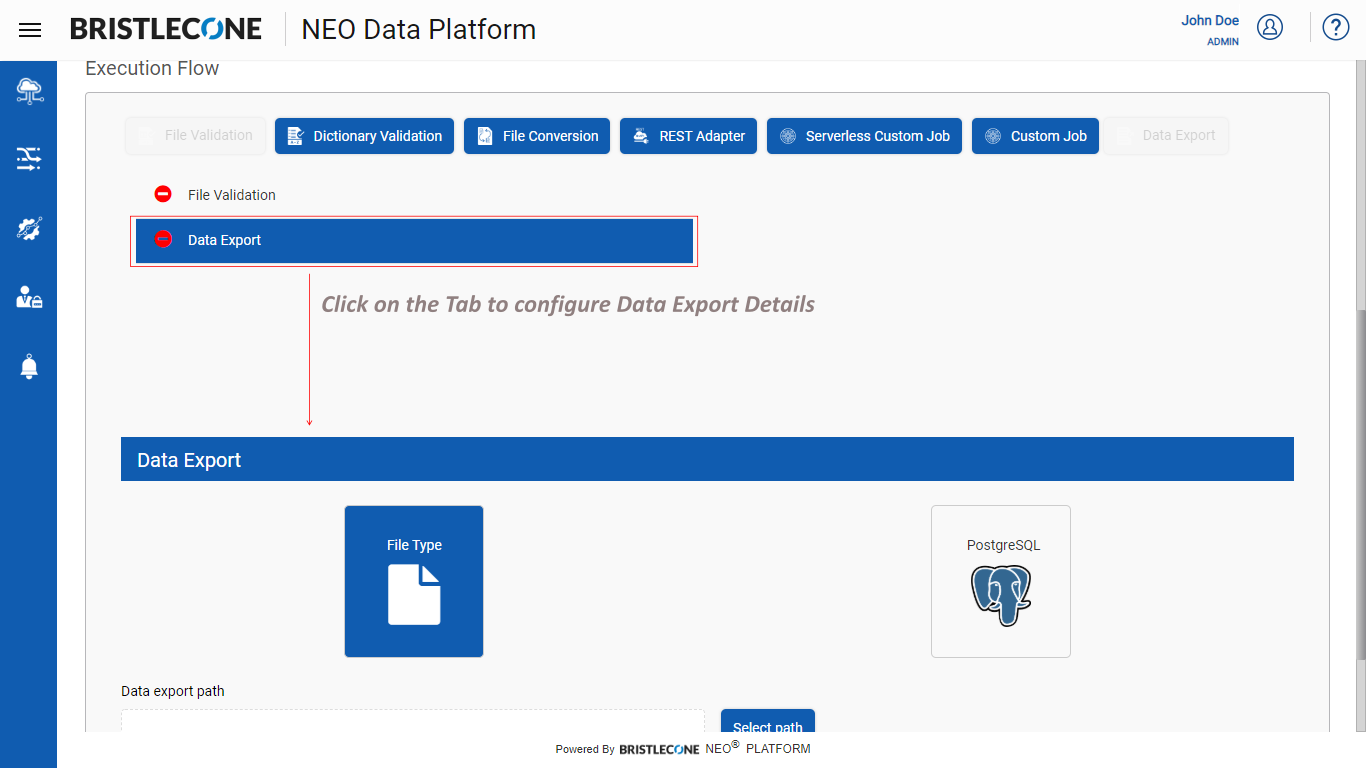
Note : Data Export as “File Type” is selected by default
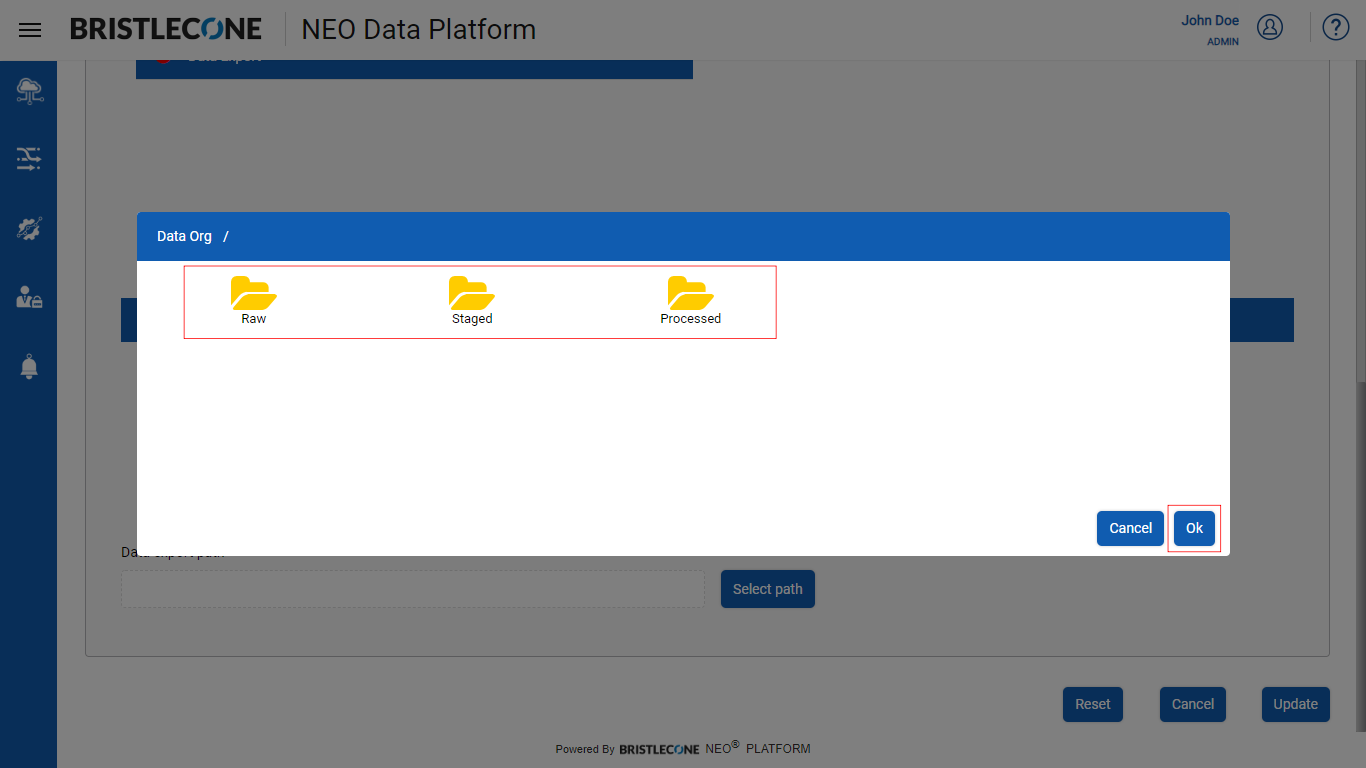
Step 5 : Click on Select Path button to set the Data Export path where the file will be stored after

Step 6 : Select the Folder or Child Folder and Click OK button to set the path
Step 7 : Click on Create / Update button to configure Data Export as File Type configuration
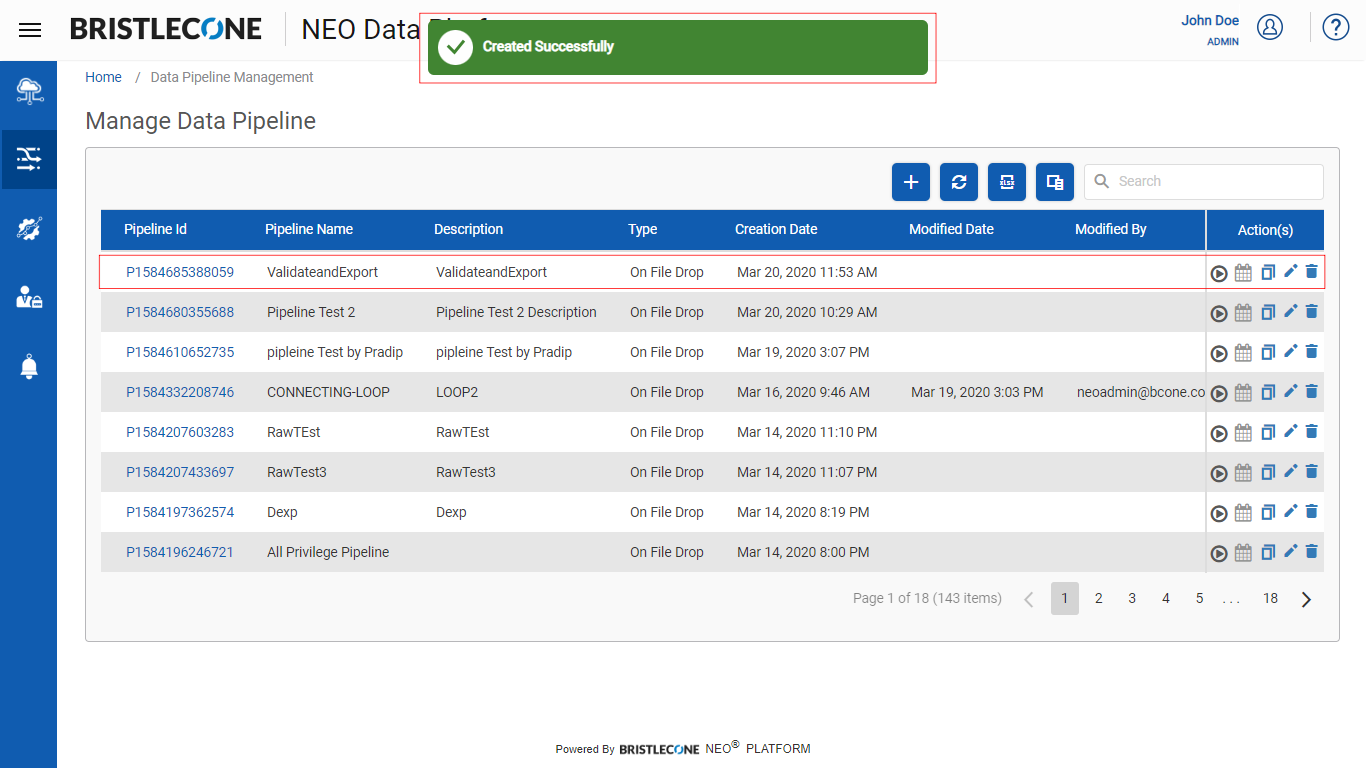
Post successful creation a success notification will appear, and the newly created/updated pipeline will be listed on Pipeline Management Dashboard as shown below
Step 8 : Run the Data Pipeline to export the data successfully

2. Data Export to Postgres SQL
Prerequisite
A Table structure must be predefined as per the data dictionary into the POSTGRE SQL before exporting the data as shown below
Steps to create a Table to export output data in PostgreSQL
Step 1 : Use the API endpoint below to save a new connection to connect existing database(Postgres SQL)
https://api.{{accountName}}-neo.bcone.com/sql/v1/saveconnection
Sample body for save connection [ above API ]
{
"connectionid": "demoid",
"connectiontype": "demotype",
"connectionname": "demoname",
"dbhost": "will be provided by NEOsupport@bcone.com",
"dbname": "will be provided by NEOsupport@bcone.com",
"dbpasswd": "w ill be provided by NEOsupport@bcone.com",
"dbport": "will be provided by NEOsupport@bcone.com",
"dbuser": "will be provided by NEOsupport@bcone.com"
}
Step 2 : Create Table with columns which has to be mapped with the dictionary using the following API
https://api.{{accountName}}-neo.bcone.com/sql/v1/createTable
Note : : Dictionary must contain columns of the custom job output file
Sample body for createTable API
{
"connectionId": "demoid",
"schema":"public",
"tableName": "API_Test_Demo",
"fields": {
"PaymentDateFiscalYear":"2018",
"CompanySiteDivision":"Detroit_Demo",
"CostCenterGLBusinessUnit":"Mahindra AFS",
"AccountingDateQuarter":"3rd Quarter",
"CompanSiteInternationalRegions":"Michigan",
"CompanySiteOperatingUnitId":"D1",
"CompanySiteOU":"Detroit_Demo",
"CorningSourceSystemCorningSourceSystem":"Spend",
"CustomCategoryL2":"l2",
"CustomCategoryL1":"l1",
"CustomCategoryL3":"l3",
"CustomCategoryL4":"l4",
"keys": {
"primaryKey": [
{
"columnName": "SupplierID",
"columnType": "demo_column"
}]
}
}}
Note: Values declared in the above API body are for illustration purposes only
Following are the steps showing how to export data with File Validation as an example
Step 3: Click on File Validation button as shown below
Step 4 : Click on File Validation tab and configure the details as shown below
Step 5 : Click on Data Export button as shown below
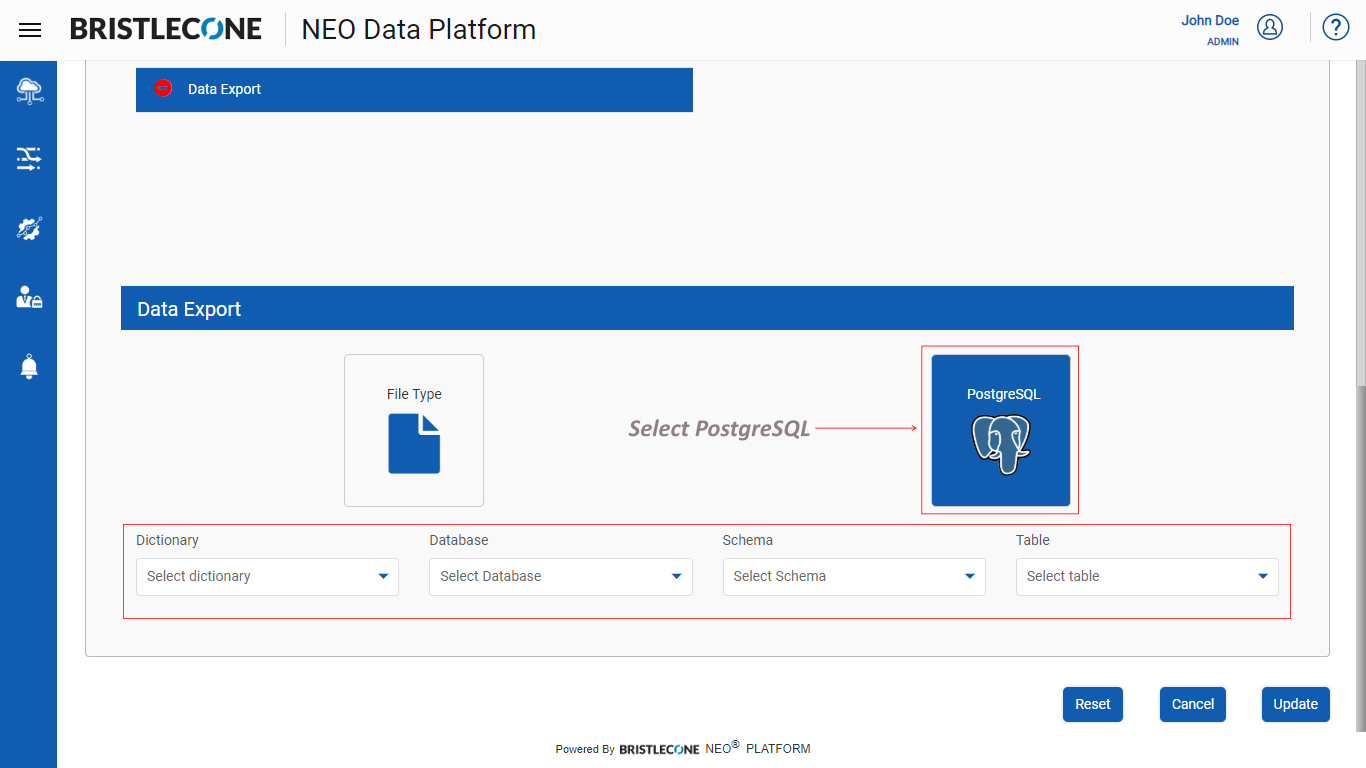
Step 6 : Click on Data Export tab and configure the details
Note: Data Export as “File Type” is selected by default
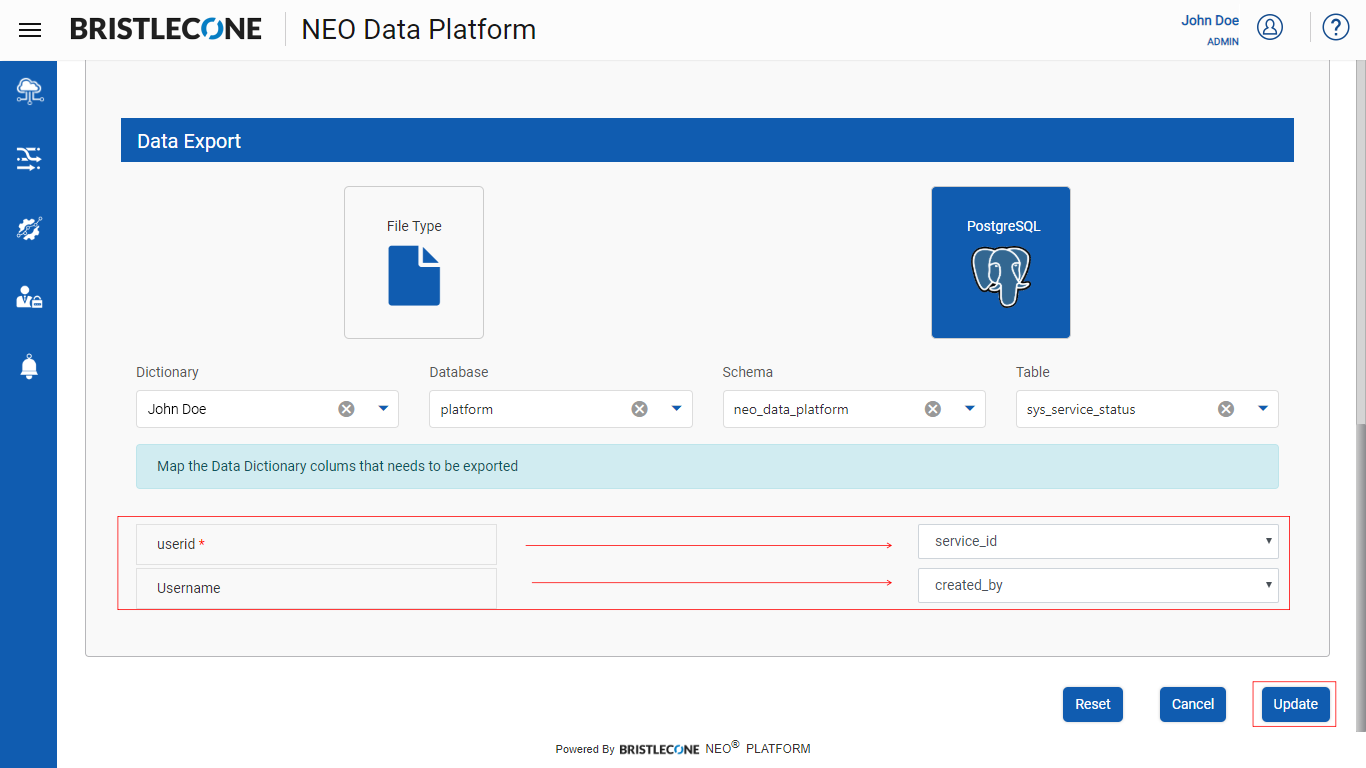
Step 7 : Select PostgreSQL option and input the parameters Dictionary Name, Database Name, Schema Name, Table Name as shown below
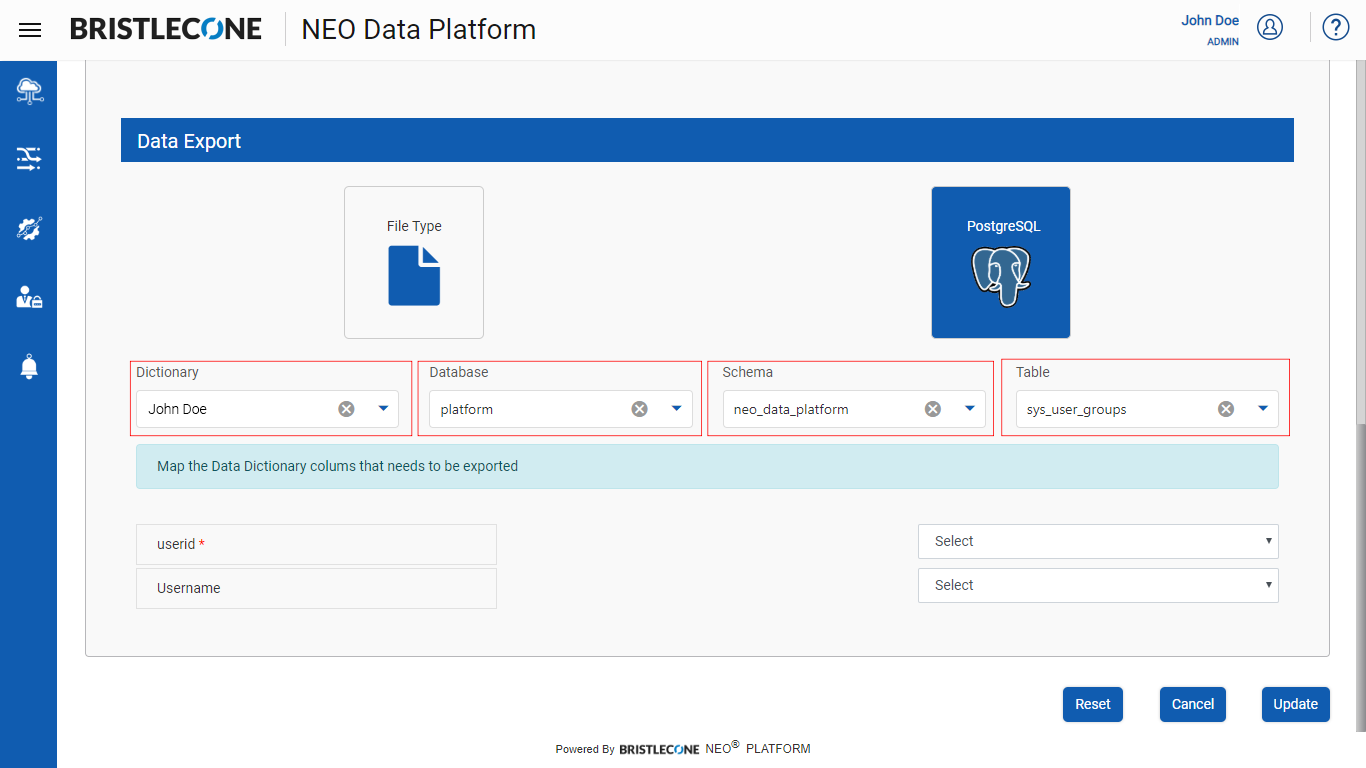
Step 8 : Map the columns present in the Data Dictionary Table to the columns of the output table and click on Create / Update button to save the configurations
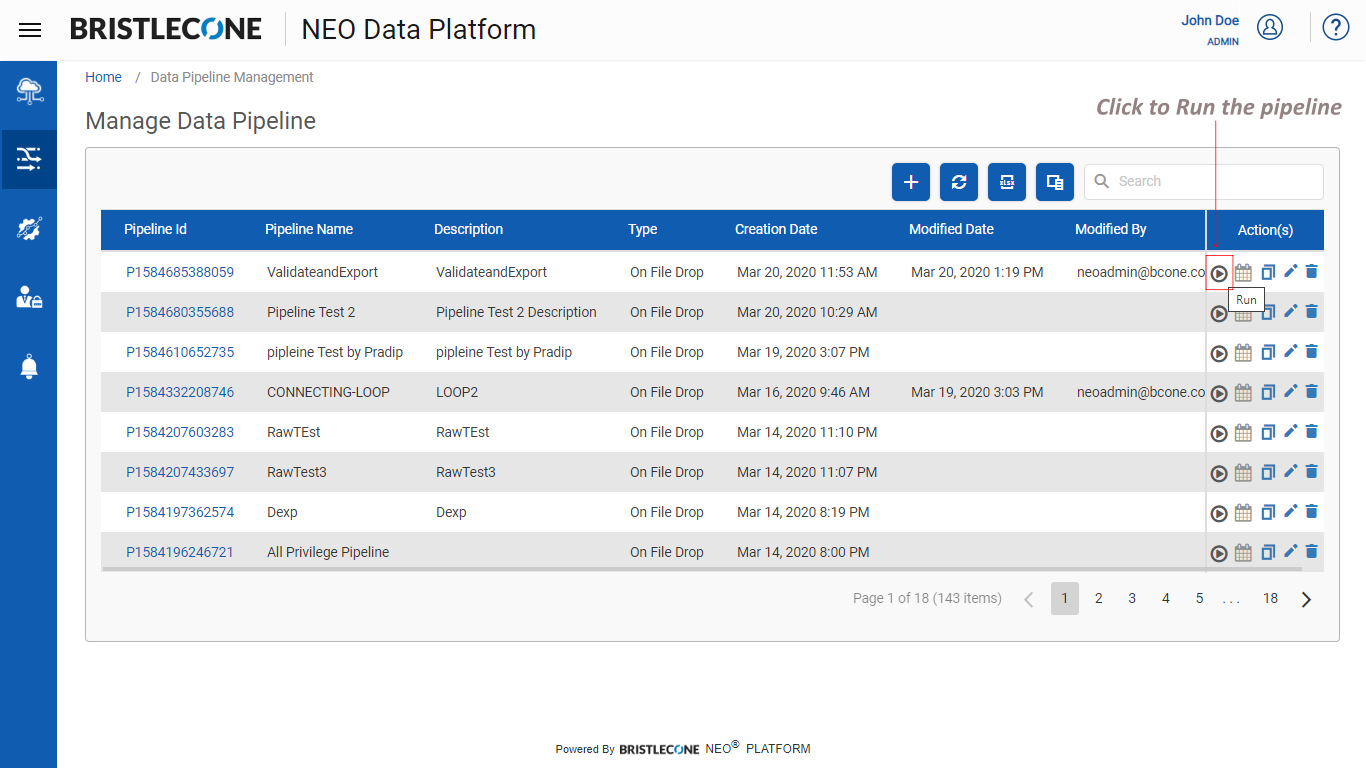
Post successful creation a success notification will appear, and the newly created/updated pipeline will be listed on Pipeline Management Dashboard as shown below

Step 9 : Trigger the Data Pipeline as shown below
Step 10 : Post Data Export, read the output of the exported data using the following read Record API
"https://api.{{$accountName}}-neo.bcone.com/sql/v1/readRecords"
Sample body for reading the API
{
"connectionId": "supplierId",
"schemaName":"public",
"tableName": "API_Test_Demo",
"responseColumns": [ "DISTINCT supplierId","INVPaymentDateDate"]
}
Post read, the output is as shown below
{
"status": "SUCCESS",
"listMetadata": [
{
"supplierid": "GLOBL-ASP01-0000000373",
"invoriginalcurrencycode": "Corning Display Technologies",
},
{
"supplierid": "GLOBL-ASP01-0000004882",
"invoriginalcurrencycode": "Corning Display Technologies",
},
{
"invpaymentdatefiscalyear": "Unclassified",
"supplierid": "SAPGB-SAPGB-0000617551",
"invoriginalcurrencycode": "Optical Fiber and Cable",
},
{
"invpaymentdatefiscalyear": "FY2016",
"supplierid": "GLOBL-NFT01-0000140730",
"invoriginalcurrencycode": "Corning Environmental Technologies",
},
{
"supplierid": "APCPM-APCPM-A0001018",
"invoriginalcurrencycode": "Corning Precision Materials",
},
{
"invpaymentdatefiscalyear": "Unclassified",
"supplierid": "GLOBL-ASP01-0000013118",
"invoriginalcurrencycode": "Corning Display Technologies",
},
{
"supplierid": "SAPGB-SAPGB-0000616358",
"invoriginalcurrencycode": "Optical Connectivity Solutions",
},
{
"invpaymentdatefiscalyear": "Unclassified",
"supplierid": "GLOBL-ASP01-0000019500",
"pooriginalcurrencycode": null,
"invoriginalcurrencycode": "Corning Life Sciences",
},
{
"invpaymentdatefiscalyear": "Unclassified",
"supplierid": "GLOBL-NFT01-0000146941",
"invoriginalcurrencycode": "Corning Life Sciences",
},
{
"invpaymentdatefiscalyear": "Unclassified",
"supplierid": "SAPGB-SAPGB-0000625359",
"invoriginalcurrencycode": "Corning International",
},
{
"supplierid": "GLOBL-EMA01-0000001191",
"invoriginalcurrencycode": "Corning Environmental Technologies",
"supplierid": "GLOBL-ASP01-0000018304",
"pooriginalcurrencycode": null,
"invoriginalcurrencycode": "Corning Display Technologies",
},
{
"supplierid": "GLOBL-NFT01-0000102440",
"invoriginalcurrencycode": "Corning Life Sciences",
},
{
"supplierid": "SAPGB-SAPGB-0000651027",
"invoriginalcurrencycode": "Corning International",
},
{
"invoriginalcurrencycode": "Corning Life Sciences",
},
{
"supplierid": "APCPM-APCPM-A0001023",
"invoriginalcurrencycode": "Corning Precision Materials",
},
{
"invpaymentdatefiscalyear": "Unclassified",
"supplierid": "APCPM-APCPM-A0005578",
"invoriginalcurrencycode": "Corning Precision Materials",
},
{
"invpaymentdatefiscalyear": "Unclassified",
},
{
"invpaymentdatefiscalyear": "Unclassified",
"supplierid": "GLOBL-EMA01-0000011919",
"invoriginalcurrencycode": "Corning Life Sciences",
},
{
"invpaymentdatefiscalyear": "FY2016",
"supplierid": "GLOBL-NFT01-0000007892",
"invoriginalcurrencycode": "Optical Fiber and Cable",
},
{
"invpaymentdatefiscalyear": "Unclassified",
"supplierid": "APCPM-APCPM-N1A0-00",
"invoriginalcurrencycode": "Corning Precision Materials",
},
{
"supplierid": "GLOBL-EMA01-0000001017",
"invoriginalcurrencycode": "Corning Environmental Technologies",
},
{
"invpaymentdatefiscalyear": "Unclassified",
"supplierid": "SAPGB-SAPGB-0000651530",
"invoriginalcurrencycode": "Corning International",
},
{
"invpaymentdatefiscalyear": "Unclassified",
"supplierid": "SAPGB-SAPGB-0000621865",
"invoriginalcurrencycode": "Optical Fiber and Cable",
},
{
"invpaymentdatefiscalyear": "Unclassified",
"supplierid": "GLOBL-NFT01-0000048606",
"invoriginalcurrencycode": "Corning Environmental Technologies",
},
{
"supplierid": "APCPM-APCPM-A0005498",
"invoriginalcurrencycode": "Corning Precision Materials",
},
{
"invpaymentdatefiscalyear": "Unclassified",
"supplierid": "SAPGB-SAPGB-0000622457",
"invoriginalcurrencycode": "Corning International",
}
]
}